Femora is a hack and slash game based on Diablo II created by Blizzard Entertainment. The history takes place in medieval-fantasy universe where Prime Evil tries to destroy the last bastion of humanity. In the game appear a lot of monsters and mechanisms known in titles like Titan Quest or Path of Exile.
Gameplay
Action of the game goes on ancient land named Femora. From a certain date wild horde tries abandoned humanity from their kingdom. The bloody battles are consumed many brave warriors. There is no way to escape this madness. The only one chance is find Prime Evil and break to Pandemonium of Doom. There is one human who can do this – it’s you!
Hero class
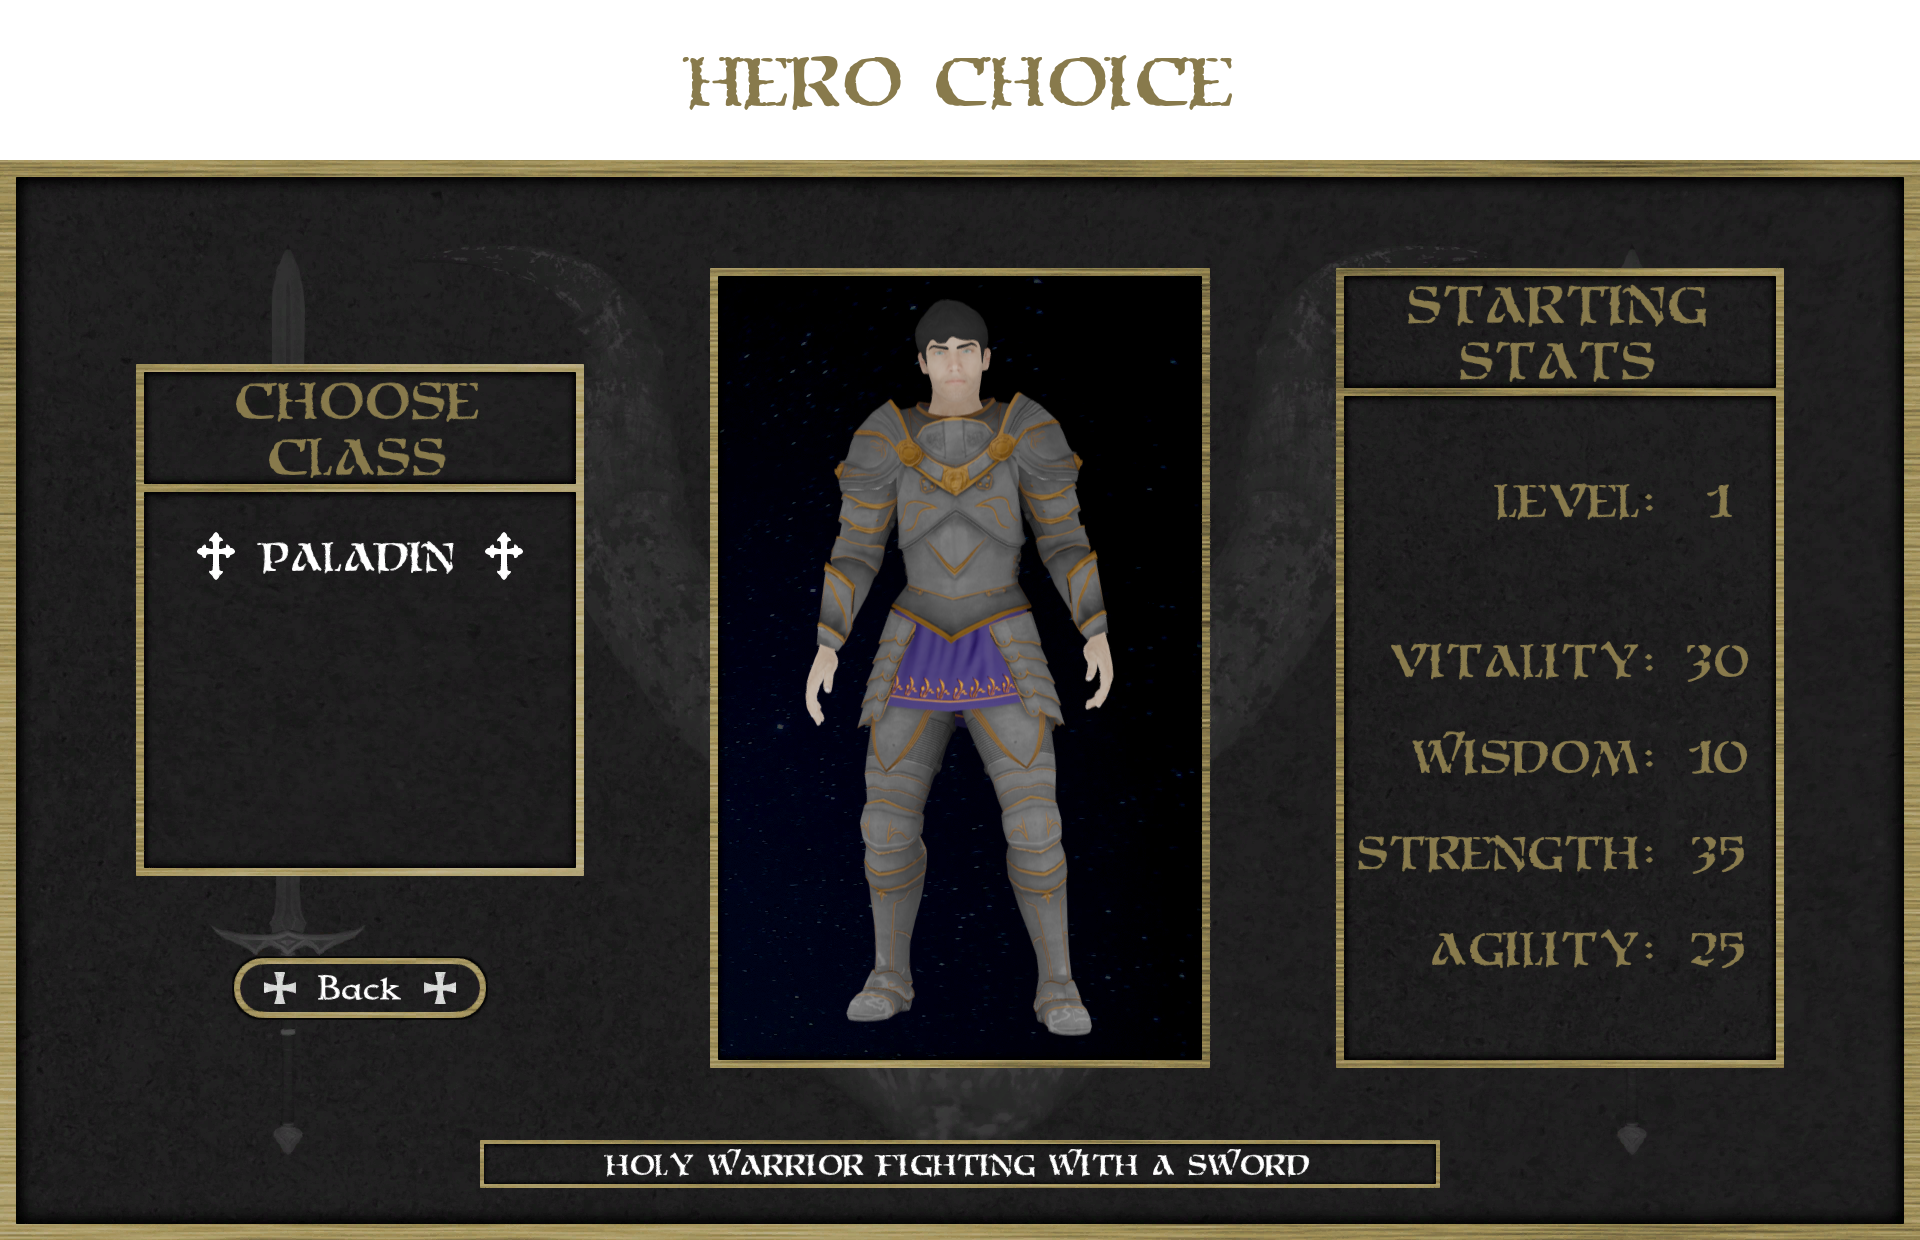
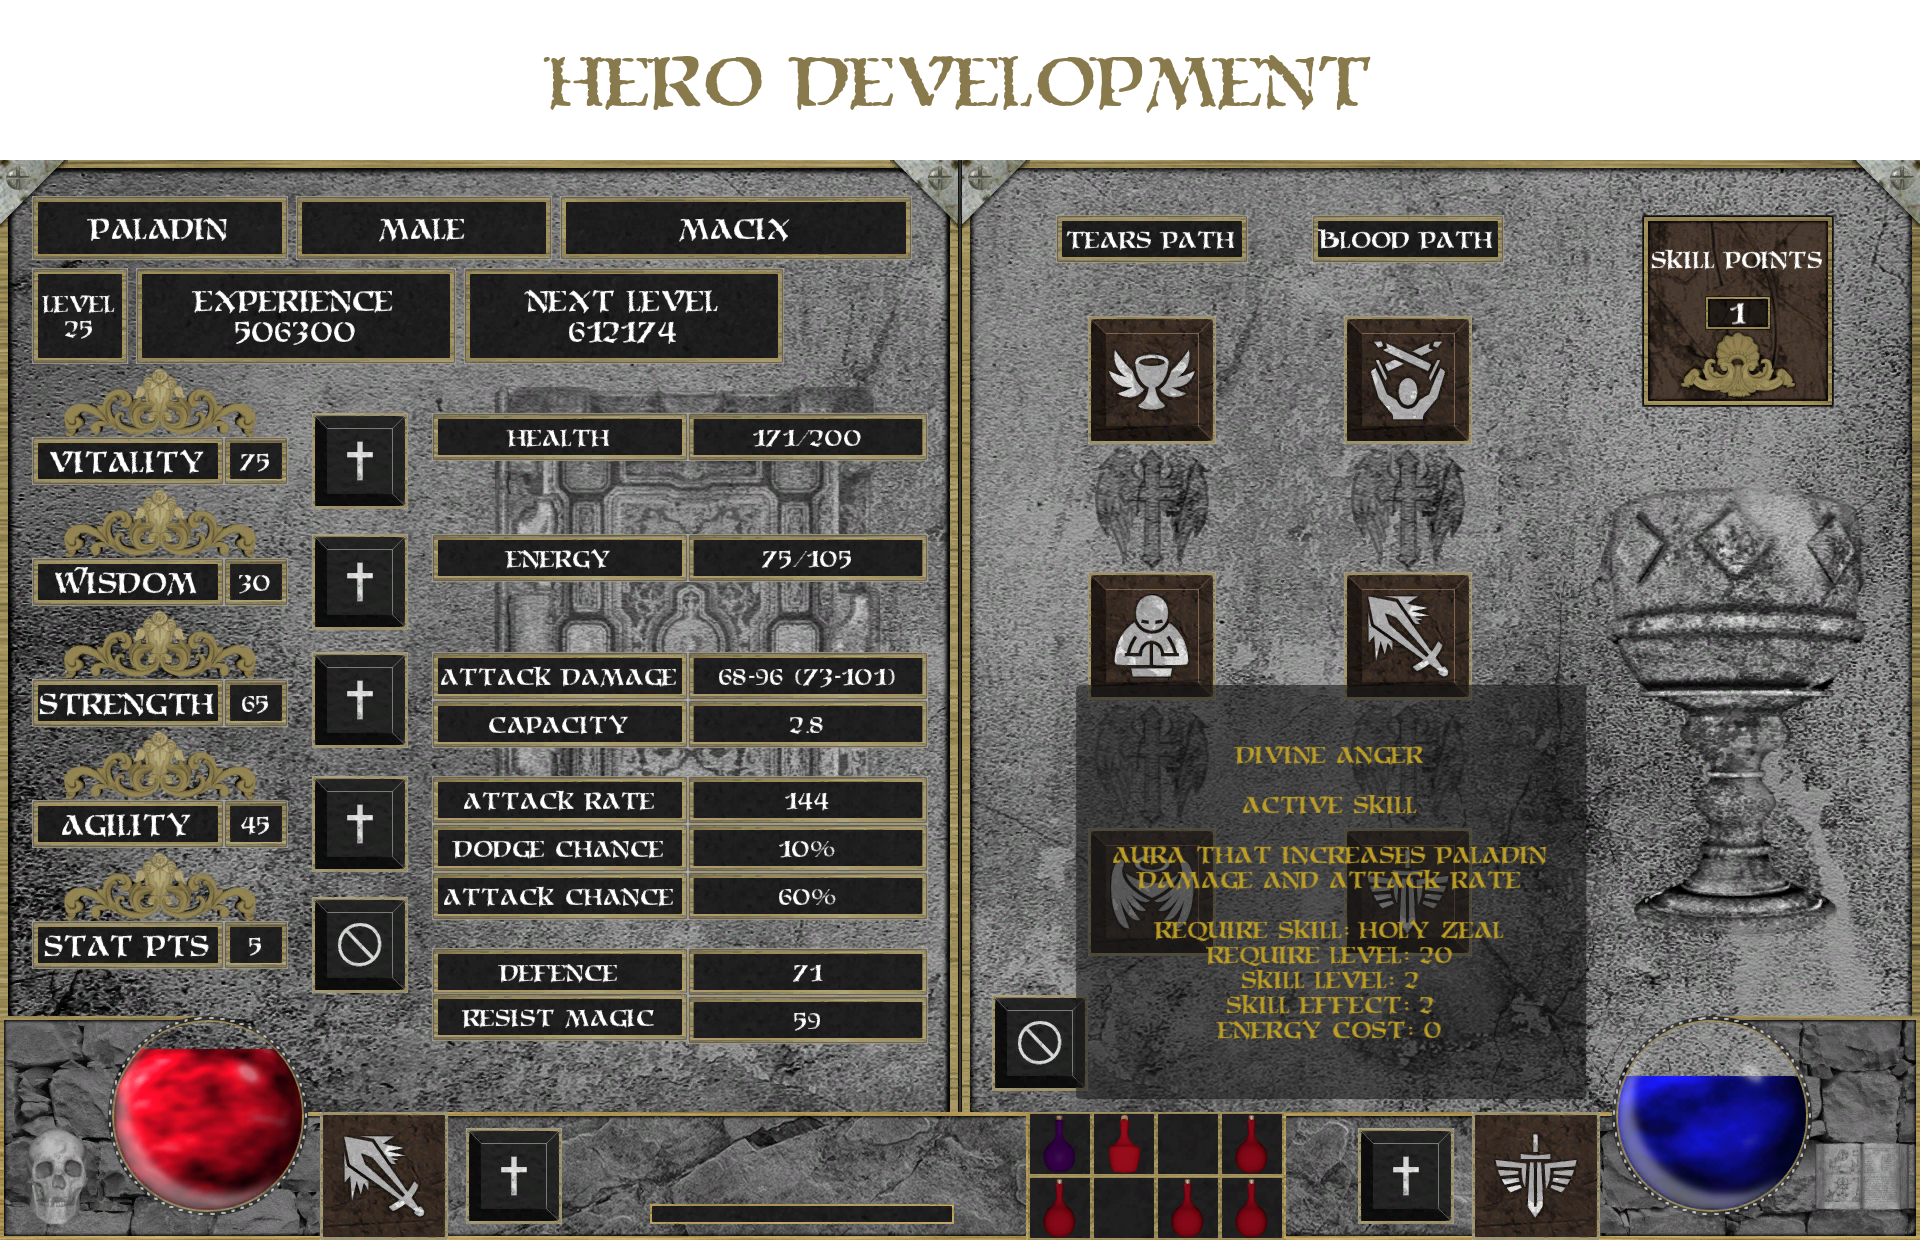
The player can take on the role of a Paladin – Holy Warrior who wreaks havoc in the ranks of the enemies. He is a specialist in cold weapon and auxiliary magic. This great knight is able to carry heavy armors and giant swords and is extremely resistant to damage. His advantage is combat ability which can be supported by passive fighting skills. Nobody can match him in hand-to-hand combat.
Enemies
There are several creatures threatening humanity:
Zombie – The weakest spawn of Hell.
Skeleton – Slow, brawny warrior with a heavy sword.
Demon Skeleton – Agile swordsman that dealing quick blows.
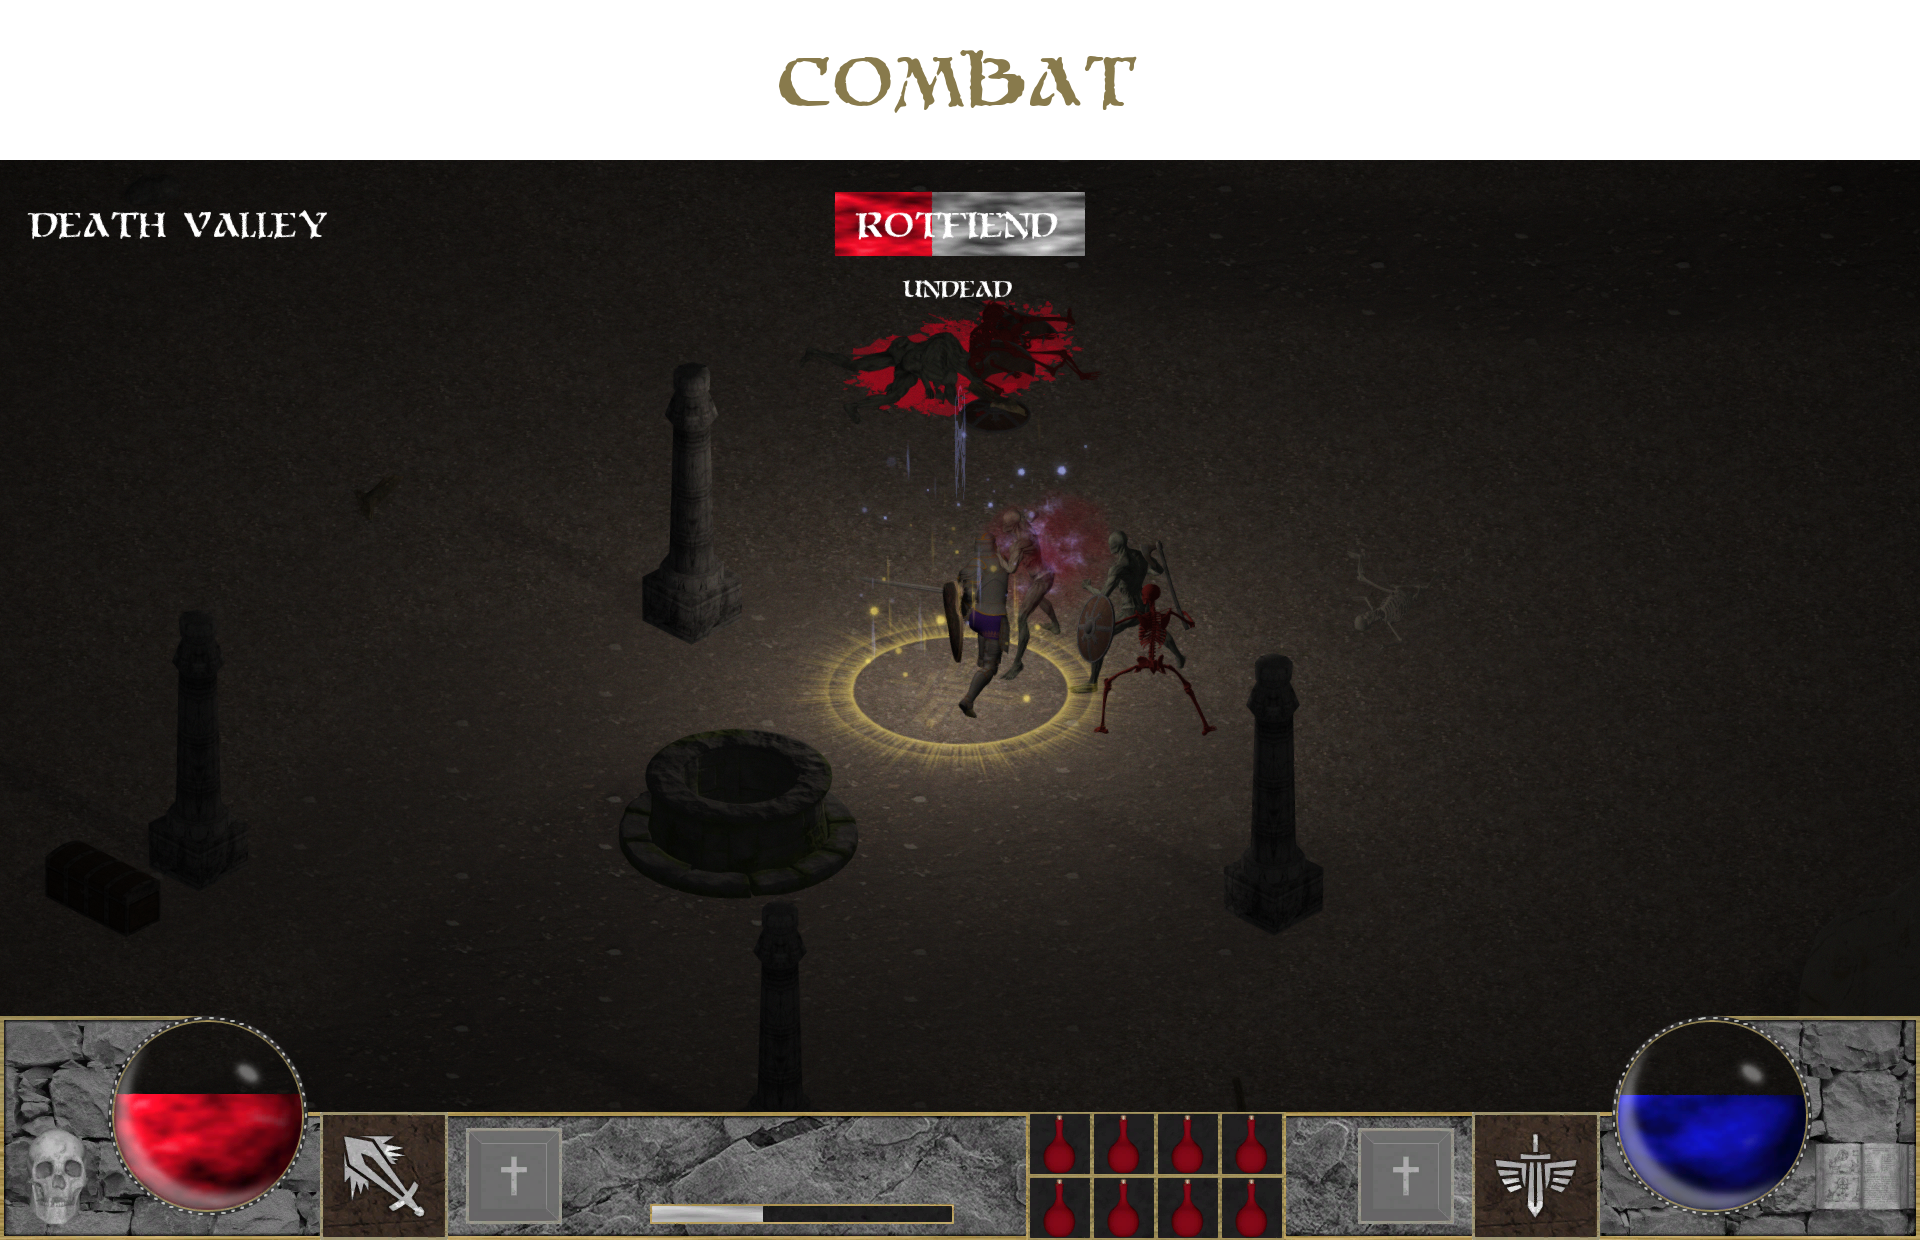
Rotfiend – Extremely fast fighter with great strength.
Pit Fiend – Huge, muscular beast that using gigantic axe.
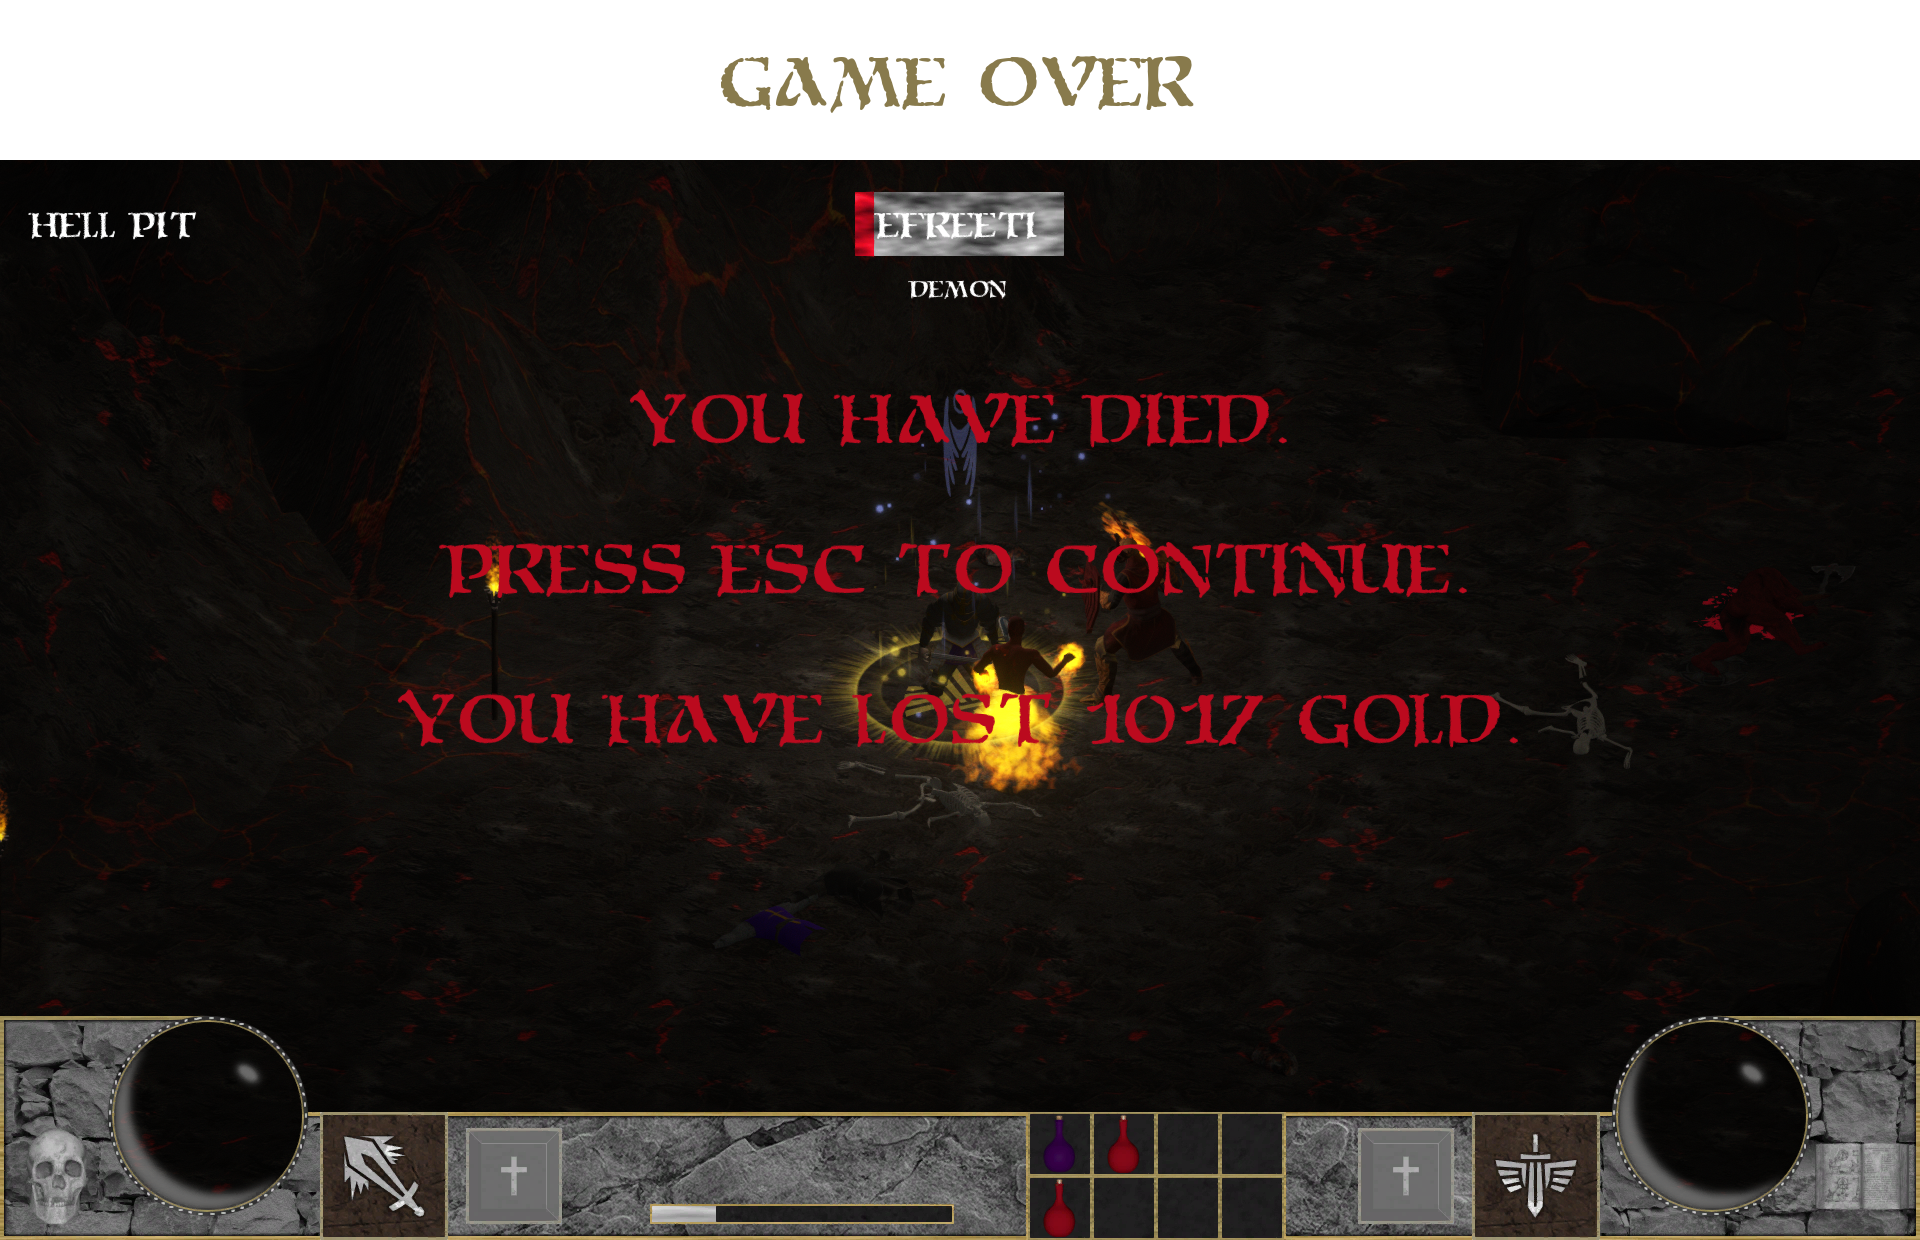
Efreeti – Fiery demon that throws fireballs.
Hell Knight – The most powerful inhibitant of Pandemonium of Doom.
Locations
In the game there are four main areas:
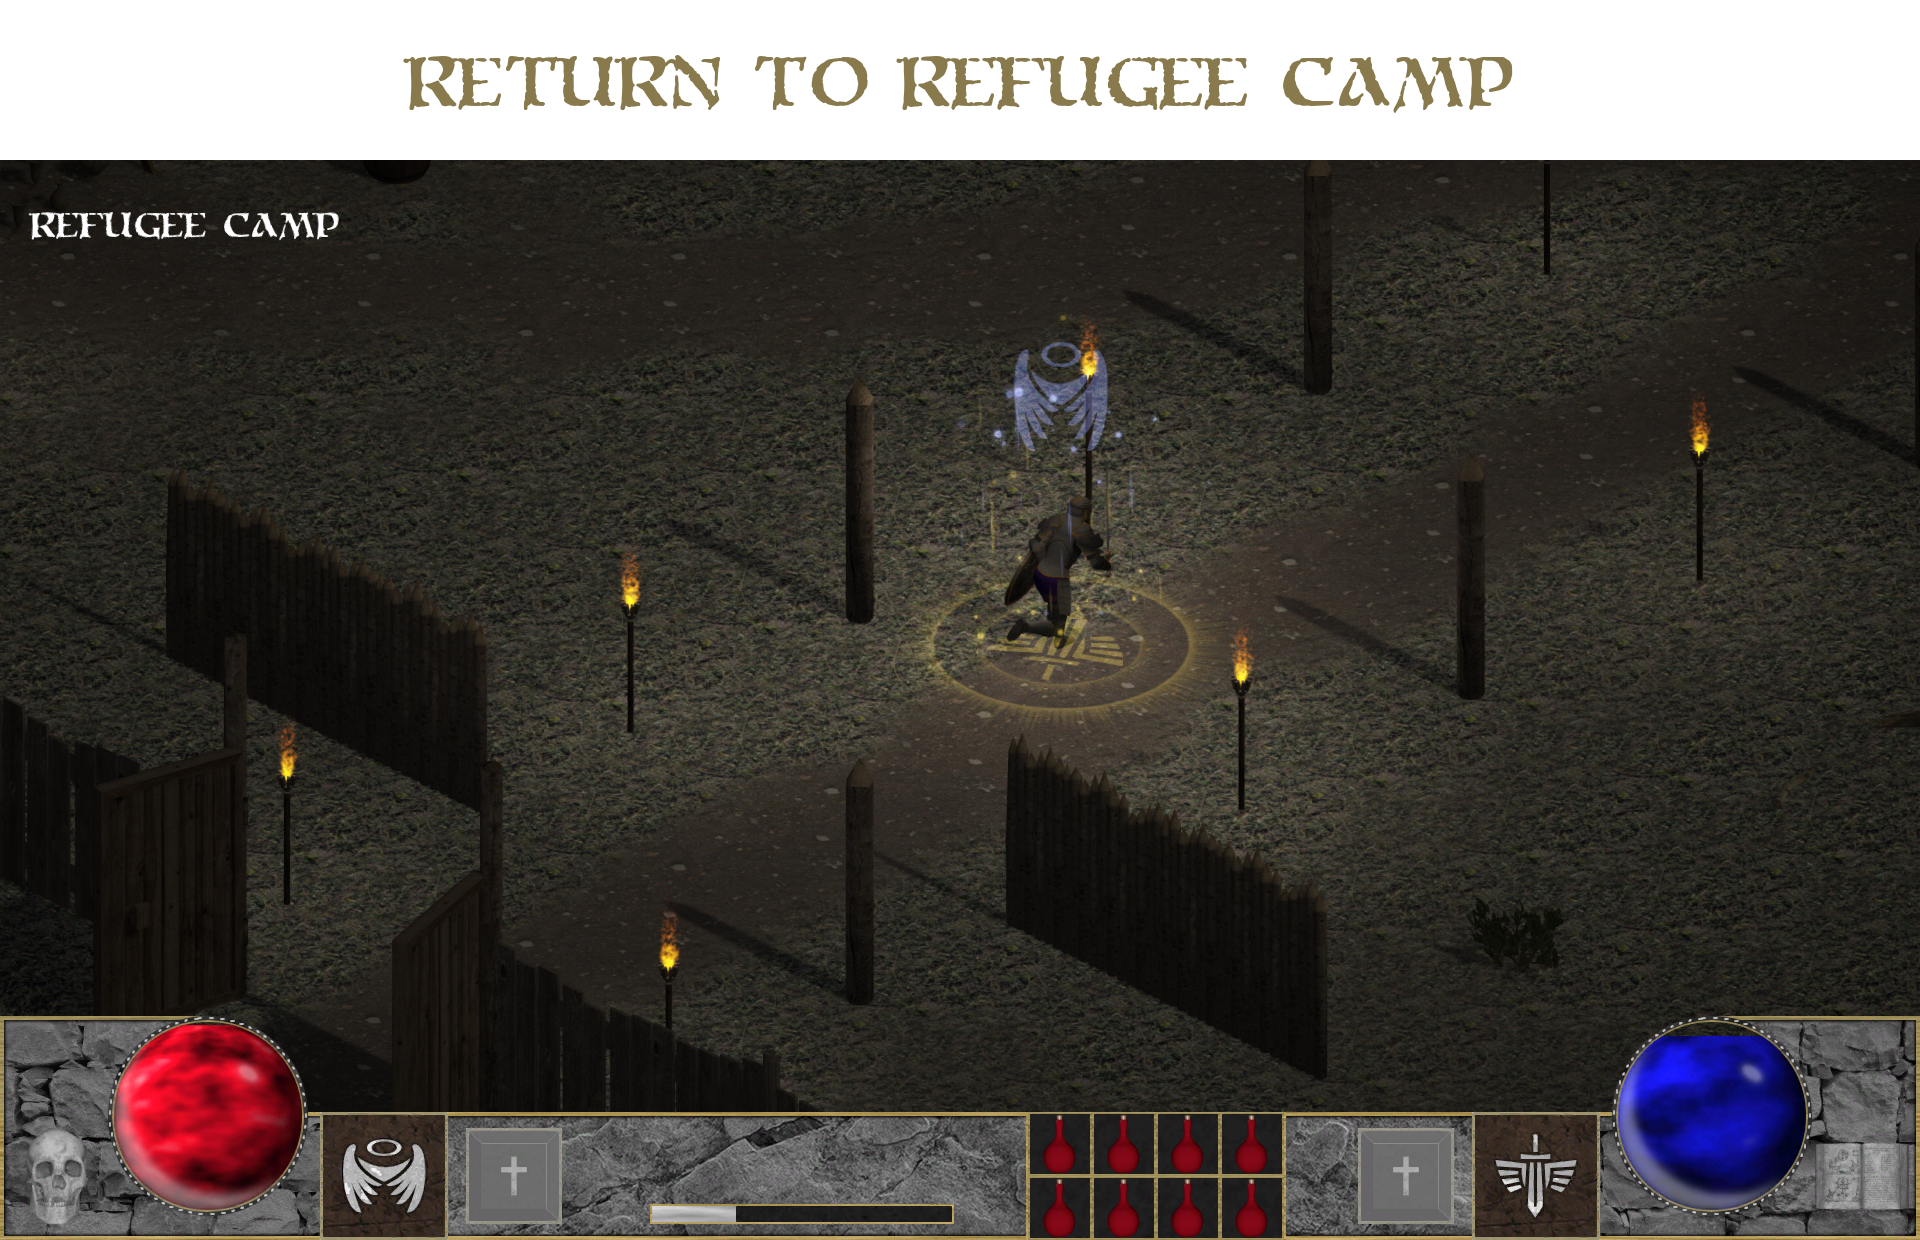
Refugee Camp – Destroyed defensive fortification inhabited by surviving warriors.
Stony Plain – Invaded lowland which is covered with lush grass.
Death Valley – Abandoned desert with no life.
Hell Pit – Hellish land immersed in flames and lava.
Independent characters
In Refugee Camp there are two traders:
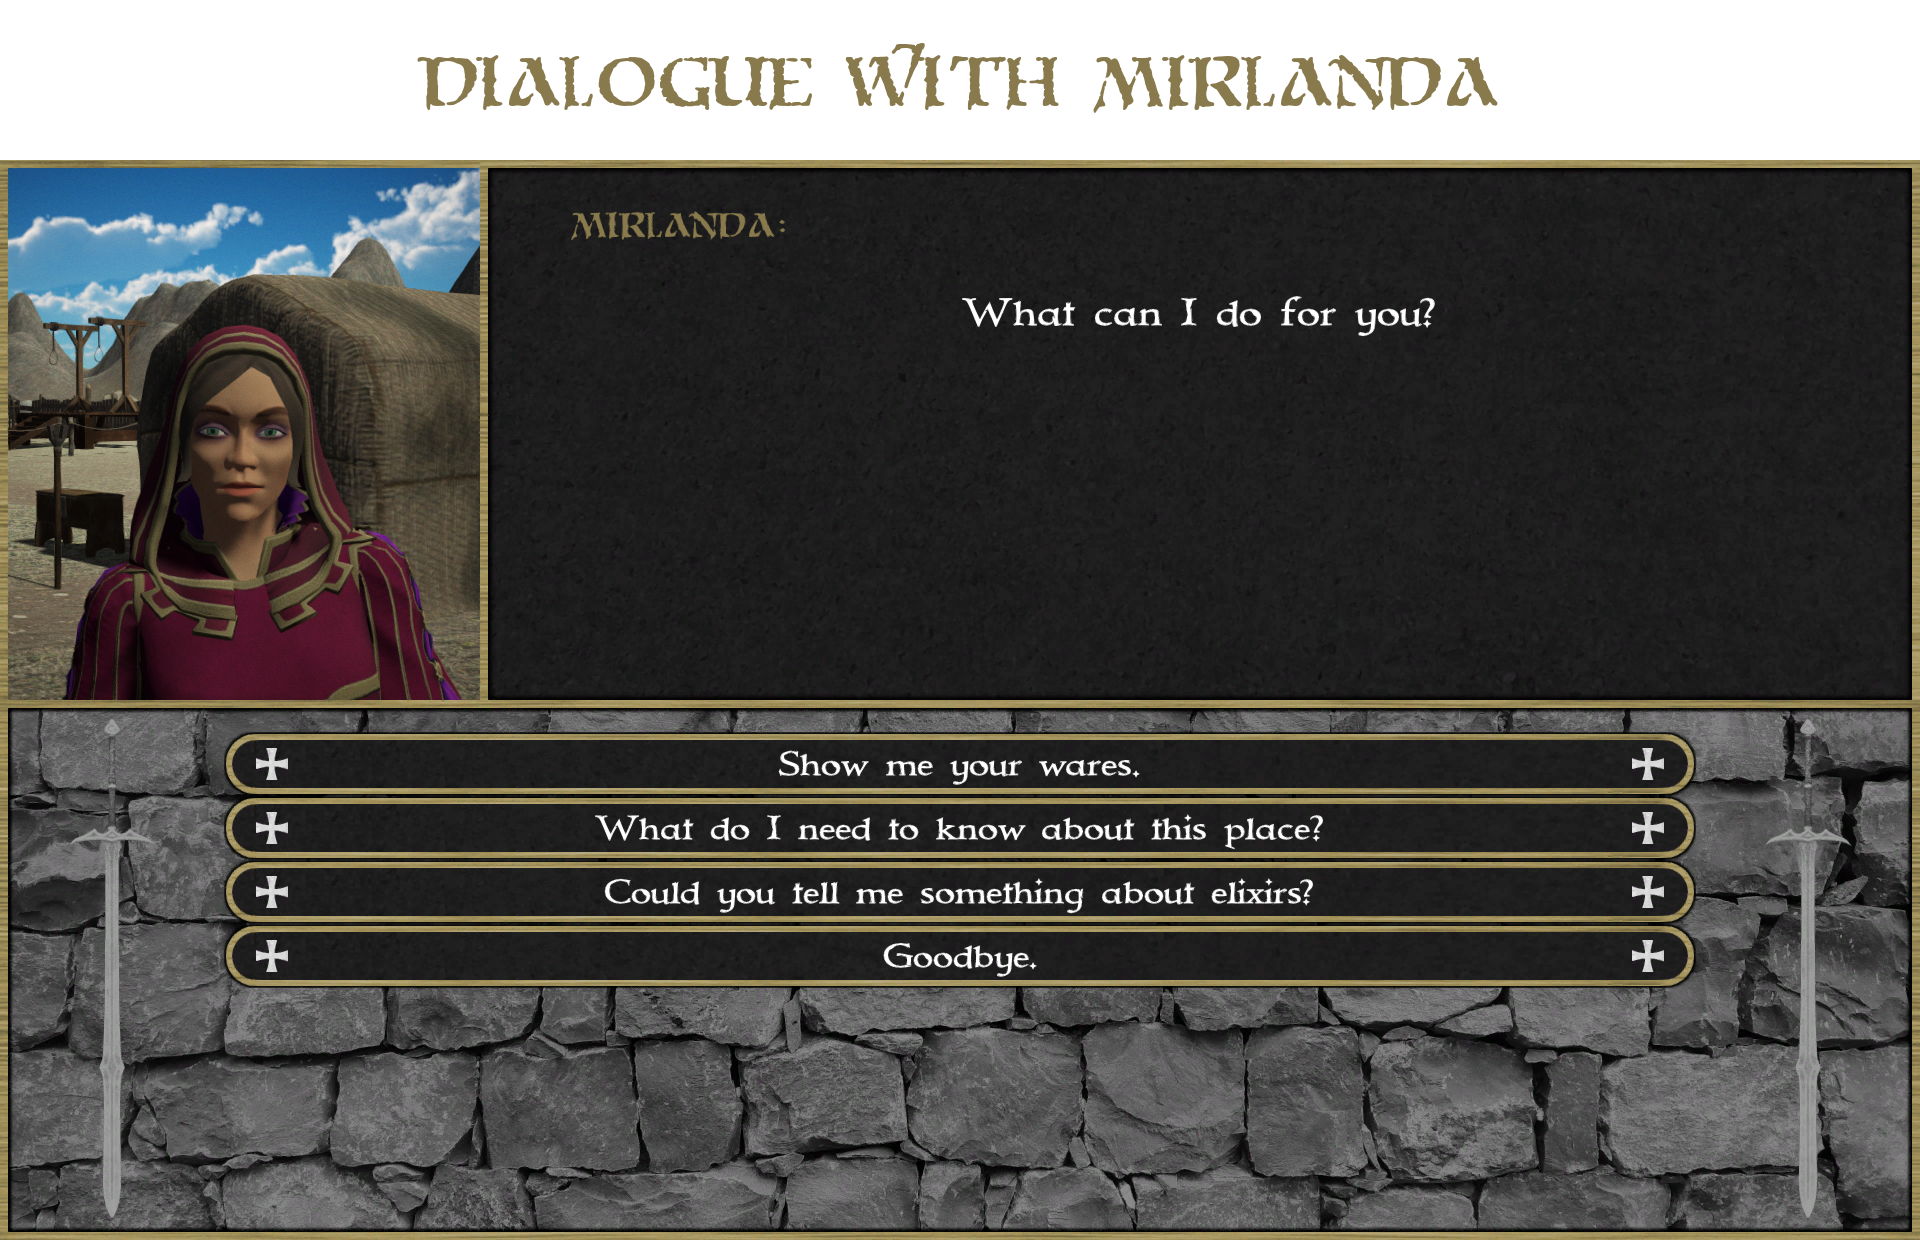
Mirlanda – Gifted Alchemy preparing potions and decoctions.
Orik – Skilled Blacksmith forging swords.
Other features
The game has the following properties:
The hero acquires experience by killing enemies. After defeating the appropriate number of opponents they can increase their skills.
The creatures leave items which can be using by hero.
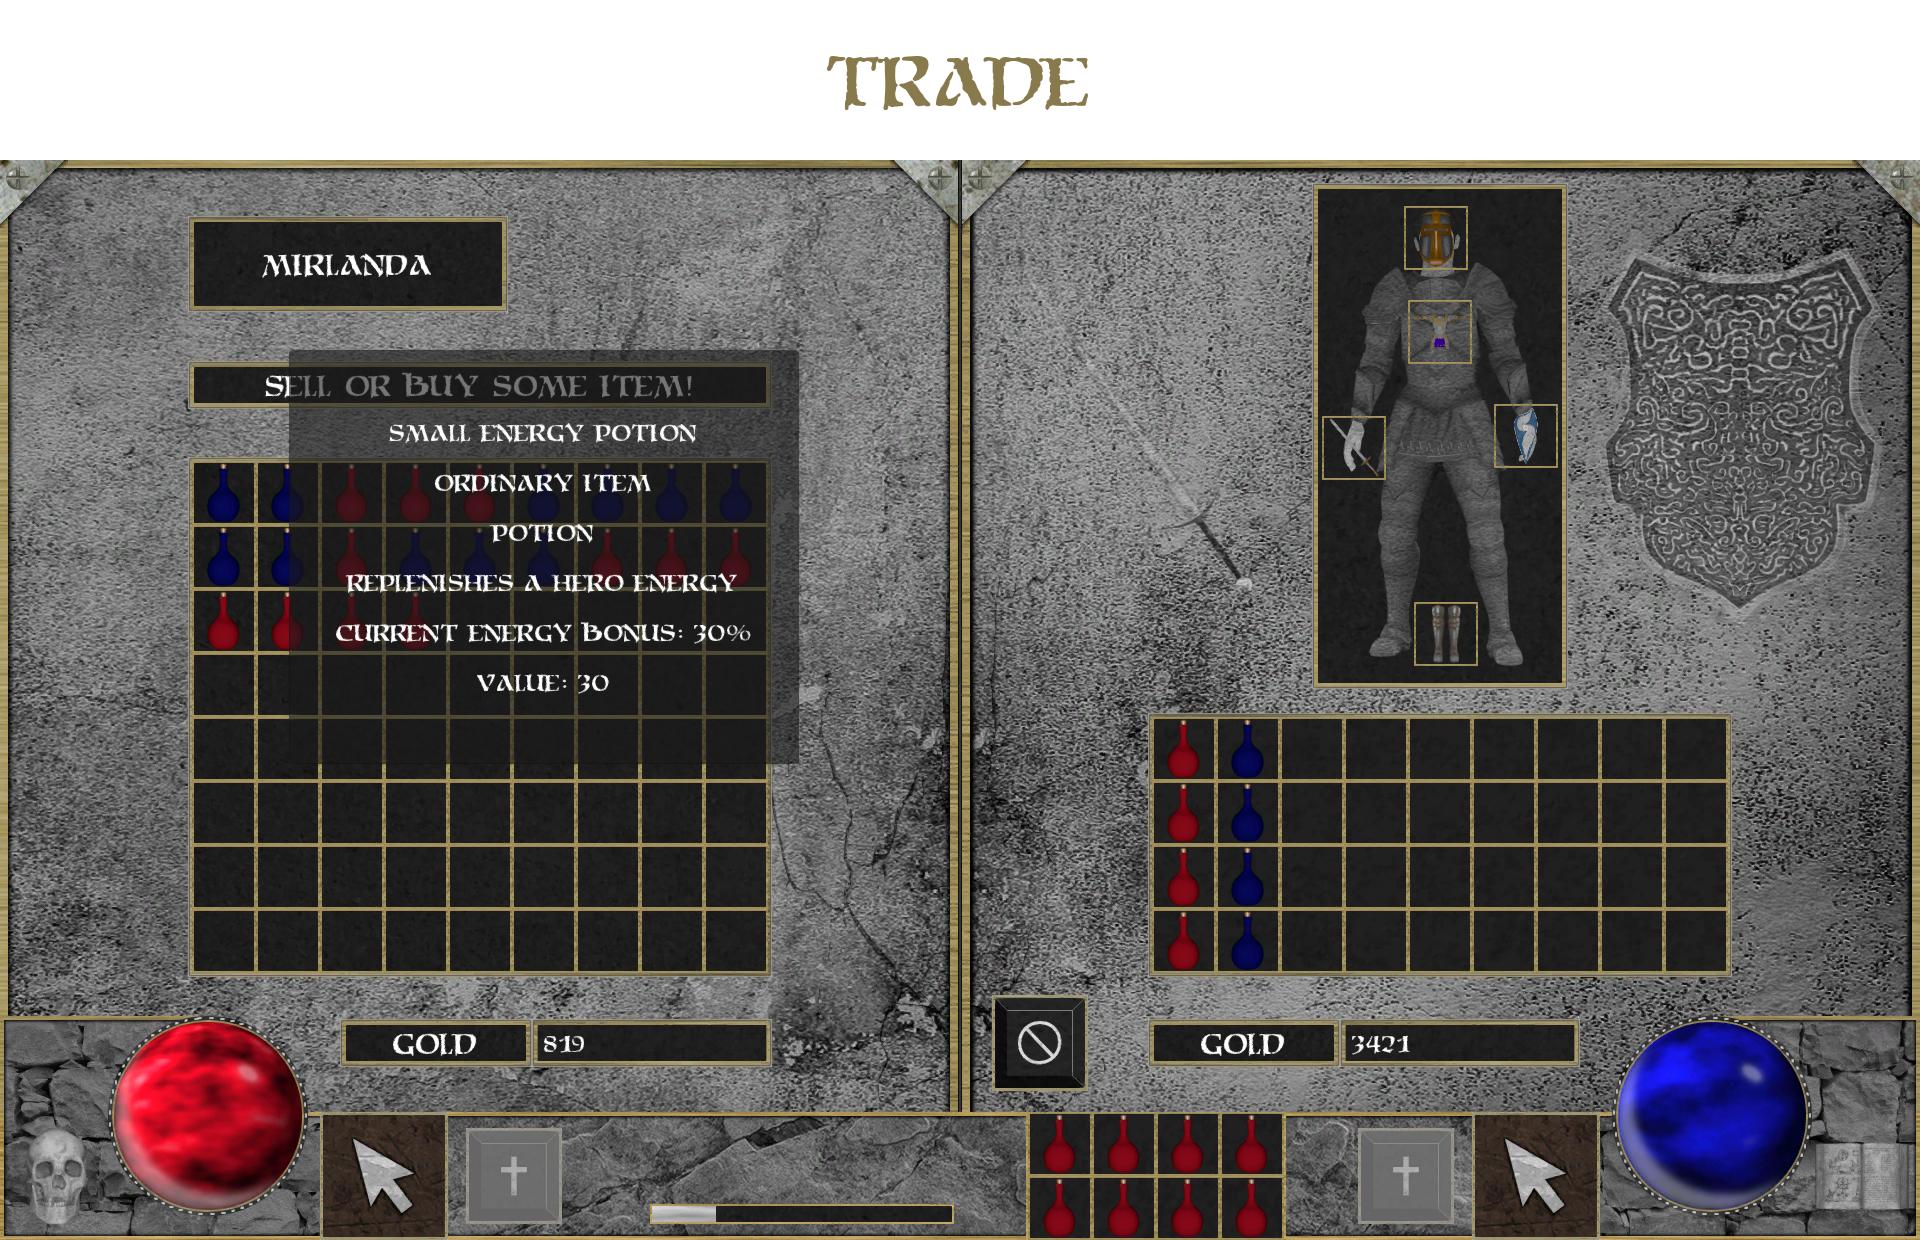
The player uses health and magic energy. Both of these attributes can be regenerated by elixirs.
The local currency (Gold) allows the exchange of goods.
In Femora there are hideouts with treasures.
The available weapons are divided into categories. Each of them improves the hero’s abilities by a certain factor.
Each of area represents certain difficulty level.
Each subsequent level requires more experience.
Realistic day and night cycle provides extra feelings and additional impressions.
Game visualization
The pictures below show the most important aspects of the game:
Used technologies
The list of used solutions:
Unity 2019.2.2f1 – Efficient and expanded game engine.
Visual Studio Code 1.50.1 – Primary, lightweight IDE.
Blender 2.83 – 3D computer graphics software used for creating visual effects.
GIMP 2.10 – Open source image editor.
Mixamo 2020 – Web service that provides animations with characters.
MakeHuman 1.2.0 – 3D graphics middleware for prototyping humanoids.
Credits
The author of the project have using many of arts shared by CC0 or CC BY license. Without this support, the game would not be possible. A complete list of the used materials and their creators can be found in the credits text file. Information can also be obtained by selecting the appropriate tab from the game menu.
Femora is a hack and slash game based on Diablo II created by Blizzard Entertainment. The history takes place in medieval-fantasy universe where Prime Evil tries to destroy the last bastion of humanity. In the game appear a lot of monsters and mechanisms known in titles like Titan Quest or Path of Exile.
Gameplay
Action of the game goes on ancient land named Femora. From a certain date wild horde tries abandoned humanity from their kingdom. The bloody battles are consumed many brave warriors. There is no way to escape this madness. The only one chance is find Prime Evil and break to Pandemonium of Doom. There is one human who can do this – it’s you!
Hero class
The player can take on the role of a Paladin – Holy Warrior who wreaks havoc in the ranks of the enemies. He is a specialist in cold weapon and auxiliary magic. This great knight is able to carry heavy armors and giant swords and is extremely resistant to damage. His advantage is combat ability which can be supported by passive fighting skills. Nobody can match him in hand-to-hand combat.
Enemies
There are several creatures threatening humanity:
Zombie – The weakest spawn of Hell.
Skeleton – Slow, brawny warrior with a heavy sword.
Demon Skeleton – Agile swordsman that dealing quick blows.
Rotfiend – Extremely fast fighter with great strength.
Pit Fiend – Huge, muscular beast that using gigantic axe.
Efreeti – Fiery demon that throws fireballs.
Hell Knight – The most powerful inhibitant of Pandemonium of Doom.
Locations
In the game there are four main areas:
Refugee Camp – Destroyed defensive fortification inhabited by surviving warriors.
Stony Plain – Invaded lowland which is covered with lush grass.
Death Valley – Abandoned desert with no life.
Hell Pit – Hellish land immersed in flames and lava.
Independent characters
In Refugee Camp there are two traders:
Mirlanda – Gifted Alchemy preparing potions and decoctions.
Orik – Skilled Blacksmith forging swords.
Other features
The game has the following properties:
The hero acquires experience by killing enemies. After defeating the appropriate number of opponents they can increase their skills.
The creatures leave items which can be using by hero.
The player uses health and magic energy. Both of these attributes can be regenerated by elixirs.
The local currency (Gold) allows the exchange of goods.
In Femora there are hideouts with treasures.
The available weapons are divided into categories. Each of them improves the hero’s abilities by a certain factor.
Each of area represents certain difficulty level.
Each subsequent level requires more experience.
Realistic day and night cycle provides extra feelings and additional impressions.
Game visualization
The pictures below show the most important aspects of the game:
Used technologies
The list of used solutions:
Unity 2019.2.2f1 – Efficient and expanded game engine.
Visual Studio Code 1.50.1 – Primary, lightweight IDE.
Blender 2.83 – 3D computer graphics software used for creating visual effects.
GIMP 2.10 – Open source image editor.
Mixamo 2020 – Web service that provides animations with characters.
MakeHuman 1.2.0 – 3D graphics middleware for prototyping humanoids.
Credits
The author of the project have using many of arts shared by CC0 or CC BY license. Without this support, the game would not be possible. A complete list of the used materials and their creators can be found in the credits text file. Information can also be obtained by selecting the appropriate tab from the game menu.
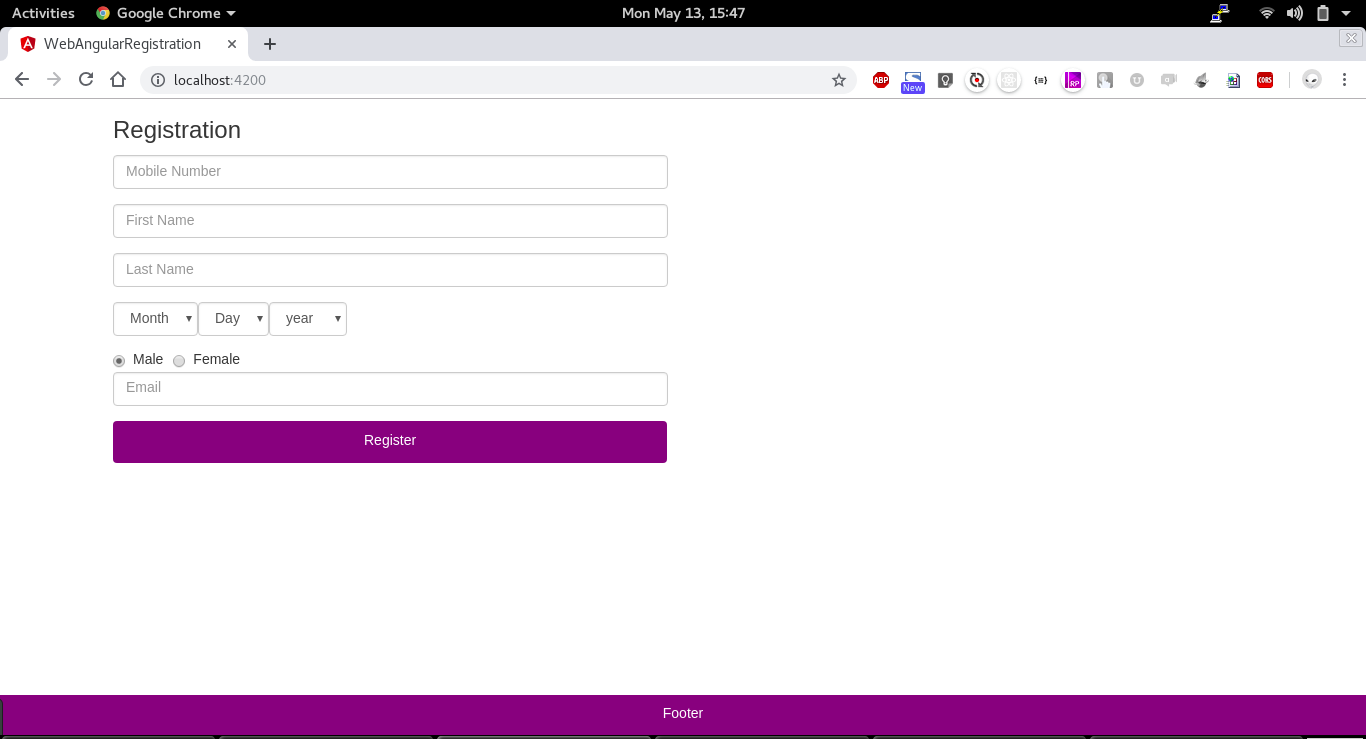
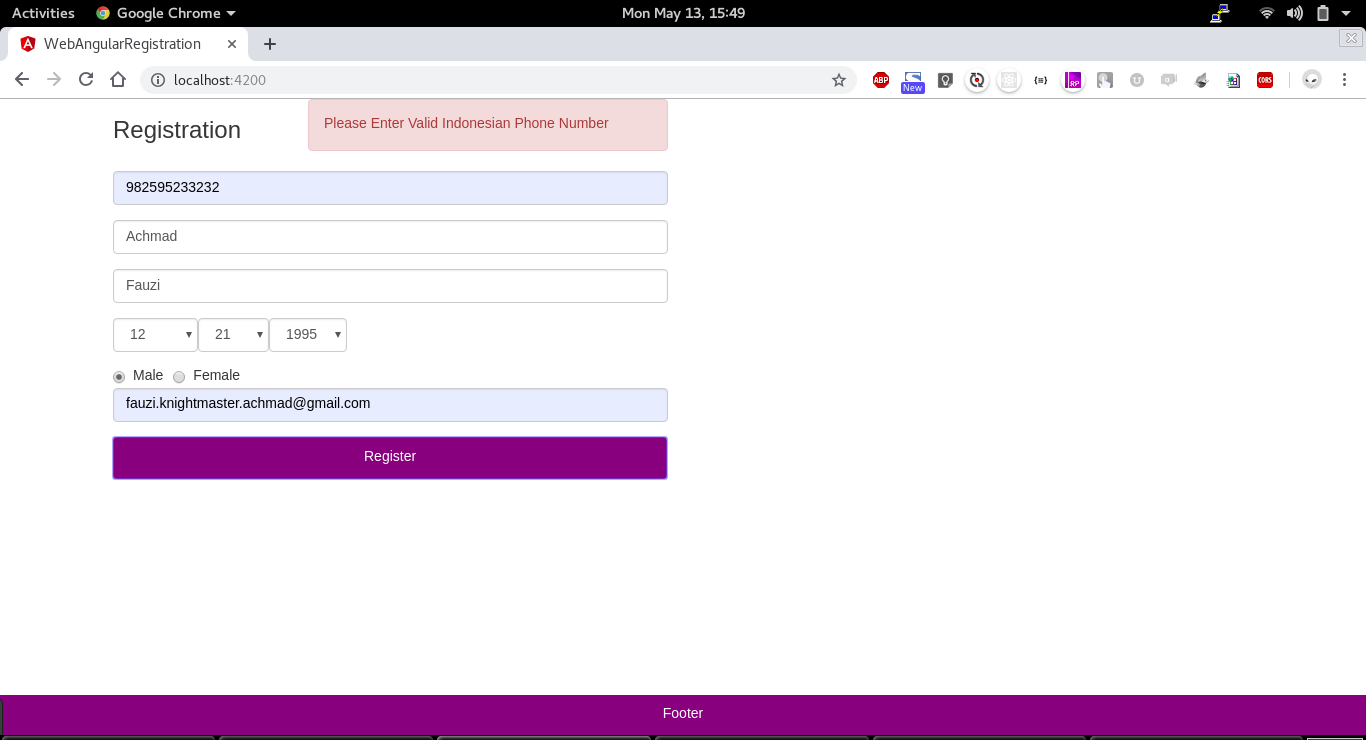
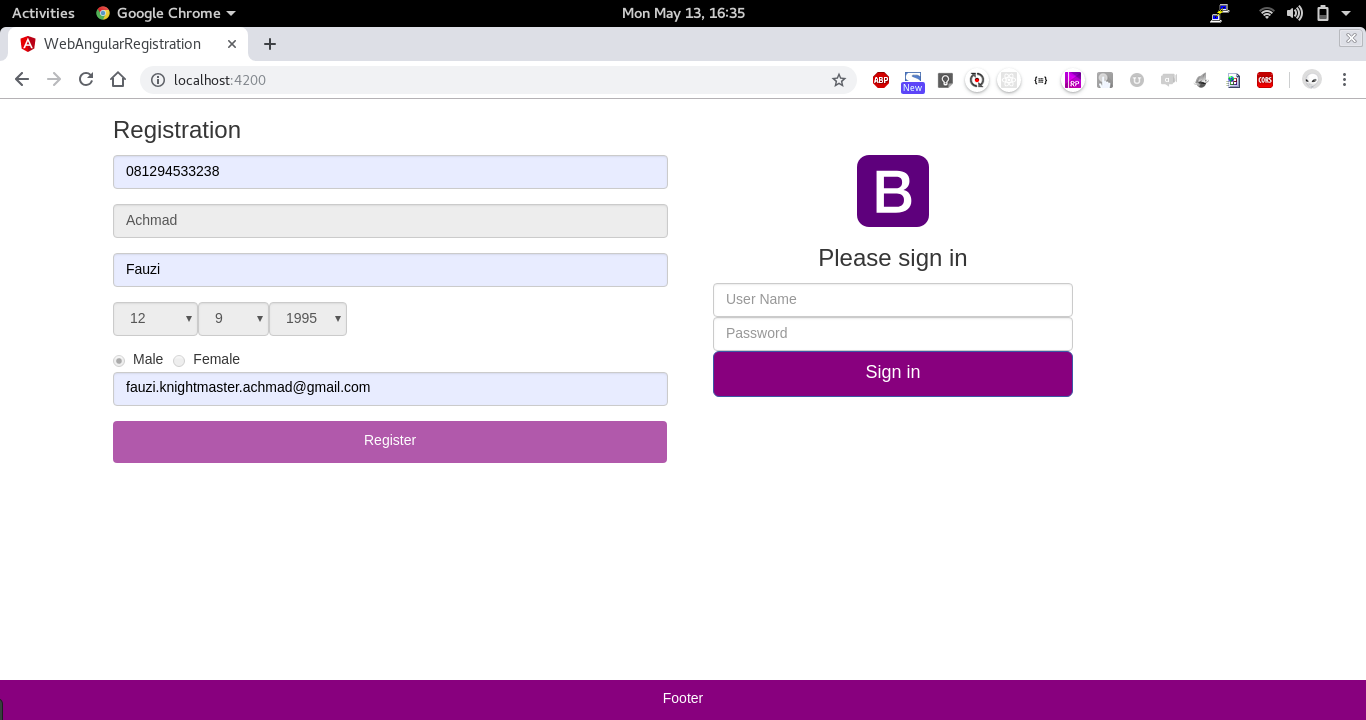
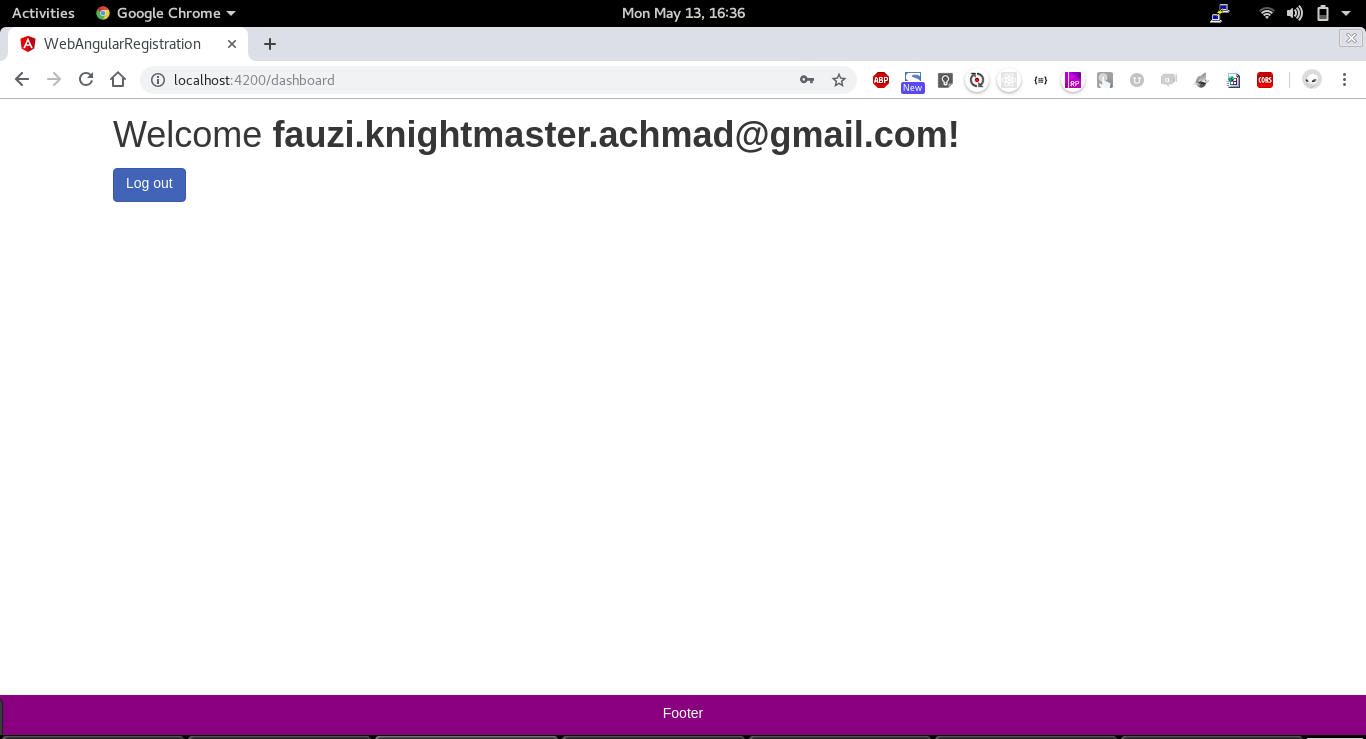
A Simple Registration and Login Page using SpringBoot and Angular. This repository contains two project spring-angular-registration for backend and web-angular-registration for the frontend.
Technologies !
WEB :
Angular 7 CLI
Bootstrap
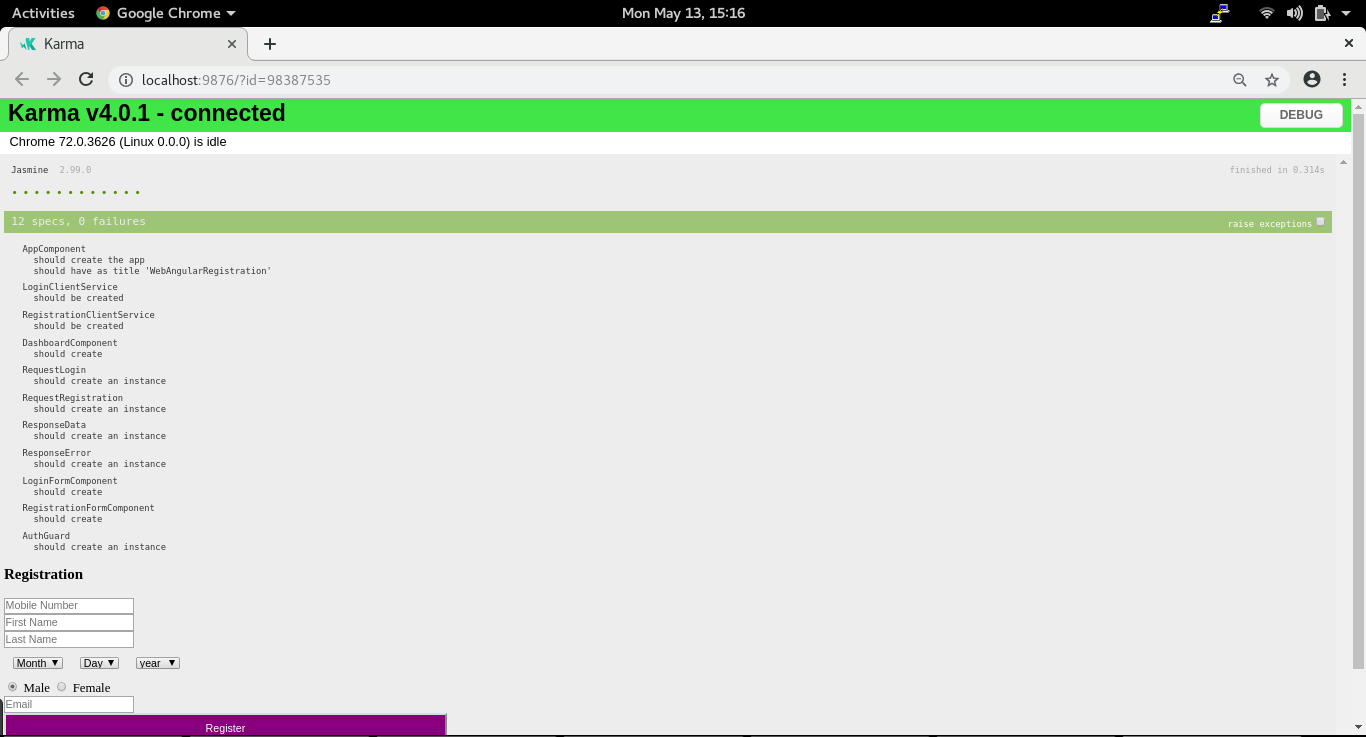
Karma
Jasmine
API :
Spring Web
Spring Security
JPA
PostgreSQL
Spring Test
Steps to run the project
Create DB and Restore file schema.sql
Run Backend spring-angular-registration and make sure there is no Error
Run Frontend web-angular-registration
How To Build And Run : spring-angular-registration (backend)
Open file : spring-angular-registration/src/main/resources/application.yml
Suppose you are running on local environment, change property spring.profiles.active : into local
Open file spring-angular-registration/src/main/resources/application-local.yml
Change property log.file.path : depend on your local storage
Change property db.name, db.host, db.port, db.username, db.password depend on your local configuration
Compile :
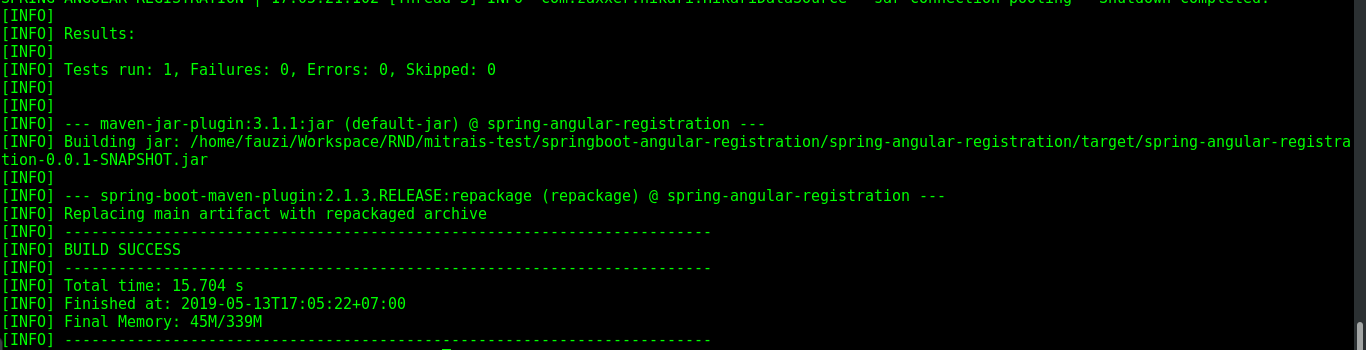
$ mvn clean package
or directly Run :
$ mvn spring-boot:run
How To Build And Run : web-angular-registration (frontend)
A Simple Registration and Login Page using SpringBoot and Angular. This repository contains two project spring-angular-registration for backend and web-angular-registration for the frontend.
Technologies !
WEB :
Angular 7 CLI
Bootstrap
Karma
Jasmine
API :
Spring Web
Spring Security
JPA
PostgreSQL
Spring Test
Steps to run the project
Create DB and Restore file schema.sql
Run Backend spring-angular-registration and make sure there is no Error
Run Frontend web-angular-registration
How To Build And Run : spring-angular-registration (backend)
Open file : spring-angular-registration/src/main/resources/application.yml
Suppose you are running on local environment, change property spring.profiles.active : into local
Open file spring-angular-registration/src/main/resources/application-local.yml
Change property log.file.path : depend on your local storage
Change property db.name, db.host, db.port, db.username, db.password depend on your local configuration
Compile :
$ mvn clean package
or directly Run :
$ mvn spring-boot:run
How To Build And Run : web-angular-registration (frontend)
Это простое приложение для просмотра информации о фильмах, созданное с использованием React, TypeScript и открытого API Кинопоиска.
Целью этого проекта является создание приложения для просмотра информации о фильмах, которое будет использовать React, TypeScript и открытое API Кинопоиска для получения данных о фильмах. Приложение будет иметь следующий функционал:
Отображение списка фильмов:
Приложение отображает список фильмов, получаемых с помощью API.
Отображает фильмы постранично по 50 фильмов на страницу с возможность менять количество фильмов на странице.
Для каждого фильма отображено:
Постер фильма (если доступен).
Название фильма.
Год выпуска.
Рейтинг фильма.
Есть возможность фильтровать список фильмов:
По жанру (выбор нескольких жанров)
По рейтингу (диапазон рейтинга).
По году выпуска (диапазон лет начиная с 1990).
Просмотр детальной информации о фильме:
При клике на фильм из списка или результатов поиска, приложение переходит на страницу с детальной информацией об этом фильме.
На странице фильма отображено:
Постер фильма (если доступен).
Название фильма.
Описание фильма.
Рейтинг фильма.
Дату выхода.
Список жанров.
Инструменты:
Дополнительные задания:
Есть возможность добавления фильмов в список “избранное”:
Отдельная страница со списком избранных фильмов.
Сохраняется список при перезагрузке страницы.
Ожидаемый результат:
Рабочее многостраничное SPA приложение для просмотра информации о фильмах, удовлетворяющее всем перечисленным требованиям.
Начало работы
Чтобы запустить проект локально, необходимо выполнить следующие шаги:
Languages: C + Python 2.7 (Python 3.5 will work but you need to modify files in /scripts a little bit)
Step by Step Tutorial
Step-1. Prepare machine and environment
a. System and GPU
A Ubuntu 14.04 native system is preferred in training process.
At least one NVIDIA GPU Card is required such as GeForce series to enable GPU mode. This is not a must but strongly recommended if you do not have lots of time.
It is very tricky to use virtualBox on top of macOS/windows to communicate to GPU (actually, to be more general, taking advantages of host machine’s resources including memories on VirtualBox is quite limited). Therefore, I do not recommend this way but feel free to try it if you have no other work around.
b. Environment (GPU)
Descriptions:
OpenCV : OpenCV is useful no matter whether you want to enable GPU mode and here we use OpenCV v2.4.13 for Ubuntu 14.04;
NVIDIA Driver: NVIDIA Driver is needed for machine to communicate with GPU;
CUDA: CUDA is a parallel computing platform and application programming interface (API) model created by Nvidia and we use CUDA 8.0 here;
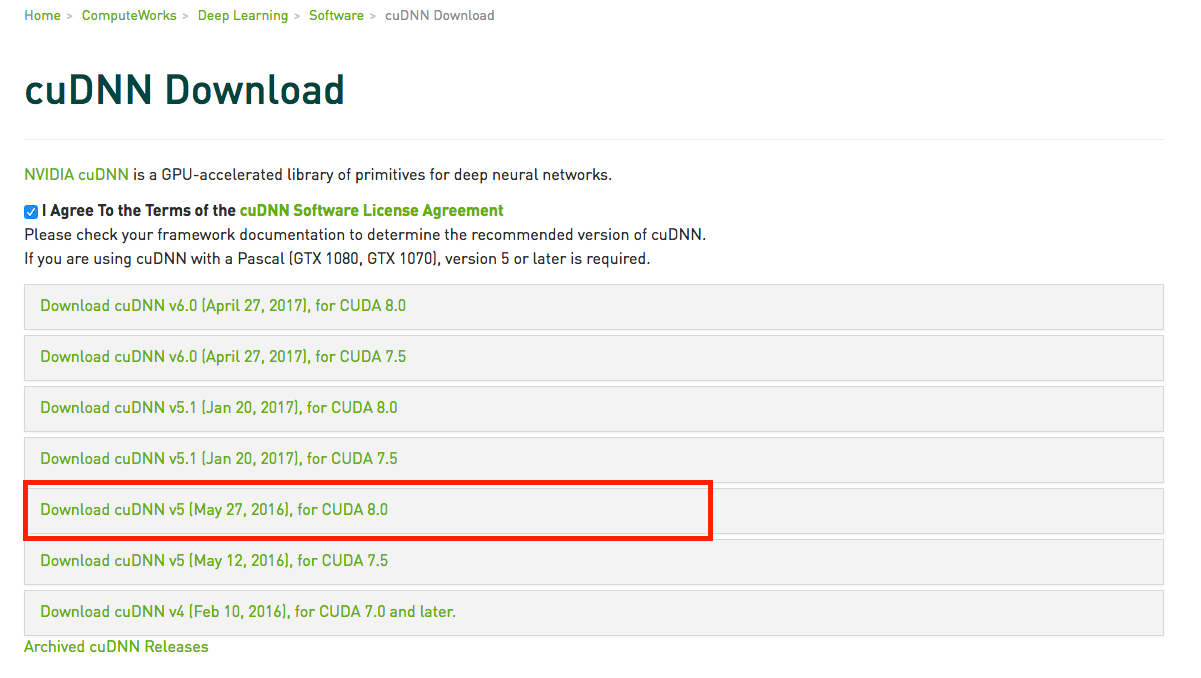
cuDNN: cuDNN is a GPU acceleration library, especially for deep learning neural networks (i. e., it speeds up when you work with GPU) and we use cuDNN v5.0 for CUDA 8.0 here
For Ubuntu, if you install the system together with Windows sharing BIOS/UEFI, you probably would like to turn off Security Boot so that you don’t have any signature issues while installing the NVIDIA driver.
If you are using AWS EC2 Ubuntu Machines, also run following(which is to disable nouveau since it conflicts with NVIDIA’s kernel module and please PAY ATTENTION TO THE LAST LINE, which requires REBOOT. Pay extra attention, if you are using AWS EC2 spot instance):
sudo apt-get install linux-image-extra-virtual
echo "blacklist nouveau" | sudo tee -a /etc/modprobe.d/blacklist-nouveau.conf
echo "blacklist lbm-nouveau" | sudo tee -a /etc/modprobe.d/blacklist-nouveau.conf
echo "options nouveau modeset=0" | sudo tee -a /etc/modprobe.d/blacklist-nouveau.conf
echo "alias nouveau off" | sudo tee -a /etc/modprobe.d/blacklist-nouveau.conf
echo "alias lbm-nouveau off" | sudo tee -a /etc/modprobe.d/blacklist-nouveau.conf
echo options nouveau modeset=0 | sudo tee -a /etc/modprobe.d/nouveau-kms.conf
sudo update-initramfs -u
sudo reboot
If you are not using AWS EC2 Ubuntu or, to be more clear, if you are using an Ubuntu with an UI, it means that you are running a X server, which will bring your problems on executing last line.
Therefore, you need to kill the X server to install nvidia driver (which by default will prompt out an UI) and then restart X server.
Therefore:
Press Control + ALT + F1
Type your ubuntu system username (exp. ubuntu) and password to log in
Kill X Server by sudo service lightdm stop
Navigate to the correct folder and Install NVIDIA Driver in silent mode sudo ./nvidia_installers/NVIDIA-Linux-x86_64-375.26.run -s
Restart X server by sudo service lightdm start
Go back to your fancy UI if you are using any by Control + ALT + F7
download cudnn-8.0-linux-x64-v5.0-ga.tgz from https://developer.nvidia.com/cudnn (You may need to sign up a NVIDIA developer to download it and don’t panic, it’s free.)
Step-4. Pre-process labeled data and Configure model
a. Pre-process labeled data
First of all, you need to know how many classes you want to classify (i.e, how many kinds of objects you want this algorithm to spot eventually) and their names.
Then, open scripts/easy_label.py and edit the 7th line to replace the classes. For example, the default one is for task to is train a model to spot banana, monkey, panda in future photos/videos of a zoo.
Also, in the same file, edit the 6th line to replace the format of your images, and by default, it’s png.
At last, add(replace the default) classes names in ./easy.names.
Which is exactly a DEV Kit for your deep learning model.
b. Configure Model
Firstly,
Let’s say, your training images size is A*A (which means width and height are both A) and classes number (how many classes you are trying to classify) is B.
Navigate to the root of this folder and run:
python ${PWD}/scripts/in_place.py -f ${PWD}/cfg/easy.cfg -o ${IMAGE_WIDTH} -n A
python ${PWD}/scripts/in_place.py -f ${PWD}/cfg/easy.cfg -o ${IMAGE_HEIGHT} -n A
python ${PWD}/scripts/in_place.py -f ${PWD}/cfg/easy.cfg -o ${CLASS_NUM} -n B
python ${PWD}/scripts/in_place.py -f ${PWD}/cfg/easy.data -o ${CLASS_NUM} -n B
Secondly,
We need to do some math and let’s say you have C = (classes + 5) * 5.
Then continue run:
python ${PWD}/scripts/in_place.py -f ${PWD}/cfg/easy.cfg -o ${FILTERS_NUM} -n C
Note: If those scripts does not work, you just manually replace them.
Step-5. Make darknet executable and Train
a. Configure Makefile
If you are using GPU to train, then do not change any thing.
If you are using CPU to train, open Makefile and edit first 4 lines to be below:
GPU=0
CUDNN=0
OPENCV=1
DEBUG=0
which basically just disable GPU mode
b. Create darknet executable
Navigate to the root of this folder and run:
make
Then you are supposed to see a file just called darknet in root.
c. Train
Navigate to the root of this folder and run:
make train
Command above will train model with single GPU
If you want to train with multiple GPUs you need to first still run above and then wait for a model called easy_1000.weights (or whatever weights files larger than 1000) occur in backup folder.
And then run:
make train-multi-gpus
(Examples above assume that you have 2 GPUs and with easy_1000.weights)
TADA! You can go to sleep and wait for several hours (days) to get a trained model sitting in backup folder.
Step-6. Test with static image and live stream camera
a. Static Image
Drag your image into the root folder and rename it as test.png, then run:
make test
b. Live stream camera
make test-camera
Further Work
Add a python wrapper
Build a docker image to automate the entire process (could be tricky to mount with camera tho)
This small plugin for Neovim allows using vim.opt.completefunc to serve, expand and browse snippets.
Usage
require("incomplete").setup()
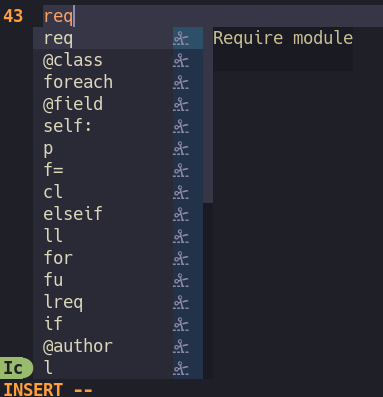
After that, try opening your completefunc (CTRL-X CTRL-U) and using it as usual (type to filter, CTRL-n,CTRL-p to
scroll, CTRL-y to select). See help completefunc.
Only vscode-like json snippets are supported, they must be placed in a snippets/ folder at the root of your
runtimepath (e.g. at $XDG_CONFIG_HOME/nvim/snippets) with a package.json that contains metadata about all snippets.
Snippets for ft named all will be always loaded. Snippets for other fts will be loaded lazily only for that filetype.
Simply install them using your plugin manager, no need to call any lazy load etc. Incomplete.nvim will load snippets for
a given filetype automatically when opening such buffer.
To support Java 17, we needed to add support for the RUNTIME_VERSION option when creating procedures and functions with JVM languages.
The runtime parameter was added to the applications DSL to support this change, but the default value will stay 11 for now to align with the Snowflake default.
Additionally, Java 17 is also being used now to compile and build this plugin.
Motivation
It needs to be easy to develop and test JVM applications even if they are being deployed to Snowflake.
Using Gradle, we can easily build shaded JAR files with all dependencies included using
the shadow plugin, and I’ve provided
a sample Java project that demonstrates this basic use case:
cd examples/java-manual &&
./gradlew build
But this JAR would still have to be uploaded to a stage in Snowflake, and the UDF would have to be created or possibly
recreated if its signature changed.
I wanted an experience using Snowflake that is as natural to developers using IntelliJ or VS Code for standard JVM
projects.
The Gradle Snowflake Plugin
This plugin provides easy configuration options for those getting started with Gradle but also provides advanced
features for teams already using Gradle in other areas of the organization.
It has three basic modes:
Lightweight publishing to internal Snowflake stages using Snowpark.
Slightly heavier publishing using external Snowflake stages and autoconfiguration of
the maven-publish plugin.
Publishing to Snowflake using external stages and custom configuration of
the maven-publish plugin.
This plugin can be used to build UDFs and procedures in any JVM language supported by Gradle, which currently provides
official support
for Java, Scala, Kotlin and Groovy.
See the examples directory for examples using different languages.
Internal Stages using Snowpark
Unless you have a heavy investment in Gradle as an organization, this is likely the option you want to use.
Additionally, if you plan on sharing UDFs across Snowflake accounts, this is the option you have to use, as JARs
need to be in named internal stages.
Look at the sample Java project using the plugin and you’ll notice a few differences in
the build file.
cd examples/java &&
cat build.gradle
We applied io.github.stewartbryson.snowflake and removed com.github.johnrengelman.shadow because the shadow plugin
is automatically applied by the snowflake plugin:
plugins {
   id 'java'
   id 'io.github.stewartbryson.snowflake' version '2.1.22'
}
We now have the snowflakeJvm task available:
❯ ./gradlew help --task snowflakeJvm

> Task :help
Detailed task information for snowflakeJvm

Path
     :snowflakeJvm

Type
     SnowflakeJvm (io.github.stewartbryson.SnowflakeJvm)

Options
     --config     Custom credentials config file.

     --connection     Override the credentials connection to use. Default: use the base connection info in credentials config.

     --jar     Optional: manually pass a JAR file path to upload instead of relying on Gradle metadata.

     --stage     Override the Snowflake stage to publish to.

     --rerun     Causes the task to be re-run even if up-to-date.

Description
     A Cacheable Gradle task for publishing UDFs and procedures to Snowflake

Group
     publishing

BUILD SUCCESSFUL in 2s
5 actionable tasks: 3 executed, 2 up-to-date
Several command-line options mention overriding other configuration values.
This is because the plugin also provides a DSL closure called snowflake that we can use to configure our build, which
is documented in
the class API docs:
Snowflake credentials are managed in a config file, with the default being ~/.snowflake/config.toml as prescribed by the Snowflake Developer CLI project.
As a secondary location, we also support the SnowSQL config file.
In searching for a credentials config file, the plugin works in the following order:
A custom location of your choosing, configured with the --config option in applicable tasks.
<HOME_DIR>/.snowflake/config.toml
<HOME_DIR>/.snowsql/config
./config.toml (This is useful in CI/CD pipelines, where secrets can be written easily to this file.)
The connection property in the plugin DSL defines which connection to use from the config file, relying on the default values if none is
provided.
It first loads all the default values, and replaces any values from the connection, similar to how Snowflake CLI and SnowSQL work.
The nested applications DSL
might seem a bit daunting.
This is a simple way to configure all the different UDFs and procedures we want to automatically create (or recreate)
each time we publish the JAR file.
The example above will generate and execute the following statement.
Notice that the imports part of the statement is automatically added by the plugin as the JAR (including our code and all dependencies) is automatically uploaded to Snowflake:
CREATE OR REPLACE function add_numbers (a integer, b integer)
  returns string
  language JAVA
  handler = 'Sample.addNum'
  runtime_version = '17'
  imports = ('@upload/libs/java-0.1.0-all.jar')
With the configuration complete, we can execute the snowflakeJvm task, which will run any unit tests (see Testing
below) and then publish
our JAR and create our function.
Note that if the named internal stage does not exist, the plugin will create it first:
❯ ./gradlew snowflakeJvm

> Task :snowflakeJvm
Using credentials config file: /Users/stewartbryson/.snowflake/config.toml
File java-0.1.0-all.jar: UPLOADED
Deploying ==>
CREATE OR REPLACE function add_numbers (a integer, b integer)
  returns string
  language JAVA
  handler = 'Sample.addNum'
  runtime_version = '17'
  imports = ('@upload/libs/java-0.1.0-all.jar')


BUILD SUCCESSFUL in 5s
7 actionable tasks: 2 executed, 5 up-to-date
Our function now exists in Snowflake:
select add_numbers(1,2);

Sum is: 3
The snowflakeJvm task was written to be incremental and cacheable.
If we run the task again without making any changes to task inputs (our code) or outputs, then the execution is avoided,
which we know because of the up-to-date keyword.
Gradle
has built-in Testing Suites for JVM projects,
and using this functionality for JVM applications with Snowflake was my main motivation for writing this
plugin.
We’ll now describe two topics regarding this plugin: unit testing and functional testing.
Unit Testing
Unit testing with Gradle is a dense topic, and the documentation will inform developers better than we can.
In general, unit tests are what developers write regardless of where the code eventually gets executed.
In the Java with testing example, you can see a sample testing specification (spec) using the Spock Framework and written in Groovy, which is a requirement for that framework,
as is applying the groovy plugin to the project.
cd examples/java-testing
Our plugins DSL from the build file:
plugins {
id 'java'
id 'groovy'// needed for Spock testing framework
id 'io.github.stewartbryson.snowflake' version '2.1.22'
}
Our choice to use the Spock framework in the default test testing suite:
test {
   useSpock('2.3-groovy-3.0')
}
And the unit test SampleTest spec in src/test/groovy:
importspock.lang.Sharedimportspock.lang.Specificationimportspock.lang.SubjectclassSampleTestextendsSpecification {
@Shared@Subjectdef sample =newSample()
def"adding 1 and 2"() {
when: "Two numbers"def a =1def b =2then: "Add numbers"
sample.addNum(a, b) =="Sum is: 3"
}
def"adding 3 and 4"() {
when: "Two numbers"def a =3def b =4then: "Add numbers"
sample.addNum(a, b) =="Sum is: 7"
}
}
All unit tests in either src/test/java (written using JUnit or something else) or src/test/groovy (written with Spock)
will automatically run whenever the test or build task is executed.
❯ ./gradlew build

> Task :test

SampleTest

  Test adding 1 and 2 PASSED
  Test adding 3 and 4 PASSED

SUCCESS: Executed 2 tests in 487ms

BUILD SUCCESSFUL in 1s
9 actionable tasks: 5 executed, 4 up-to-date
All Gradle testing tasks are automatically incremental and cacheable, and would be avoided if executed again without changes to the code in either the source or the spec.
The same applies for the topic of functional testing below.
Functional Testing
Functional testing describes what the system does,
and in my mind, this involves testing our deployed code in Snowflake.
Regardless of what we call it, we know we need this as a crucial component in our build chain.
This plugin contains a custom Spock Specification class called SnowflakeSpec that can be used in a new test suite.
By default, this test suite is called functionalTest, though the name can be configured using the testSuite property.
Here is our configuration of the functionalTest test suite.
The DSL provided by Gradle in JVM Testing is convoluted (in my opinion), but no one asked me:
functionalTest(JvmTestSuite) {
   targets {
       all {
           useSpock('2.3-groovy-3.0')
           dependencies {
               implementation "io.github.stewartbryson:gradle-snowflake-plugin:2.1.22"
           }
           testTask.configure {
               failFast true
               // which credentials connection to use
               systemProperty 'connection', project.snowflake.connection
           }
       }
   }
}
I’ll walk through a few of these points.
So that the SnowflakeSpec is available in the test classpath, we have to declare the plugin as a dependency
to the test suite.
Notice that we use the library maven coordinates, which are different from the coordinates in the plugins DSL.
Additionally, our test specs are unaware of all the configurations of our Gradle build, so we have to pass our connection
property as a Java system property to the SnowflakeSpec class.
This is the SnowflakeSampleTest spec in src/functionalTest/groovy:
importgroovy.util.logging.Slf4jimportio.github.stewartbryson.SnowflakeSpec/** * The SnowflakeSpec used for testing functions.*/@Slf4jclassSnowflakeSampleTestextendsSnowflakeSpec {
def'ADD_NUMBERS() function with 1 and 2'() {
when: "Two numbers exist"def a =1def b =2then: 'Add two numbers using ADD_NUMBERS()'
selectFunction("add_numbers", [a,b]) =='Sum is: 3'
}
def'ADD_NUMBERS() function with 3 and 4'() {
when: "Two numbers exist"def a =3def b =4then: 'Add two numbers using ADD_NUMBERS()'
selectFunction("add_numbers", [a,b]) =='Sum is: 7'
}
}
The selectFunction method is an easy way to execute a function and test the results by just passing the function name and a list of arguments to pass to that function.
And of course, this executes against Snowflake in real time.
❯ ./gradlew functionalTest
> Task :test
SampleTest
Test adding 1 and 2 PASSED
Test adding 3 and 4 PASSED
SUCCESS: Executed 2 tests in 481ms
> Task :snowflakeJvm
Using credentials config file: /Users/stewartbryson/.snowflake/config.toml
File java-testing-0.1.0-all.jar: UPLOADED
Deploying ==>
CREATE OR REPLACE functionadd_numbers (a integer, b integer)
returns string
language JAVA
handler = 'Sample.addNum'
runtime_version = '17'
imports = ('@upload/libs/java-testing-0.1.0-all.jar')
> Task :functionalTest
SnowflakeSampleTest
Test ADD_NUMBERS() functionwith 1 and 2 PASSED (1.1s)
Test ADD_NUMBERS() functionwith 3 and 4 PASSED
SUCCESS: Executed 2 tests in 3.8s
BUILD SUCCESSFUL in 11s
11 actionable tasks: 7 executed, 4 up-to-date
Testing with Ephemeral Database Clones
Running functional tests using static Snowflake databases is boring, especially considering
the zero-copy cloning functionality
available.
The plugin supports cloning an ephemeral database from the database we connect to and using it for testing our application.
This workflow is useful for CI/CD processes and is configured with the plugin DSL.
The plugin is aware when it is running in CI/CD environments and currently supports:
Because the plugin is aware when executing in CICD environments, we expose that information through the DSL,
and can use it to control our cloning behavior.
Our build file change to enable ephemeral testing:
The useEphemeral property will determine whether the createEphemeral and dropEphemeral tasks
are added at the beginning and end of the build, respectively.
This allows for the functionalTest task to be run in the ephemeral clone just after our application is published.
We’ve also added a little extra magic to keep the clone when building a pull request.
The createEphemeral task issues a CREATE DATABASE... IF NOT EXISTS statement, so if will not fail if the clone exists from a prior run.
Remember that our SnowflakeSpec class doesn’t automatically know the details of our build, so we have to provide
the ephemeral name using java system properties. Here is our modified testing suite:
functionalTest(JvmTestSuite) {
targets {
all {
useSpock('2.3-groovy-3.0')
dependencies {
implementation "io.github.stewartbryson:gradle-snowflake-plugin:1.1.4"
}
testTask.configure {
failFast true// which credentials connection to use
systemProperty 'connection', project.snowflake.connection
// if this is ephemeral, the test spec needs the name to connect toif (project.snowflake.useEphemeral) {
systemProperty 'ephemeralName', snowflake.ephemeralName
}
}
}
}
}
We can simulate a GitHub Actions environment just by setting the GITHUB_ACTIONS environment variable:
❯ export GITHUB_ACTIONS=true
❯ ./gradlew functionalTest
> Task :createEphemeral
Using credentials config file: /Users/stewartbryson/.snowflake/config.toml
Ephemeral clone EPHEMERAL_JAVA_TESTING_PR_4 created.
> Task :snowflakeJvm
Reusing existing connection.
File java-testing-0.1.0-all.jar: UPLOADED
Deploying ==>
CREATE OR REPLACE functionadd_numbers (a integer, b integer)
returns string
language JAVA
handler = 'Sample.addNum'
runtime_version = '17'
imports = ('@upload/libs/java-testing-0.1.0-all.jar')
> Task :functionalTest
SnowflakeSampleTest
Test ADD_NUMBERS() functionwith 1 and 2 PASSED
Test ADD_NUMBERS() functionwith 3 and 4 PASSED
SUCCESS: Executed 2 tests in 3s
BUILD SUCCESSFUL in 6s
13 actionable tasks: 4 executed, 9 up-to-date
When the CI/CD environment is detected, the plugin will name the ephemeral database clone based on the pull request
number, the branch name, or the tag name instead of an autogenerated one.
If we prefer to simply specify a clone name instead of relying on the plugin to generate it, that is supported as well:
ephemeralName ='testing_db'
❯ ./gradlew functionalTest

> Task :createEphemeral
Using credentials config file: /Users/stewartbryson/.snowflake/config.toml
Ephemeral clone testing_db created.

> Task :snowflakeJvm
Reusing existing connection.
File java-testing-0.1.0-all.jar: UPLOADED
Deploying ==>
CREATE OR REPLACE function add_numbers (a integer, b integer)
 returns string
 language JAVA
 handler = 'Sample.addNum'
 runtime_version = '17'
 imports = ('@upload/libs/java-testing-0.1.0-all.jar')


> Task :functionalTest

SnowflakeSampleTest

 Test ADD_NUMBERS() function with 1 and 2 PASSED
 Test ADD_NUMBERS() function with 3 and 4 PASSED

SUCCESS: Executed 2 tests in 3.3s


> Task :dropEphemeral
Reusing existing connection.
Ephemeral clone testing_db dropped.

BUILD SUCCESSFUL in 7s
13 actionable tasks: 4 executed, 9 up-to-date
Autoconfiguration of maven-publish with External Stages
This option is useful when you want your artifacts available to consumers other than just Snowflake without publishing
them to disparate locations.
Gradle has built-in support
for S3 or GCS as a Maven repository, and Snowflake has support for S3 or GCS external stages, so we simply marry the two
in a single location.
Looking at the sample project, notice we’ve populated a few additional properties:
The groupId and artifactId, plus the built-in version property that exists for all Gradle builds, provide
the Maven coordinates for publishing externally to S3 or GCS.
I’ve also created a property in my local gradle.properties file for the bucket:
# local file in ~/.gradle/gradle.propertiessnowflake.publishUrl='s3://myrepo/release'
The plugin doesn’t create the stage, but it does do a check to ensure that the Snowflake stage metadata matches the
value in publishUrl. We get a few new tasks added to our project:
❯ ./gradlew tasks --group publishing

> Task :tasks

------------------------------------------------------------
Tasks runnable from root project 'java-external-stage'
------------------------------------------------------------

Publishing tasks
----------------
generateMetadataFileForSnowflakePublication - Generates the Gradle metadata file for publication 'snowflake'.
generatePomFileForSnowflakePublication - Generates the Maven POM file for publication 'snowflake'.
publish - Publishes all publications produced by this project.
publishAllPublicationsToS3_mavenRepository - Publishes all Maven publications produced by this project to the s3_maven repository.
publishSnowflakePublicationToMavenLocal - Publishes Maven publication 'snowflake' to the local Maven repository.
publishSnowflakePublicationToS3_mavenRepository - Publishes Maven publication 'snowflake' to Maven repository 's3_maven'.
publishToMavenLocal - Publishes all Maven publications produced by this project to the local Maven cache.
snowflakeJvm - A Cacheable Gradle task for publishing UDFs and procedures to Snowflake
snowflakePublish - Lifecycle task for all Snowflake publication tasks.

To see all tasks and more detail, run gradlew tasks --all

To see more detail about a task, run gradlew help --task <task>

BUILD SUCCESSFUL in 875ms
5 actionable tasks: 1 executed, 4 up-to-date
These are granular tasks for building metadata and POM files and publishing that along with the artifacts to S3.
But the snowflakeJvm task initiates all these dependent tasks,
including publishSnowflakePublicationToS3_mavenRepository which uploads the artifact but unfortunately doesn’t provide
console output to that effect:
Manual configuration of maven-publish with External Stages
For organizations that already use maven-publish extensively, or have customizations outside the scope of
autoconfiguration, the plugin supports disabling autoconfiguration:
useCustomMaven =true
We then configure publications and repositories as described in
the maven-publish documentation, and
add task dependencies for the snowflakeJvm task.
The publishUrl property is no longer required because it’s configured in the publications closure, but if provided,
the plugin will ensure it matches the metadata for the stage property. groupId and artifactId are still required so that snowflakeJvm can autogenerate the imports section of
the CREATE OR REPLACE... statement.
Contributing
Anyone can contribute! You don’t need permission, my blessing, or expertise, clearly.
To make changes to the README.md file, please make them in the master README file instead.
The version tokens in this file are automatically replaced with the current value before publishing.
Three different testing tasks are defined:
❯ ./gradlew tasks --group verification

> Task :tasks

------------------------------------------------------------
Tasks runnable from root project 'gradle-snowflake'
------------------------------------------------------------

Verification tasks
------------------
check - Runs all checks.
functionalTest - Runs the functional test suite.
integrationTest - Runs the integration test suite.
test - Runs the test suite.

To see all tasks and more detail, run gradlew tasks --all

To see more detail about a task, run gradlew help --task <task>

BUILD SUCCESSFUL in 1s
1 actionable task: 1 executed
The functionalTest task contains all the tests that actually make a connection to Snowflake and test a deployment,
except those involved with external stages.
You need to add a connection in ~/.snowflake/config.toml called gradle_plugin.
WARNING: Ensure that the credentials you provide in gradle_plugin are safe for development purposes.
The integrationTest task requires the following external stages to exist in your Snowflake account:
gcs_maven: An external stage in GCS.
s3_maven: An external stage in S3.
It also requires the following gradle properties to be set, with the easiest method being placing them in ~/.gradle/gradle.properties:
gcsPublishUrl: the GCS url of gcs_maven.
s3PublishUrl: the S3 url of s3_maven.
It is understandable if you are unable to test external stages as part of your contribution.
We segmented them out for this reason.
Open a pull request against the develop branch so that it can be merged and possibly tweaked before
we open the PR against the main branch.
This will also enable us to test external stages.
Transform the core object tables into analytics-ready models.
Includes options to explore video demographics and a comprehensive overview of video performance that you could combine with other organic ad platform reports.
Generates a comprehensive data dictionary of your source and modeled Youtube Analytics data through the dbt docs site.
The following table provides a detailed list of all tables materialized within this package by default.
TIP: See more details about these tables in the package’s dbt docs site.
Each record represents an individual video enriched with metadata.
Materialized Models
Each Quickstart transformation job run materializes 11 models if all components of this data model are enabled. This count includes all staging, intermediate, and final models materialized as view, table, or incremental.
How do I use the dbt package?
Step 1: Prerequisites
To use this dbt package, you must have the following:
At least one Fivetran Youtube Analytics connection syncing data into your destination.
A BigQuery, Snowflake, Redshift, PostgreSQL, or Databricks destination.
Databricks Dispatch Configuration
If you are using a Databricks destination with this package you will need to add the below (or a variation of the below) dispatch configuration within your dbt_project.yml. This is required in order for the package to accurately search for macros within the dbt-labs/spark_utils then the dbt-labs/dbt_utils packages respectively.
Include the following Youtube Analytics package version in your packages.yml file:
TIP: Check dbt Hub for the latest installation instructions or read the dbt docs for more information on installing packages
# packages.ymlpackages:
- package: fivetran/youtube_analyticsversion: [">=1.0.0", "<1.1.0"] # we recommend using ranges to capture non-breaking changes automatically
All required sources and staging models are now bundled into this transformation package. Do not include fivetran/youtube_analytics_source in your packages.yml since this package has been deprecated.
Step 3: Define database and schema variables
By default, this package runs using your destination and the youtube_analytics schema. If this is not where your Youtube Analytics data is (for example, if your youtube schema is named youtube_analytics_fivetran), add the following configuration to your root dbt_project.yml file:
This packages assumes you are syncing the YouTube channel_demographics_a1 report. If you are not syncing this report, you may add the below configuration to your dbt_project.yml to disable the stg_youtube__demographics model and all downstream references.
# dbt_project.ymlvars:
youtube__using_channel_demographics: false # true by default
(Optional) Step 5: Additional configurations
Unioning Multiple Youtube Analytics Connections
If you have multiple Youtube Analytics connections in Fivetran and want to use this package on all of them simultaneously, we have provided functionality to do so. The package will union all of the data together and pass the unioned table(s) into the final models. You will be able to see which source it came from in the source_relation column(s) of each model. To use this functionality, you will need to set either (note that you cannot use both) the union_schemas or union_databases variables:
# dbt_project.ymlvars:
##You may set EITHER the schemas variables belowyoutube_analytics_union_schemas: ['youtube_analytics_one','youtube_analytics_two']##Or may set EITHER the databases variables belowyoutube_analytics_union_databases: ['youtube_analytics_one','youtube_analytics_two']
Change the build schema
By default, this package will build the YouTube Analytics staging models within a schema titled (<target_schema> + _youtube_source) and the YouTube Analytics final models within a schema titled (<target_schema> + _youtube) in your target database. If this is not where you would like your modeled YouTube Analytics data to be written to, add the following configuration to your dbt_project.yml file:
# dbt_project.ymlmodels:
youtube_analytics:
+schema: my_new_schema_name # Leave +schema: blank to use the default target_schema.staging:
+schema: my_new_schema_name # Leave +schema: blank to use the default target_schema.
Change the source table references
If an individual source table has a different name than the package expects, add the table name as it appears in your destination to the respective variable:
IMPORTANT: See this project’s dbt_project.yml variable declarations to see the expected names.
This dbt package is dependent on the following dbt packages. These dependencies are installed by default within this package. For more information on the following packages, refer to the dbt hub site.
IMPORTANT: If you have any of these dependent packages in your own packages.yml file, we highly recommend that you remove them from your root packages.yml to avoid package version conflicts.
How is this package maintained and can I contribute?
Package Maintenance
The Fivetran team maintaining this package only maintains the latest version of the package. We highly recommend that you stay consistent with the latest version of the package and refer to the CHANGELOG and release notes for more information on changes across versions.
Contributions
A small team of analytics engineers at Fivetran develops these dbt packages. However, the packages are made better by community contributions.
Are there any resources available?
If you have questions or want to reach out for help, see the GitHub Issue section to find the right avenue of support for you.
If you would like to provide feedback to the dbt package team at Fivetran or would like to request a new dbt package, fill out our Feedback Form.


 https://github.com/shpaker/dataclasses-settings