Blog

  • rsbuild-plugin-tailwindcss

    rsbuild-plugin-tailwindcss

    An Rsbuild plugin to integrate with Tailwind CSS V3.

    npm version license downloads

    Why?

    Tailwind CSS is able to remove unused CSS classes through Content Configuration. However, its accuracy may be insufficient when:

    • Using multiple entries
    • Using a Tailwind CSS-based component library

    This plugin uses the Rspack module graph to override the content configuration with imported modules, generating Tailwind CSS output based on usage.

    Usage

    Install:

    npm add tailwindcss@3 rsbuild-plugin-tailwindcss -D

    Add plugin to your rsbuild.config.ts:

    // rsbuild.config.ts
    import { pluginTailwindCSS } from "rsbuild-plugin-tailwindcss";
    
    export default {
      plugins: [pluginTailwindCSS()],
    };

    Custom Tailwind CSS Configuration

    Create a tailwind.config.js file at the root of the project:

    /** @type {import('tailwindcss').Config} */
    export default {
      theme: {
        colors: {
          blue: "#1fb6ff",
          purple: "#7e5bef",
          pink: "#ff49db",
          orange: "#ff7849",
          green: "#13ce66",
          yellow: "#ffc82c",
          "gray-dark": "#273444",
          gray: "#8492a6",
          "gray-light": "#d3dce6",
        },
      },
    };

    This will be auto-loaded by Rsbuild and applied by rsbuild-plugin-tailwindcss.

    Note

    You don’t need to add content in the tailwind.config.js. rsbuild-plugin-tailwindcss will add the imported modules for you.

    Custom PostCSS Options

    Create a postcss.config.js file at the root of the project:

    export default {
      plugins: {
        cssnano: process.env["NODE_ENV"] === "production" ? {} : false,
      },
    };

    Note

    You don’t need to add tailwindcss in the postcss.config.js. rsbuild-plugin-tailwindcss will add the plugin for you.

    Or use the tools.postcss option in rsbuild.config.ts.

    Options

    config

    • Type: string | undefined
    • Default: tailwind.config.js

    The path to custom Tailwind CSS configuration. Could be a relative path from the root of the project or an absolute path.

    • Example:
    // rsbuild.config.ts
    import { pluginTailwindCSS } from "rsbuild-plugin-tailwindcss";
    
    export default {
      plugins: [
        pluginTailwindCSS({
          config: "./config/tailwind.config.js",
        }),
      ],
    };

    exclude / include

    • Type: ReadonlyArray<string | RegExp> | string | RegExp | null | undefined
    • Default: undefined

    These two options are used to filter which module to be processed by Tailwind CSS using picomatch pattern.

    If include is omitted or empty, all modules that do not match any of the exclude patterns will be included. Otherwise, only modules that match one or more of the include patterns and do not match any of the exclude patterns will be included.

    • Example:

    Include all .js, .jsx, .ts, .tsx files but exclude files in ./src/store and node_modules:

    // rsbuild.config.ts
    import { pluginTailwindCSS } from "@byted-lynx/plugin-tailwindcss";
    
    export default {
      plugins: [
        pluginTailwindCSS({
          include: /\.[jt]sx?/,
          exclude: ["./src/store/**", /[\\/]node_modules[\\/]/],
        }),
      ],
    };

    Note that picomatch patterns are very similar to minimatch patterns, and in most use cases, they are interchangeable. If you have more specific pattern matching needs, you can view this comparison table to learn more about where the libraries differ.

    tailwindcssPath

    Specifies the absolute path to the tailwindcss package.

    By default, tailwindcss is resolved using Node.js module resolution algorithm starting from the root path.

    This option allows explicit specification of the tailwindcss package location for scenarios where automatic resolution fails or the resolved path is not correct, such as in monorepo.

    • Type: string | undefined
    • Default: undefined
    // rsbuild.config.ts
    import { pluginTailwindCSS } from 'rsbuild-plugin-tailwindcss'
    
    export default {
      plugins: [
        pluginTailwindCSS({
          tailwindcssPath: require.resolve('tailwindcss'),
        }),
      ],
    };

    Debugging

    Use DEBUG='rsbuild' to enable debugging mode for the plugin. When debugging is enabled, the plugin will:

    1. Save the generated Tailwind CSS configuration files in the .rsbuild/<entry-name> directory inside your project’s output path.
    2. Generate readable configuration files that include all modules being processed by Tailwind CSS.

    This is helpful for:

    • Inspecting which modules are included in the Tailwind CSS content scanning
    • Troubleshooting issues with CSS purging
    • Understanding how the plugin is generating configurations for each entry point

    Example:

    # For macOS/Linux
    DEBUG=rsbuild npm run build
    
    # For Windows (cmd)
    set DEBUG=rsbuild && npm run build
    
    # For Windows (PowerShell)
    $env:DEBUG="rsbuild"; npm run build

    You can also use more specific debug patterns:

    • DEBUG=rsbuild:tailwind – Debug only the Tailwind CSS plugin
    • DEBUG=rsbuild:* – Debug all Rsbuild plugins
    • DEBUG=* – Debug everything

    Credits

    Thanks to:

    License

    MIT.

    Visit original content creator repository https://github.com/rspack-contrib/rsbuild-plugin-tailwindcss
  • envch

    envch

    Screenshot of envch in the terminal

    An intuitive program for setting, modifying, listing, and removing environment variables on Linux

    Installation

    Cargo

    If you don’t have Cargo already, install it using this command:

    curl --proto '=https' --tlsv1.2 -sSf https://sh.rustup.rs | sh

    Install envch

    Then, install envch using:

    cargo install envch

    Manually

    To manually install envch, run the following:

    git clone https://github.com/ZackMurry/envch.git
    cd envch
    
    cargo build --release
    
    cd target/release
    ./envch

    Usage

    Envch provides three commands: list, set, and remove.

    Note about sudo

    In order to run this command with sudo, you’ll have to explicitly tell sudo to preserve the PATH variable (this is necessary for running envch). For example, to run sudo envch set MY_VAR MY_VALUE, you would instead type the following:

    sudo --preserve-env=PATH env envch set MY_VAR MY_VALUE

    If you’d like to make this easier, you can run this (preferably in .bashrc or .zshrc) to alias sudo_envch to the command above.

    alias sudo_envch='sudo --preserve-env=PATH env envch'

    Now, you can run sudo_envch set MY_VAR MY_VALUE without errors.

    List

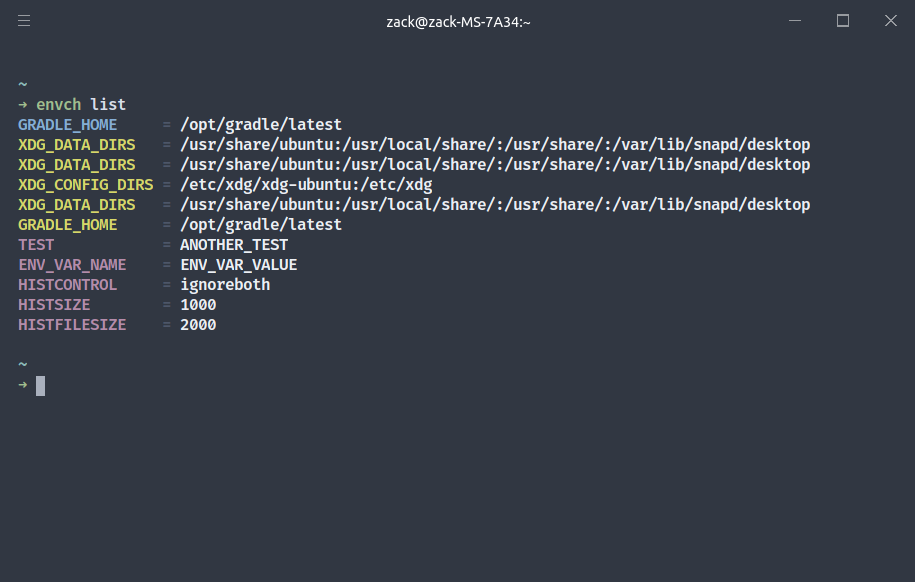
    Screenshot of output by list command
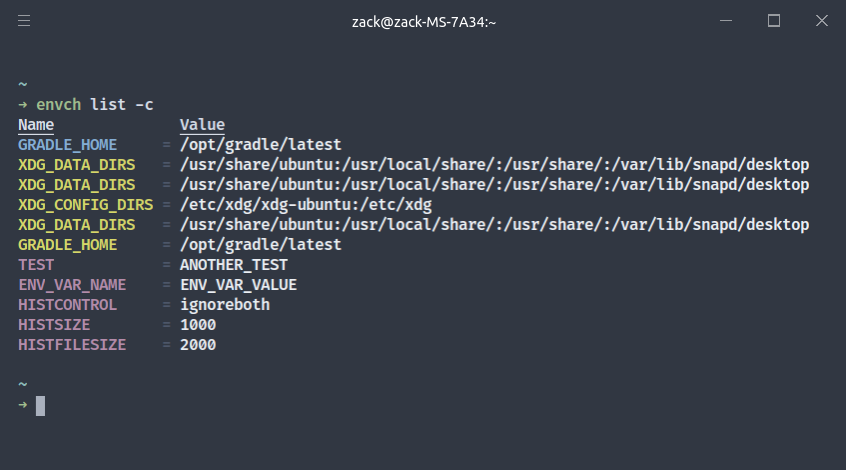
    You can run list by entering envch list. This command lists your environment variables. The names of the variables are color-coded. Blue means that it’s a system-wide environment variable, yellow means that it is a user-wide variable, and pink means that it is declared in a terminal initialization script (like .bashrc or .zshenv). By default, list does not show the PATH variable because it usually needs to be treated differently than other variables.

    Show column names

    Screenshot of list command with -c flag
    If you’d like the columns to be titled (like Name and Value), you can use the -c or --show-columns flags.

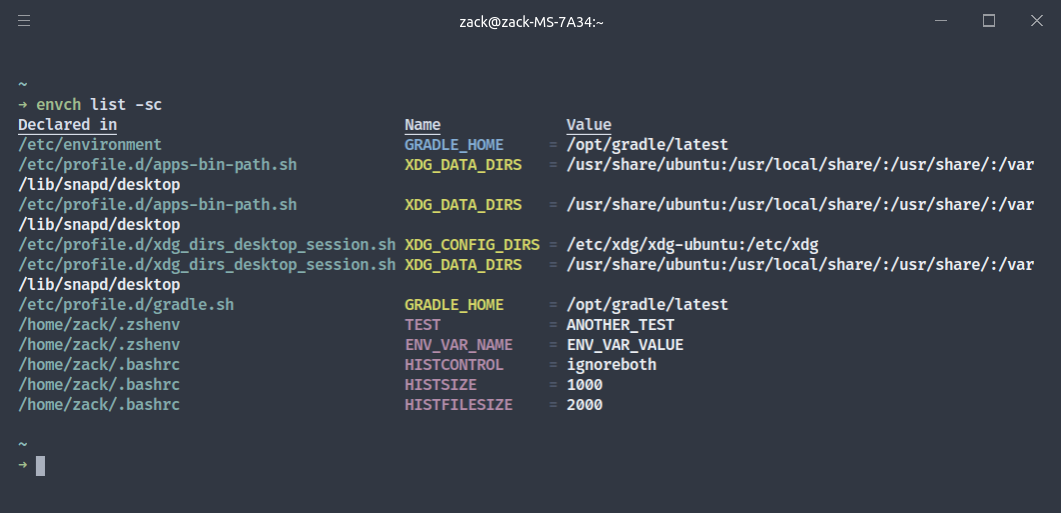
    Show declared in

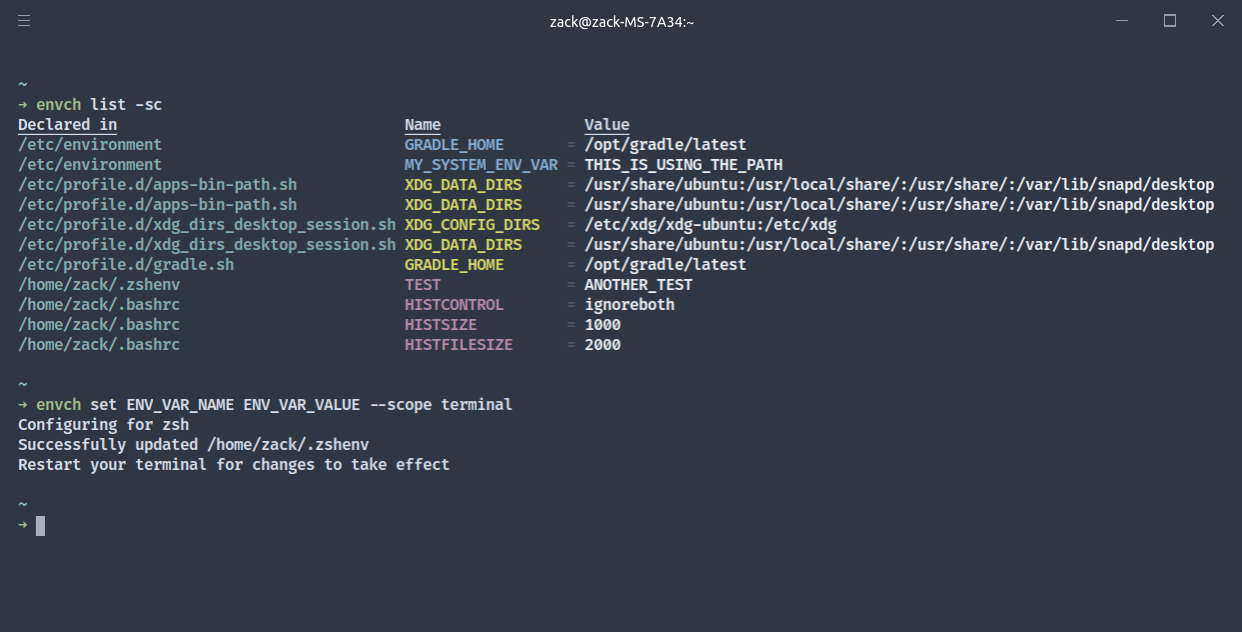
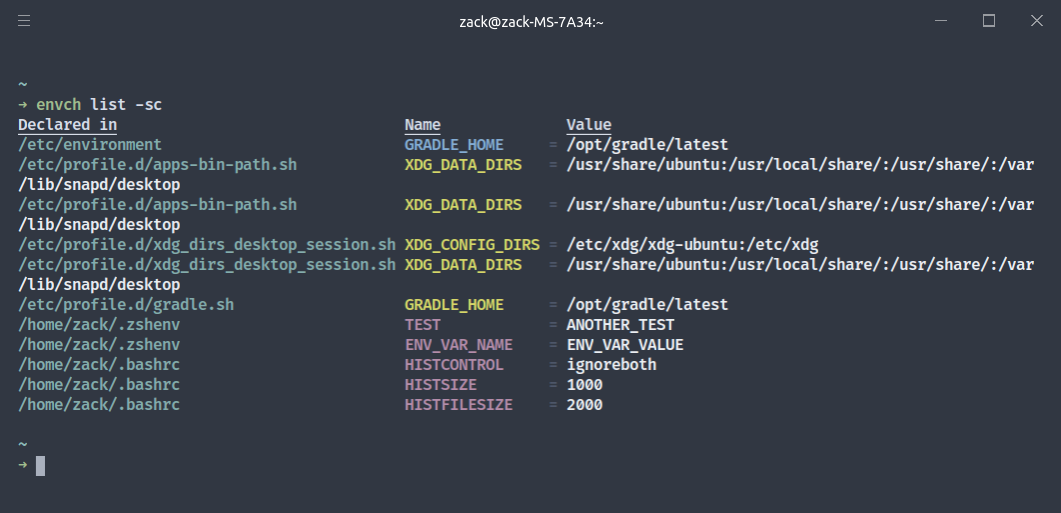
    Screenshot of list command with -sc flags
    If you’d like to see the specific file where your environment variables are declared, you can use the -s or --show-declared-in flags.

    Show path

    To include the PATH variable in the output, use the -p or --show-path flags.

    Set

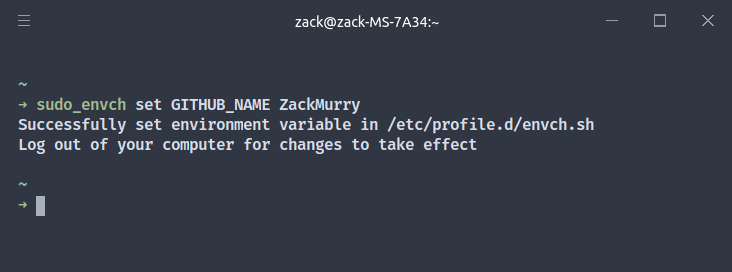
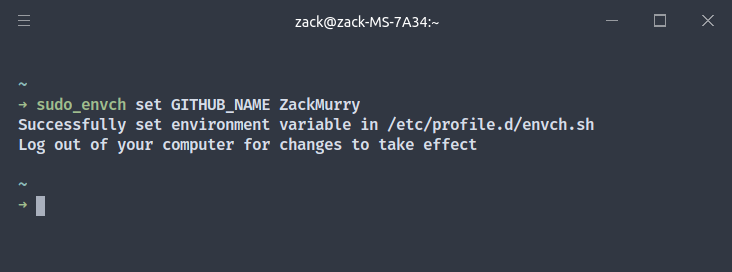
    Screenshot of setting an environment variable using sudo
    You can run set by entering envch set. set updates an environment if it exists. If no environment variable with the specified name is found, a new environment variable is declared with the specified name and value (by default, this is user-scoped). This command usually requires sudo.

    Arguments

    set takes two arguments: <name> and <value>. To set an environment variable, use envch set <name> <value>.

    Set scope

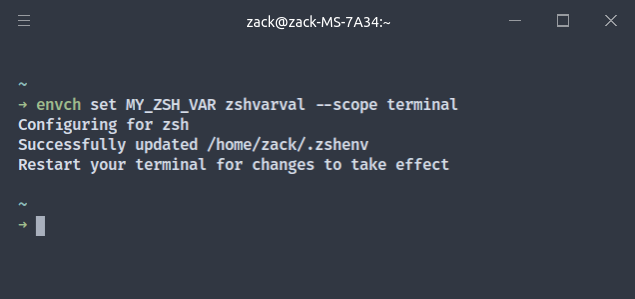
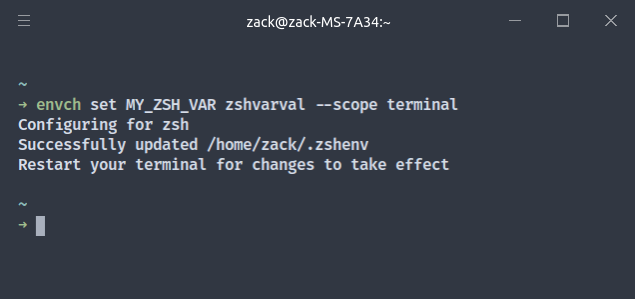
    Screenshot of setting a terminal-scoped environment variable
    When creating a new environment variable using the set command, you might want to specify which scope the new variable should be set in. There are three scopes: system, user (default), and terminal. A system environment variable can be accessed by all users on a system (these are declared in /etc/environment). A user environment variable (declared in /etc/profile.d) is accessable all users on a system. A terminal environment variable is specific to your terminal. Your terminal will be termined by the SHELL environment variable, which points to bash by default. This means that the shell will not be determined by your active terminal, but rather the shell that you’ve set to be default. Supported shells include bash and zsh. If you’d like to see another shell supported, please create an issue on the Github repository.

    Remove

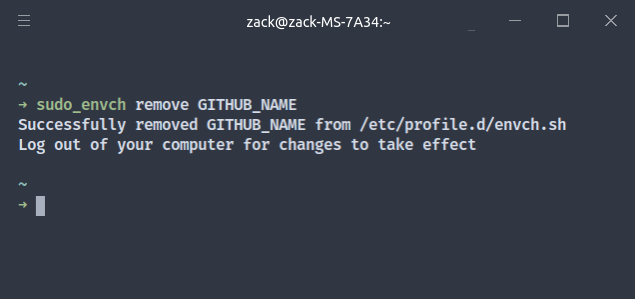
    Screenshot of removing an environment variable
    remove removes an environment variable from your computer. It takes one argument, which is the name of the environment variable to remove. For example, you can run envch remove MY_ENV_VAR to remove an environment variable called MY_ENV_VAR.

    Help

    To get help with envch in general or a specific command, you can add the -h or --help flag to any command. envch --help will print general help about the different commands you can use. envch list --help, for example, will print information about the list subcommand, like the flags it accepts.

    Debug mode

    To enable debug mode, use the -d or --debug flags.

    Visit original content creator repository https://github.com/ZackMurry/envch
  • flutter_event_bus

    flutter_event_bus

    Star this Repo Pub Package

    Flutter Event Bus is an EventBus designed specific for Flutter app, which enable developer to write flutter app with Interactor pattern, which is similar to Bloc but less structured on some aspect.

    Why another Event Bus

    There is a Event Bus package, why create another one?

    Marco Jakob did a great job while creating Event Bus package, which provides a generic Event Bus pattern implementation that can be used anywhere in Dart ecosystem.

    But while writing app in Interactor pattern in flutter, there are a few common usages that existing library are not really convenient. So Flutter Event Bus has been carefully customised for these use cases.

    Event Bus

    Event Bus is a pub/sub system to enable components collaborate with each other without direct coupling. Component can publish event to make announcement when something happens, or respond to event to take action.

    Basic Usage

    class TextChangedEvent{
      final String text;
      const TextChangedEvent(this.text);
    }
    
    final eventBus = EventBus();
    
    eventBus.respond<TextChangedEvent>((TextChangedEvent event) =>
      print("Text changed to ${event.text}");
    );
    
    eventBus.publish(TextChangedEvent("new text"));

    Stop responding events

    final subscription = eventBus.respond<TextChangedEvent>(responder);
    
    eventBus.publish(TextChangedEvent("Responded")); // This event will be responded by responder
    
    subscription.dispose();
    
    eventBus.publish(TextChangedEvent("Ignored")); // This event will not be responded by responder

    Respond to different type of events

    final subscription = eventBus
      .respond<EventA>(responderA) // Subscribe to EventA
      .respond<EventB>(responderB) // Subscribe to EventB
      .respond<EventC>(responderC) // Subscribe to EventC
      .respond(genericResponder); // Subscribe to EventA EventB EventC and any other event on event bus
    
      // Generic Responder could be useful for monitoring, logging or diagnosis purpose, probably will be hardly used to take action to event
    
    subscription.dispose(); // All previous 4 subscriptions will be cancelled all together

    Used in Flutter

    Event Bus Widget

    To embed EventBus in Flutter, you can use EventBusWidget, which provide EventBus to its child tree.

    class MyApp extends StatelessWidget {
      // This widget is the root of your application.
      @override
      Widget build(BuildContext context) =>
        EventBusWidget(
          child: MaterialApp(
            // .....
          )
        );
    }

    Capture user interaction

    You’re like to publish event in stateless widget to broadcast user interaction into your app.

    class SubmitFormEvent { }
    
    class SubmitButton extends StatelessWidget {
      @override
      Widget build(BuildContext context) =>
        FlatButton(
          child: const Text("Publish"),
          onPressed: () {
            EventBus.publish(context, SubmitFormEvent()); // Publish event to the event bus provided by ancestor EventBusWidget
          }
        )
    }

    Capture state changes

    You might also wish to publish some event when app state had a certain change

    class MyWidgetState extends State<MyWidget> {
      int _counter = 0;
      EventBus eventBus;
    
      @override
      void didChangeDependencies() {
        super.didChangeDependencies();
    
        eventBus = EventBus.of(context); // Find EventBus provided by ancestor EventBusWidget
      }
    
    
      void _incrementCounter(InreaseCounterEvent event) {
        setState(() {
          if(++_counter == 100) {
            eventBus.publish(CounterMaximizedEvent());
          }
        });
      }
    }

    Respond events

    To respond to events you can listening event bus directly. But more commonly you will do it via Interactor.

    You can use Interactor as base class as your stateful widget state, and implements the subscribeEvents method to describe the events that interactor can handle. Interactor manages the subscription and cancel the subscription when it is removed from the tree.

    class IncreaseCounterEvent {}
    class DecreaseCounterEvent {}
    class CounterChangedEvent {
      final int value;
      CounterChangedEvent(this.value);
    }
    
    class MyPage extends StatefulWidget {
      MyPage({Key key}) : super(key: key);
    
      @override
      _MyPageInteractor createState() => _MyPageInteractor();
    }
    
    class _MyPageInteractor extends Interactor<MyHomePage> {
      int _counter = 0;
    
      @override
      Widget build(BuildContext context) {
        // Build the widget tree as usual
      }
    
      @override
      Subscription subscribeEvents(EventBus eventBus) => eventBus
        .respond<IncreaseCounterEvent>(_incrementCounter)
        .respond<DecreaseCounterEvent>(_decrementCounter);
    
      void _incrementCounter(IncreaseCounterEvent event) {
        setState(() {
          _counter++;
    
          eventBus.publish(CounterChangedEvent(_counter));
        });
      }
    
       void _decrementCounter(DecreaseCounterEvent event) {
        setState(() {
          _counter--;
    
          if(_counter < 0) {
            _counter = 0;
            eventBus.publish(CounterReachZeroEvent());
          }
    
          eventBus.publish(CounterChangedEvent(_counter));
        });
      }
    }

    License

    The MIT License (MIT)

    Visit original content creator repository https://github.com/timnew/flutter_event_bus
  • m4b-maker

    M4B Audiobook Maker

    A set of bash scripts to convert audio files into M4B audiobooks with chapter markers, customizable bitrate, book metadata and embedded cover art.

    lint GitHub Release #!/bin/bash MIT License

    Table of Contents

    Overview

    M4B Audiobook Maker is a set of bash scripts that simplify converting audio files into the M4B audiobook format. It includes m4bify for single conversions and m4bulk for batch processing.

    Single Audiobook Conversion (m4bify)

    Combines audio files into a single M4B audiobook with chapter markers, ensuring correct playback order by processing files alphabetically. Chapters are automatically created based on metadata, filenames, or top-level subdirectories. You can customize the audio quality, and if an image file or embedded art is available, it will be added as the book cover. Additionally, directory names that follow supported patterns are parsed to extract metadata such as the author, title, and year.

    Batch Audiobook Conversion (m4bulk)

    Scan a root directory for audiobook folders and convert them to M4B files in parallel. Pass custom options, such as bitrate and chapter settings, to apply them to all audiobooks. m4bulk leverages multiple worker threads for simultaneous processing, speeding up batch conversions.

    Getting Started

    Ensure the following dependencies are installed: ffmpeg and mp4v2.

    # For RPM-based systems (Fedora, RHEL, CentOS)
    sudo dnf install ffmpeg libmp4v2
    
    # For Debian-based systems (Ubuntu, Debian)
    sudo apt install ffmpeg

    To install the scripts, run:

    make install

    This installs the scripts to /usr/local/sbin/.

    m4bify

    m4bify creates M4B audiobook by processing files in the specified directory, sorting them alphabetically to ensure the correct playback order. Chapters can be organized either as file-based, where each audio file becomes its own chapter named using metadata or filenames, or directory-based, where each top-level subdirectory is treated as a chapter, combining all its audio files, including those in nested folders, into one.

    Other features include:

    • Configurable audio bitrate, with high-quality AAC VBR as the default.
    • Metadata extraction from directory names that follow supported patterns.
    • Automatic cover art inclusion from image files or embedded artwork.
    • Embedding book descriptions from external text or Markdown files.
    • Comprehensive logs with chapter metadata.

    Syntax

    m4bify [--help] [-d | --chapters-from-dirs] [-b <bitrate> | --bitrate <bitrate>] <directory>

    Options

    • -d, --chapters-from-dirs: Treats each top-level subdirectory as a chapter.
    • -b <value>, --bitrate <value>: Sets the audio encoding bitrate (e.g. “128k”, default: VBR Very High).
    • --help: Displays usage instructions and exits.

    Arguments

    • <directory> (required): Path to the directory containing audiobook files.

    Directory Patterns

    Pattern Example
    <author_name> - <book_title> (<year>) J.K. Rowling – Harry Potter and the Philosopher’s Stone (1997)
    <author_name> - <book_title> Agatha Christie – Murder on the Orient Express
    <book_title> (<year>) To Kill a Mockingbird (1960)

    Both hyphen (-) and underscore (_) are supported as separators. Additionally, square brackets ([]) can be used as an alternative to parentheses (()) for enclosing year information.

    m4bulk

    m4bulk automates batch conversion of audiobook folders to M4B format using m4bify. It scans a root directory for audiobook folders and processes them in parallel.

    Key features:

    • Distributes tasks across multiple workers.
    • Automatically detects audiobook directories in the root folder.
    • Allows customization of m4bify options, such as bitrate and chapter generation.
    • Generates and saves logs for each audiobook conversion in the source folder.

    Syntax

    m4bulk [--help] [--workers <N>] [m4bify-options] <audiobooks_directory>

    Options

    • --workers <N>: Number of worker threads (default: 50% of CPU cores).
    • --help: Displays usage instructions and exits.

    Arguments

    • [m4bify-options] (optional): Optional arguments passed directly to m4bify (e.g. -b <rate>).
    • <audiobooks_directory> (required): Directory containing subdirectories of audiobooks to convert.

    Usage Examples

    Metadata Extracted from Directory Name

    Combine all audio files in /home/user/audiobooks/Author Name - Book Title (1993)/ into a single M4B audiobook. Chapters are automatically generated based on file metadata or filenames. Author, title and year are extracted from the directory name:

    m4bify "/home/user/audiobooks/Author Name - Book Title (1993)"

    Subdirectory Chapters with Custom Bitrate

    Combine all top-level subdirectories in /home/user/audiobooks/book/ into a single audiobook, with each subdirectory treated as a separate chapter. Files are processed recursively in alphabetical order, with audio encoded at 96 kbps:

    m4bify --chapters-from-dirs --bitrate 96k /home/user/audiobooks/book

    Bulk Conversion with Default Settings

    Convert all subdirectories in /home/user/audiobooks/ to M4B format using default settings. The process utilizes 50% of available CPU cores:

    m4bulk /home/user/audiobooks

    Bulk Conversion with Custom Threads and Bitrate

    Convert audiobook directories in /home/user/audiobooks/ with 4 worker threads. Each subdirectory is treated as a chapter, and audio is encoded at 128 kbps:

    m4bulk --workers 4 -d -b 128k /home/user/audiobooks

    Contributing

    Contributions, bug reports, and feature requests are welcome! Feel free to open an issue or submit a pull request.

    License

    This project is licensed under the MIT License. See the LICENSE file for details.

    Acknowledgments

    Thanks to the creators of ffmpeg and mp4v2 for their excellent tools that make this project possible.

    Visit original content creator repository https://github.com/weak-head/m4b-maker
  • docker-nuxt-basic-template

    Docker with Nuxt – basic template

    Building development or production environment with Docker, Nuxt.js, Express, MySQL, phpMyAdmin and Nginx (PMA for development mode)

    Technologies:

    • Docker (docker-compose)
    • Nuxt.js (Vue.js)
    • Express
    • Mysql 8.0.23
    • phpMyAdmin 5.0.4
    • Nginx 1.19.7

    Getting Started

    Development

    1. Clone this repository to your local environment.
    git clone https://github.com/skyfirepro/docker-nuxt-basic-template.git
    1. Set name for your project in .env file.
    COMPOSE_PROJECT_NAME=projectname
    1. Set the same project-name as proxy_pass in nginx/dev/nginx.conf (Ex. if you set foo-bar as project name – http://foo-bar-app:3000)
    proxy_pass    http://projectname-app:3000;
    1. Open terminal and run docker-compose.
    $ docker-compose -f docker-compose.yml -f docker-compose.dev.yml up --build
    1. In other terminal enter the nuxt container with the docker exec command.
    $ docker exec -it projectname-app sh
    1. Install create-nuxt-app globally inside nuxt container, initialize nuxt application and answer a few questions. After installing, a nuxt application will be created.

    $ npm i -g create-nuxt-app
    $ create-nuxt-app .

    Note: If you get Can't create . because there's already a non-empty directory . existing in path. you need delete all files and folders in nuxt-app

    1. Uncomment all in dockerfiles/Dockerfile-dev.

    FROM node:14.15.5-alpine3.13
    WORKDIR /app
    COPY package*.json ./
    RUN npm ci
    COPY . .
    CMD ["npm", "run", "dev"]
    1. Create file .dockerignore in nuxt-app and add node_modules.
    node_modules
    1. Then you need stop all containers (ctrl + c) and launch with the docker-compose command.

    Stopping projectname-app ... done
    Stopping projectname-mysql ... done
    Stopping projectname-phpmyadmin ... done
    Stopping projectname-nginx ... done
    $ docker-compose -f docker-compose.yml -f docker-compose.dev.yml up --build
    Now you can start working:

    • localhost:3000 – application
    • localhost:8080 – phpMyAdmin
    • localhost – proxy nginx

    Note: If you have any problems with hot module replacement, you need add watchers to nuxt.config.js and restart nuxt container

    watchers: {
      webpack: {
        poll: true
      }
    },
    $ docker restart projectname-app

    Backend with Express

    Enter the nuxt container.

    $ docker exec -it projectname-app sh

    Install express.

    $ npm i express nodemon

    Add serverMiddleware to nuxt.config.js.

    serverMiddleware: {
      '/api': '~/api'
    },

    Create api folder in nuxt-app folder and index.js file in it.

    const express = require('express')
    const app = express()
     
    module.exports = app

    Replace dev command in package.json.

    "dev": "nodemon -L --watch api --exec \"nuxt\"",

    Production

    You can test production build in local environment.

    1. Set server_name and proxy_pass in nginx/prod/nginx.conf.

    server_name    projectname.local;
    proxy_pass    http://projectname-app:3000;
    1. Add domain in file hosts.
    • Windows XP, 2003, Vista, 7, 8, 10 — c:\windows\system32\drivers\etc\hosts
    • Linux, Ubuntu, Unix, BSD — /etc/hosts
    • Mac OS — /private/etc/hosts
    127.0.0.1 projectname.local
    1. Replace start command in package.json.
    "start": "nuxt build && nuxt start",
    1. Launch with the docker-compose command.
    docker-compose up --build
    Open projectname.local in browser.

    Visit original content creator repository
    https://github.com/skyfirepro/docker-nuxt-basic-template

  • MusicPlayer-JetpackCompose

    🎵 Music Player – Jetpack Compose

    A modern and lightweight Music Player built using Jetpack Compose and Kotlin. This open-source project provides a smooth and interactive UI for playing music, managing playlists, and marking favorite songs. 🚀

    ✨ Features

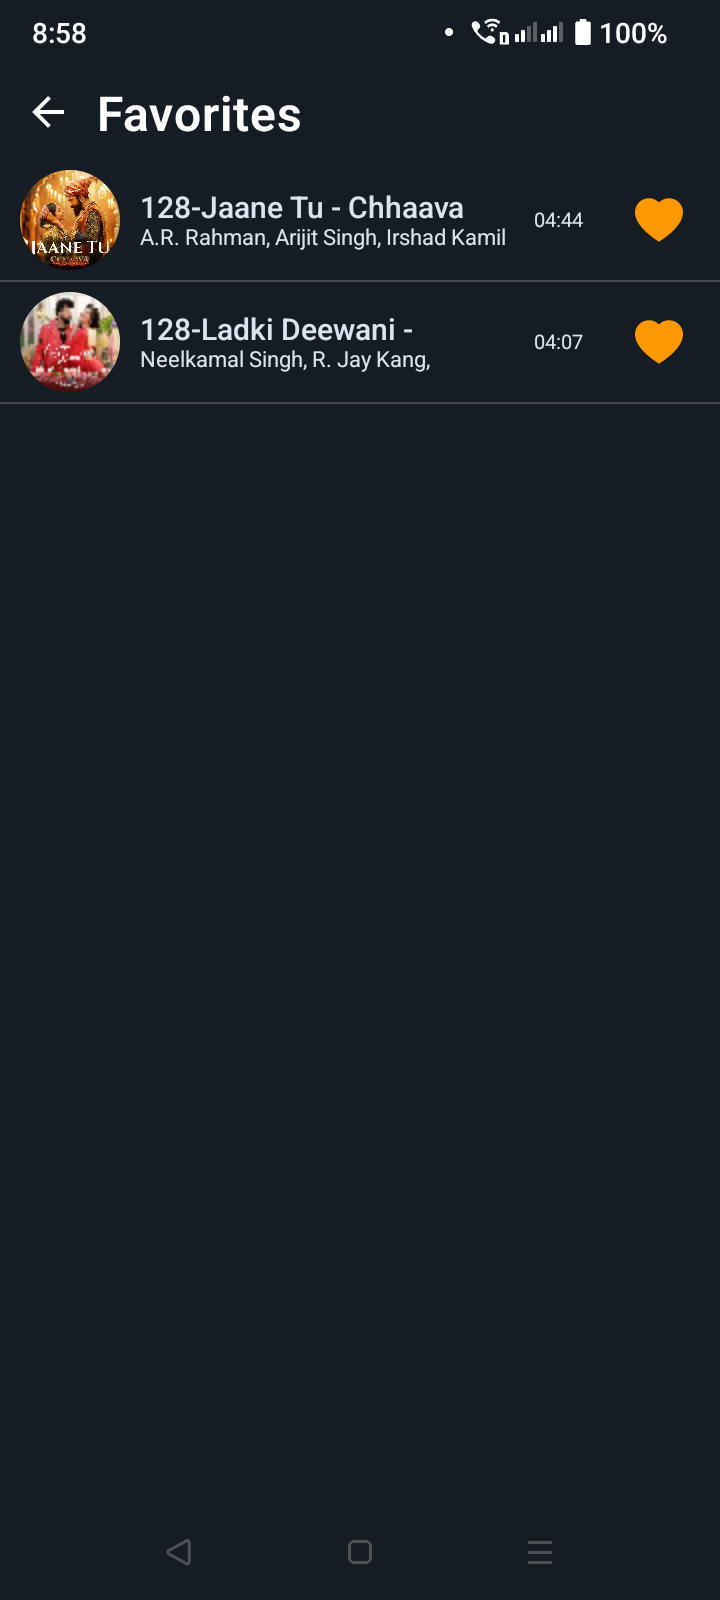
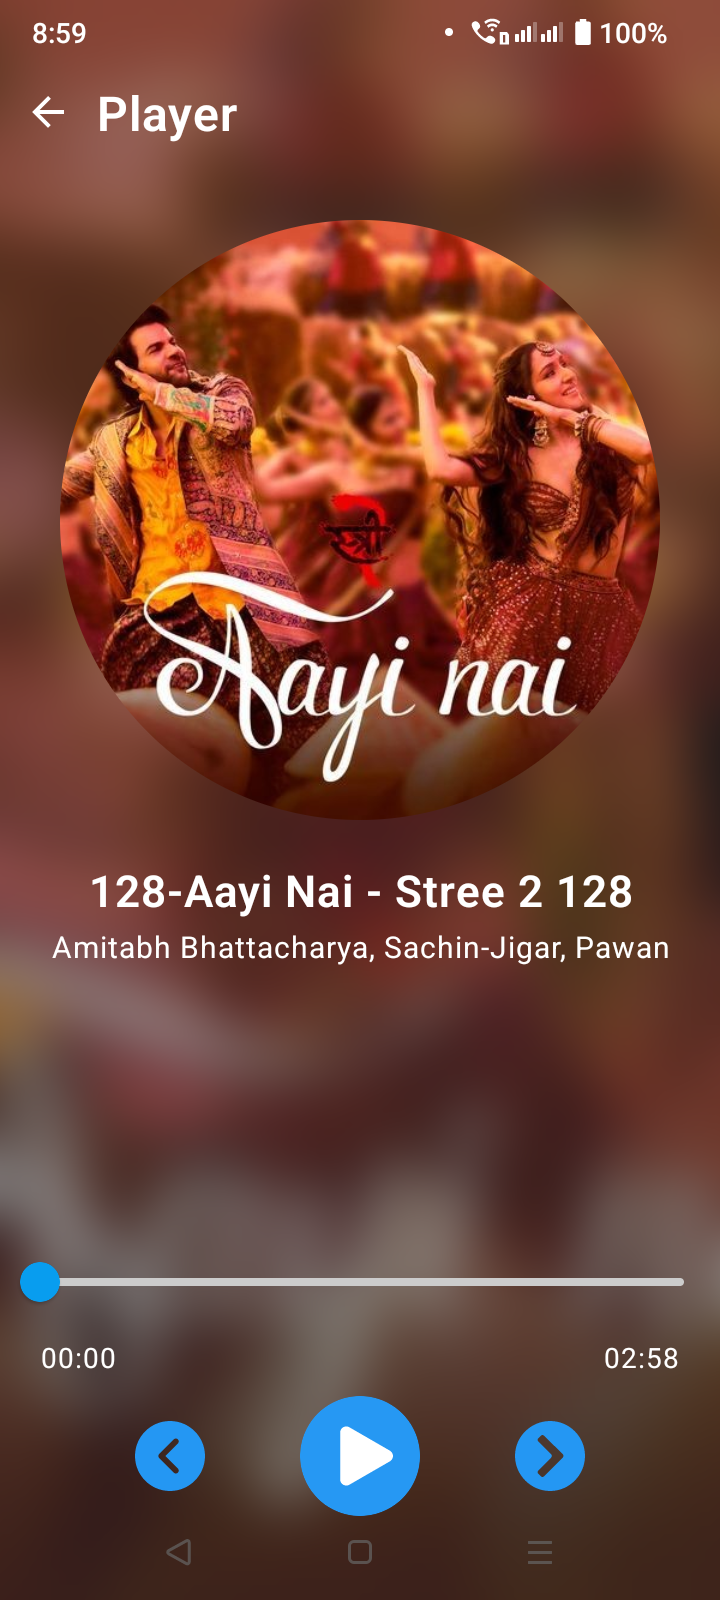
    • 🎶 Play Music – Play your favorite songs seamlessly.
    • ❤️ Favorite Songs – Mark and access your favorite tracks easily.
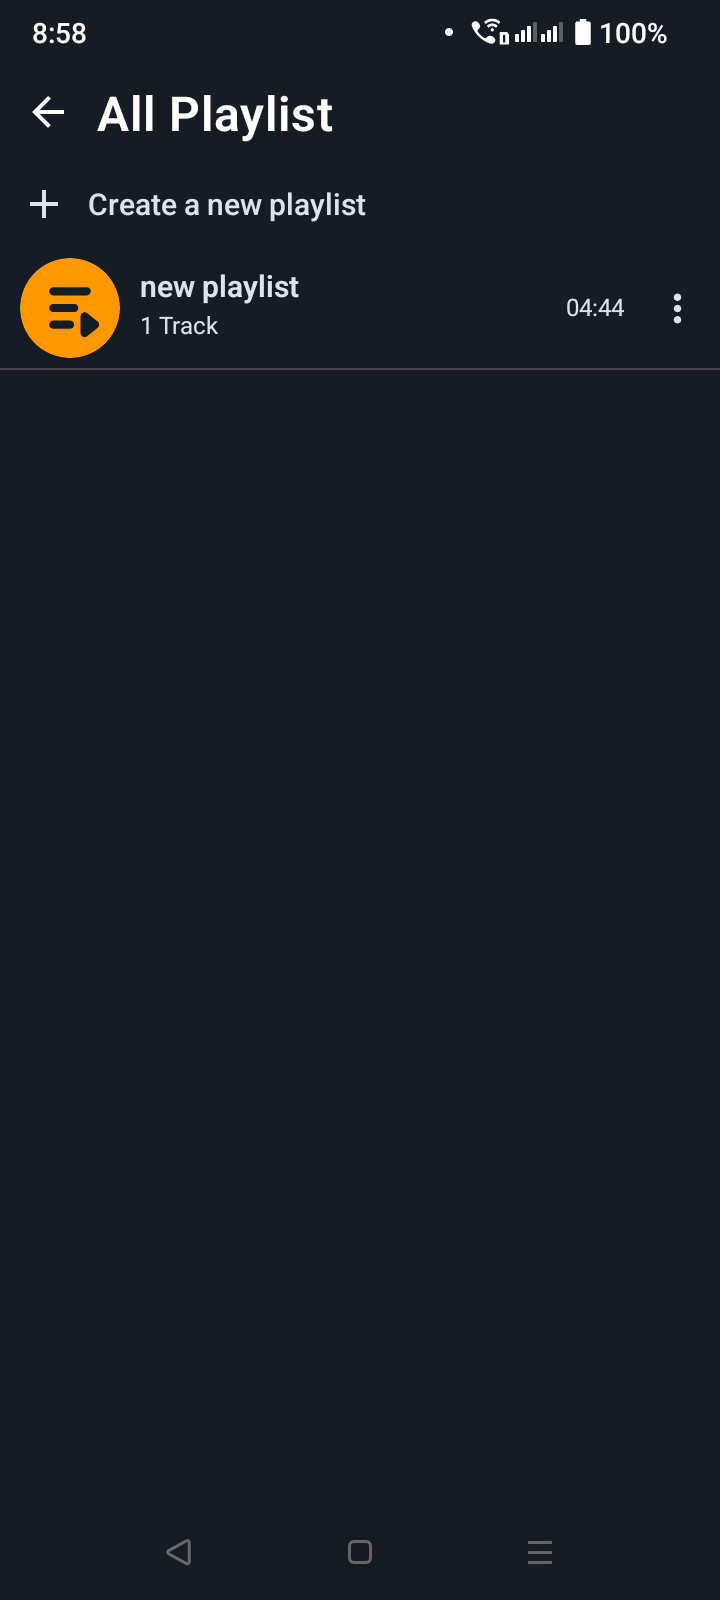
    • 📂 Playlists – Create, update, and delete custom playlists.
    • 🎭 Artists & Albums – Browse music by artists and albums.
    • 📁 Music Folders – Access and play music directly from device folders.
    • 🔄 Smooth Navigation & Animations – Added sleek transitions for a better user experience.
    • Optimized Performance – Improved pager scrolling and reduced lags.
    • 🆓 Open-Source – Contributions are welcome!

    🛠️ Tech Stack

    • Kotlin – Modern programming language for Android development.
    • Android Studio – Official IDE for Android development.
    • Jetpack Compose – Declarative UI framework for Android.
    • Hilt – Dependency injection for better scalability.
    • Room – Local database for storing playlists and favorites.

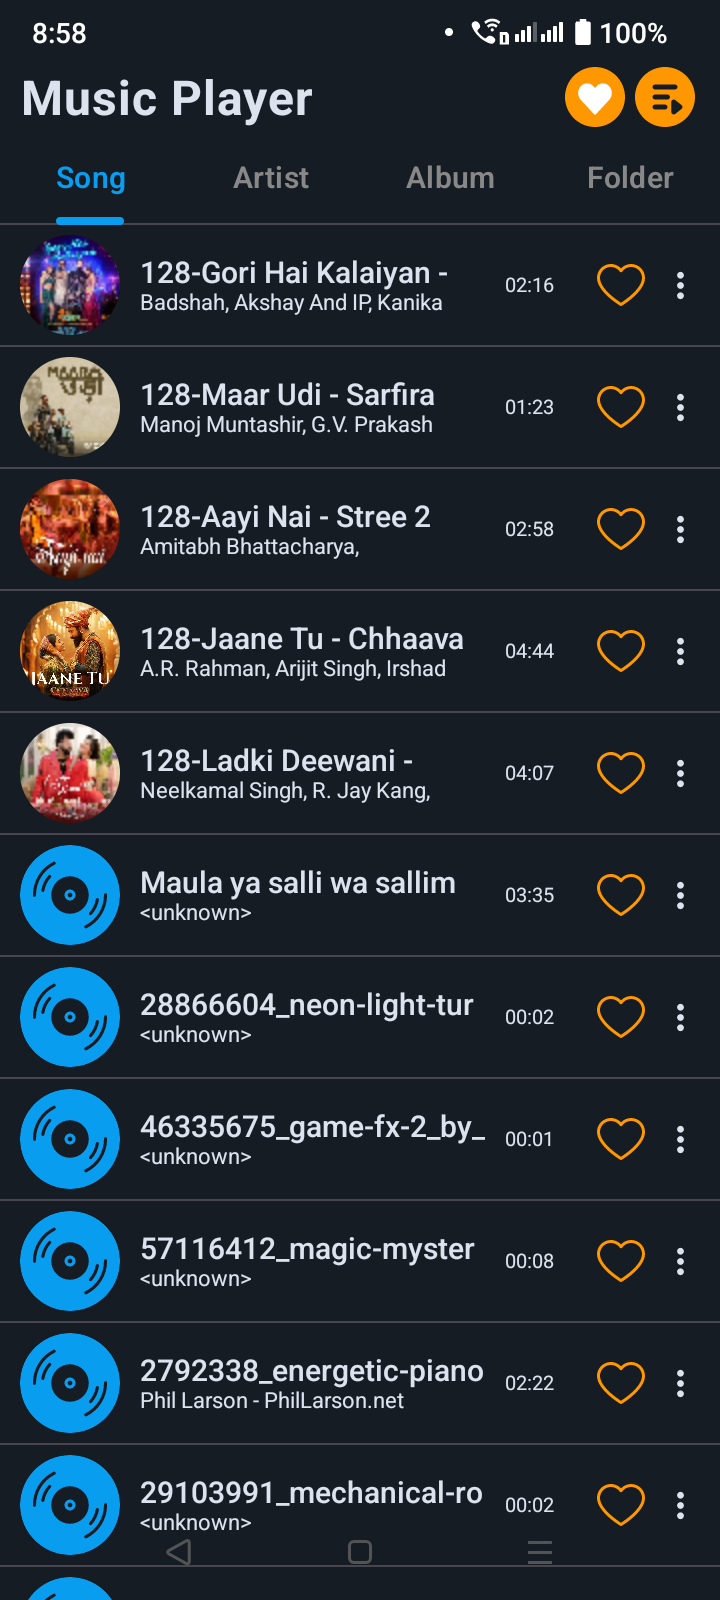
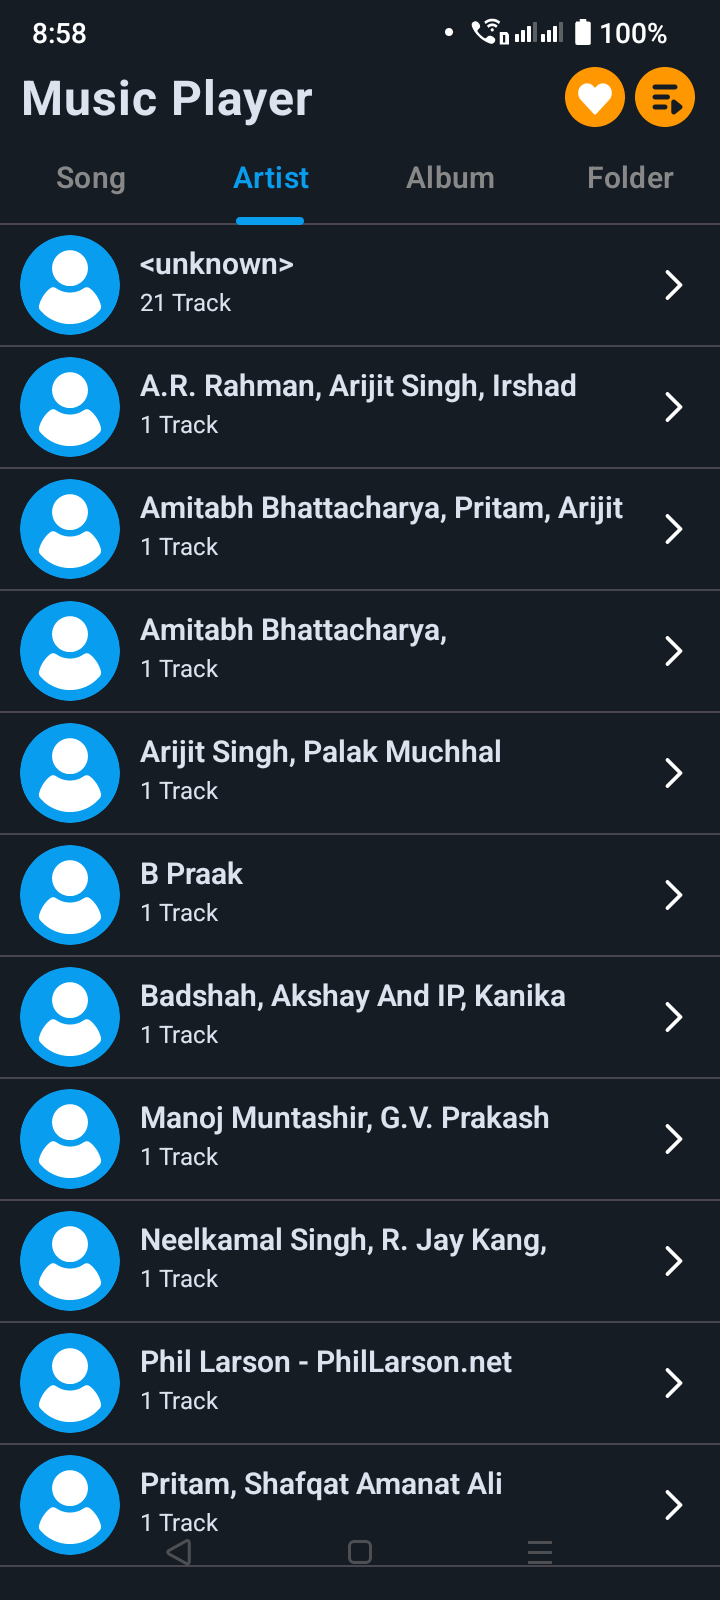
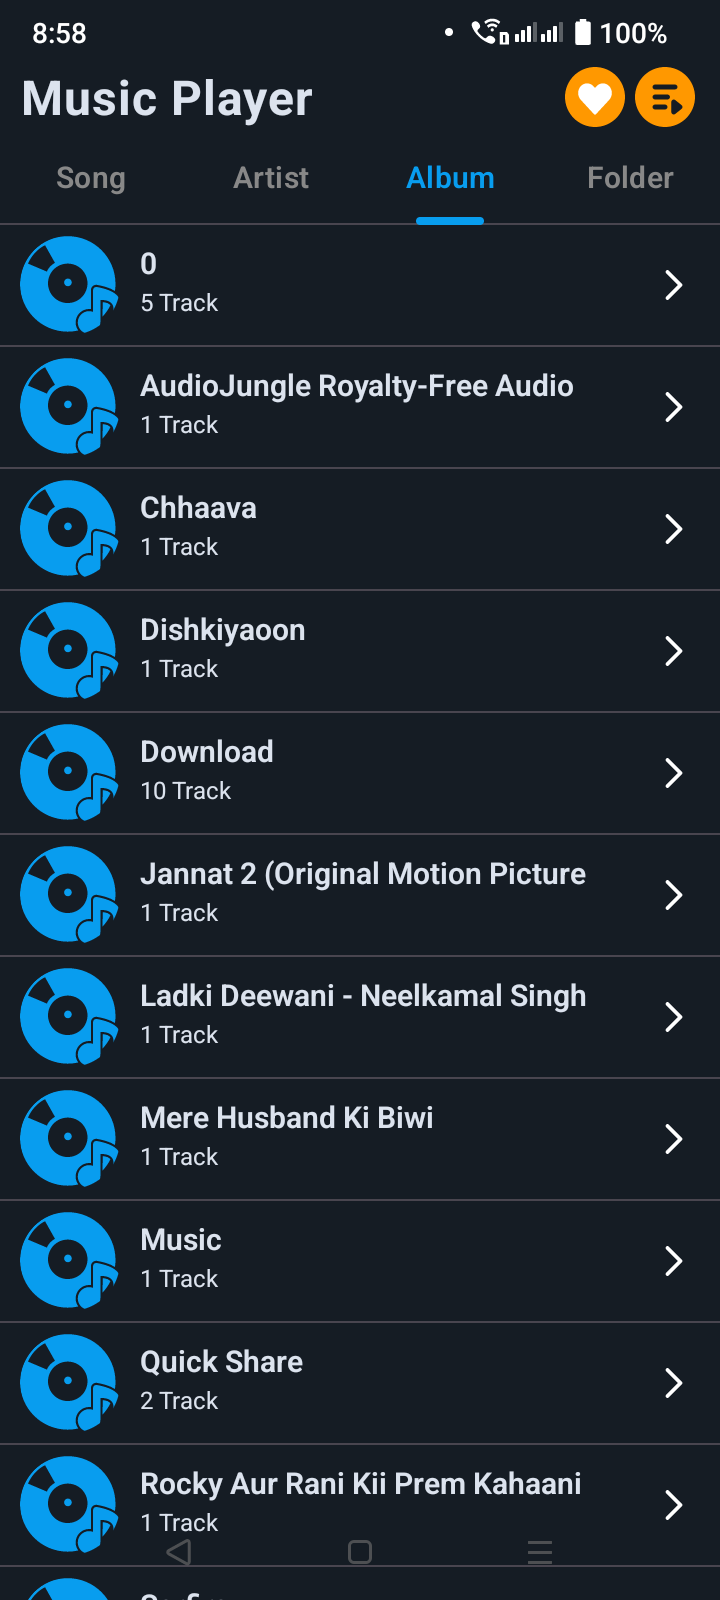
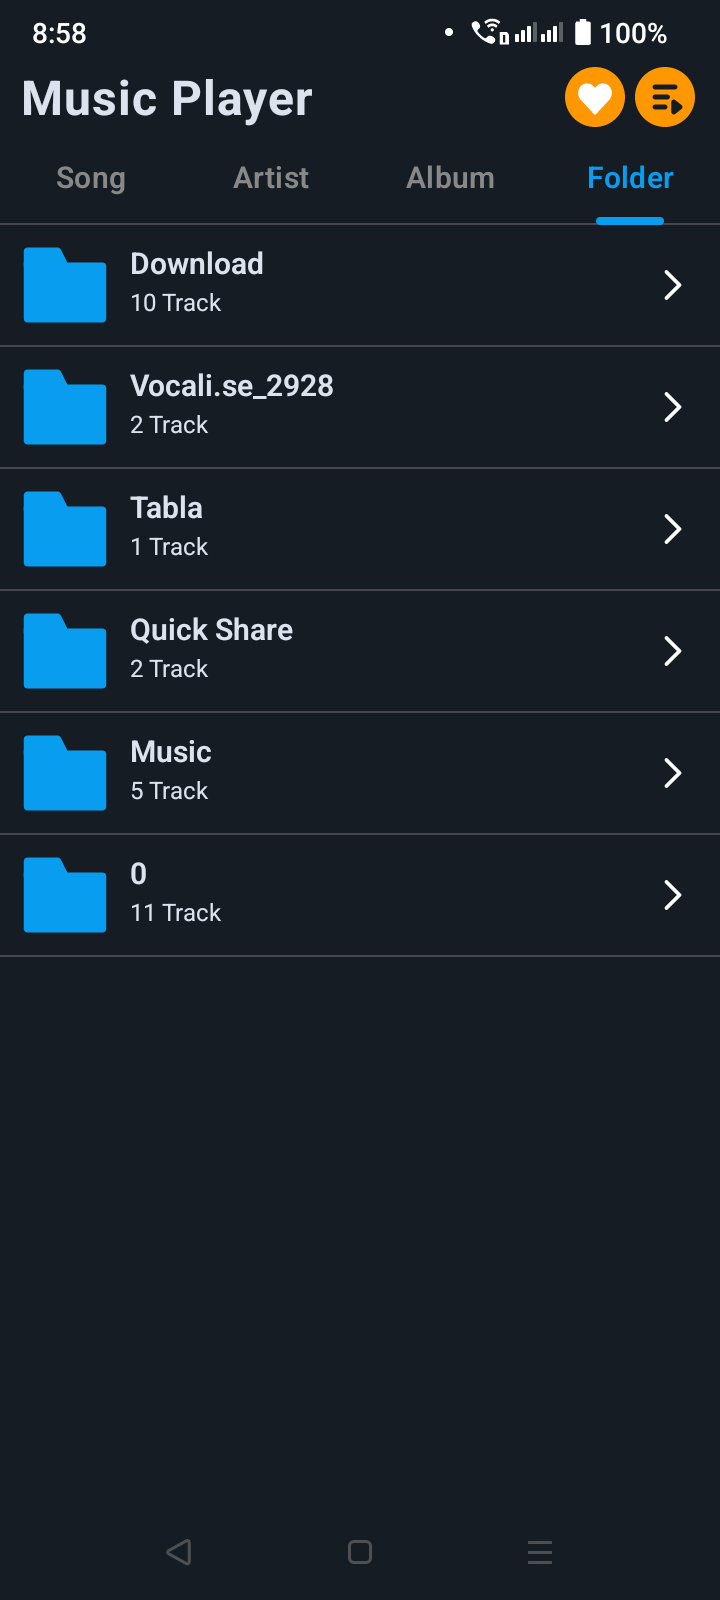
    🖥️ Screenshots

    Image Image Image Image Image Image Image

    🚀 Getting Started

    Prerequisites

    • Android Studio (Latest Version)
    • Kotlin & Jetpack Compose Knowledge
    • Android Device or Emulator (API 21+)

    Clone Repository

    git clone https://github.com/UmairOye/MusicPlayer-JetpackCompose.git
    cd MusicPlayer-JetpackCompose

    Open in Android Studio

    1. Open Android Studio.
    2. Select Open an Existing Project.
    3. Navigate to the cloned directory and select it.
    4. Let Gradle sync the dependencies.
    5. Run the project on an emulator or a physical device.

    📌 How to Contribute

    We welcome contributions! Follow these steps to contribute:

    1. Fork the repository 📌
    2. Create a new branch: git checkout -b feature-branch
    3. Make your changes and commit: git commit -m "Added new feature"
    4. Push to your fork: git push origin feature-branch
    5. Open a Pull Request and describe your changes!

    Feel free to DM me if you have any questions or want to discuss ideas! 🚀

    💬 Feedback & Support

    If you have any suggestions, feel free to open an issue or reach out! Your feedback is valuable in making this project even better. 🙌


    📌 GitHub Repo: MusicPlayer-JetpackCompose
    🚀 Let’s build something great together! 🎵

    💼 Hire Me

    Need help with Android development?
    I specialize in:

    • Custom UI components (e.g., animated bottom navigation)
    • API integration (AI tools, social media, ads)
    • Performance optimization and clean architecture

    👉 Hire me on Fiverr

    Visit original content creator repository https://github.com/UmairOye/MusicPlayer-JetpackCompose
  • Spy.pet-Info

    This repository serves as an index for all info the community has gathered on the Spy.pet situation and as well as my own tables and tools written for these investigations.
    All credit to the original files and investigations goes to their owners, in case I forgot to credit someone please contact me ASAP, thanks!

    Spy.pet was taken down by Discord on 11.08.2024, this is just an archive of what bots where in each server.

    Credits

    • data/ids.json – originally found by kickthespy.pet using an API vulnerability.
    • data/servers.json – big thanks to youcoldyet for scraping and compiling the giant lists of servers by Spy.pet.
    • data/servers_and_ids.json – big thanks to youcoldyet for scraping and compiling the giant lists of servers by Spy.pet.

    Repository Structure

    • data/ids.json – Data file made by kickthespy.pet containing all bot accounts used by spy.pet.
    • data/servers.json – Data file scraped by youcoldyet containing all servers tracked by spy.pet.
    • data/crawler_output/json – Data file containing crawled pages from the spy.pet domain.
    • data/servers_and_ids.json – Data file scraped by youcoldyet containing all servers and bot accounts used by spy.pet.
    • data/detailed_servers_and_ids.json – Data file compiled by merging scanner_output.json made by me and servers_and_ids.json made by youcoldyet
    • data/all_known_servers_22042024.json – Data file containing the full list of known servers by spy.pet
    • data/all_tracked_servers_22042024 – Data file containing the full list of tracked servers by spy.pet
    • data/detailed_all_known_servers_22042024.json – Data file containing the full detailed list of known servers by spy.pet
    • data/detailed_all_tracked_servers_22042024 – Data file containing the full detailed list of tracked servers by spy.pet
    • kts_tester.py – Script used to check guilds for bot accounts using kickthespy.pet’s endpoint.
    • data/kts_tester_output.json – Output file for kts_tester.py.
    • user_scanner.py – Script used to check the Discord IDs inside ids.json with Discord’s API.
    • data/scanner_output.json – Output file for user_scanner.py.
    • server_scanner.py – Script used to check server IDs inside all_known_servers_22042024.json and all_tracked_servers_22042024 with Discord’s API.
    • index.html – Main HTML file for the web interface.
    • styles.css – Main CSS file for the web interface.
    • script.js – Main JavaScript file for the web interface.

    Bot accounts used by Spy.pet

    the following list contains confirmed bot accounts via an API vulnerability discovered by kickthespy.pet and checked against Discord’s API by myself to compile the list and the incoming site.

    NUMBER DISCORD_ID USERNAME NICKNAME PROFILE IMAGE
    1 1185030898148724777 markumusqupo_25047 Markumus Profile-Image
    2 956131521733984287 mrazozygamer. MrAzozyGamer Profile-Image
    3 956097947727179806 rfirered. RFireRed Profile-Image
    4 1185045871478448242 charles26ntiyex0740_87313 Charles26ntiyex Profile-Image
    5 932096380879667253 alcah2277 alcah Profile-Image
    6 956246550152118374 mysterioeses. Mysterioeses Profile-Image
    7 928549000431407164 gokublackssr49864 GokublackSSR4 Profile-Image
    8 976786710836944936 qestron. NONE Profile-Image
    9 956128945227567145 vector0934 vector Profile-Image
    10 956137602564640799 varel5894 Varel Profile-Image
    11 956237066503585873 mr.robot5972 Mr. Robot Profile-Image
    12 932098848900411423 warypug3727 WaryPug Profile-Image
    13 932079867003039804 raevi10_ raevi10 Profile-Image
    14 956054319529066527 petitepugilist Petite Pugilist Profile-Image
    15 932082257689190450 xheqdshot0710 xheqdshot Profile-Image
    16 956131426250657862 xhediome xhedio Profile-Image
    17 932041199282454528 carrotffs1209 CarrotFFS Profile-Image
    18 1185048077468450947 joseph28axhuvut0465_78086 Joseph28axhuvUt Profile-Image
    19 1185034806908682281 phillipunan0861_14052 Phillipunan Profile-Image
    20 1185046309976166460 michael71kmkebay0523_43623 Michael71kmkebAy Profile-Image
    21 928561259069177947 super5819 Super Profile-Image
    22 1185046163473309696 richard87vplibij0153_16225 Richard87vplibIj Profile-Image
    23 956350881241104495 nauke._ NONE Profile-Image
    24 978778806863151114 rpi1893 NONE Profile-Image
    25 923404990511480852 swiftknight7019498 SwiftKnight701 Profile-Image
    26 1172074070901264404 peasapwx peasapwx Profile-Image
    27 928453229740712006 dream000633 D r e a m Profile-Image
    28 956292731880239176 niconicokneecaps1508 Nico-Nico-kneecaps Profile-Image
    29 975468900244398151 jbrtoy NONE Profile-Image
    30 1185046537944973383 thomasorav_364_05311 Thomasorav Profile-Image
    31 956126507984637982 otak1264 otak Profile-Image
    32 956119888991232050 pratboi69 NONE Profile-Image
    33 1185044083996098590 calvinsited_343_44117 CalvinsitEd Profile-Image
    34 928490228841328680 rat07542 Rat Profile-Image
    35 1172076548791226439 desutd_31778 desutd Profile-Image
    36 1185044808637616159 ronald12bs_47492 Ronald12bs Profile-Image
    37 1185047344148918509 tillerezamadef_76453 Tillerezam Profile-Image
    38 1185035242222923927 george02oeirux0923_21512 George02oeirux Profile-Image
    39 1185047045413797898 kenneth38iz0211_33502 Kenneth38iz Profile-Image
    40 1185038000795680769 christopher86rxumih_02451 Christopher86rxumih Profile-Image
    41 956080137932259398 mortina9768 Mortina Profile-Image
    42 1210161585658798100 outwestt_76004 OUT WEST Profile-Image
    43 932084358326681662 fuzzyg1885 FuzzyG Profile-Image
    44 956069338820001837 mcducklings. McDucklings Profile-Image
    45 956173030218940486 paiym. NONE Profile-Image
    46 956261113115336774 louky6623 Louky Profile-Image
    47 956104664821157918 maximxls. NONE Profile-Image
    48 956178931512410222 mekonya Mekonya Profile-Image
    49 956031608144666665 idunnowhattoputhere0360 i dunno what to put here Profile-Image
    50 923351918439436309 krista6530 Krista Profile-Image
    51 1185019322331045902 ericepur_96318 Ericepur Profile-Image
    52 1185051129147555890 tonytomiy_51927 TonytomIy Profile-Image
    53 1185050948675047539 james19jrbahin_55571 James19jrbahIn Profile-Image
    54 956375867632799787 stormfuls_ NONE Profile-Image
    55 1185045560273666170 fredusef_27373 Fredusef Profile-Image
    56 1185046383015760016 thomas30pd0664_35675 Thomas30pd Profile-Image
    57 1210165420493905982 jcmoon420 J. C. Moon Profile-Image
    58 1185046791826178099 josefoyorolor_15224 JosefoyOr Profile-Image
    59 1185047847557672993 john90nz0497_98774 John90nz Profile-Image
    60 1185036634270478406 joseph64xw0442_60910 Joseph64xw Profile-Image
    61 1185042820009054312 george72xw0746_56809 ThomasBerrington Profile-Image
    62 956075132571508757 ektoman11 NONE Profile-Image
    63 956164930061619230 milk.man69. milk.man69 Profile-Image
    64 1185033314189443133 david11tc_68956 David11tc Profile-Image
    65 959468187328589845 bravo05357 ! Bravo Profile-Image
    66 1185039817231323187 juanewuqmegq_70955 Juanewuq Profile-Image
    67 956037057157943377 seargent4542 NONE Profile-Image
    68 956222023816847411 slavicity NONE Profile-Image
    69 1185010648120303717 mark13hn0787_01529 JayEvans Profile-Image
    70 1171219789738410037 deathyzr Deathyzr Profile-Image
    71 1185036106257944677 kenneth86sxqotex_32333 Kenneth86sxqotEx Profile-Image
    72 1185045436331982848 kenneth49yv0920_84309 Kenneth49yv Profile-Image
    73 1171206094794797191 kingidyi KingIdyi Profile-Image
    74 956035417860362308 shaleniyserg COMRADES Profile-Image
    75 1185047194261274665 theodoreopog_22575 Theodoreopog Profile-Image
    76 1185043981785112728 randallanin_604_87246 Randallanin Profile-Image
    77 1171223723714556015 aetheqwk aetheqwk Profile-Image
    78 974926574346440765 pzycho9357 NONE Profile-Image
    79 1185047344023081011 joseph18qr0605_93268 Joseph18qr Profile-Image
    80 932033861699919882 xivswooxiv1740 XIVSwooXIV Profile-Image
    81 1171223836973338634 fenovsbt FeNovsbt Profile-Image
    82 1185033074304630936 john07fi0806_59617 EthaneHancock Profile-Image
    83 1185047968886308895 mark44vouquk_45843 Mark44vouquk Profile-Image
    84 928483283698851901 matt5895 matt; Profile-Image
    85 1171225487494893622 luishttd_33862 Luishttd Profile-Image
    86 1185038081322135603 mikeapob_86960 Mikeapob Profile-Image
    87 956200330251624468 fpsmarcus. FPSMarcus Profile-Image
    88 1210212474780127232 kwaitlover Kwait Lover Profile-Image
    89 928350122843193385 reallybabyyoda_ ReallyBabyYoda Profile-Image
    90 1185047033183227947 kevin41fs0630_70553 JeffreyCollins Profile-Image
    91 1172086562176114689 l03rahj_39262 l03rahj Profile-Image
    92 1210158972280111164 lockbitrewards FBI Supp Profile-Image
    93 1185037104523268189 anthony07et0450_17606 JustineDonovan Profile-Image
    94 1210170987073503265 guntergaymaster Gnter Profile-Image
    95 956153059371810836 mistermack. Mister Mack Profile-Image
    96 1185047092478095443 john00sl0122_76360 EddieBaker Profile-Image
    97 928369956716937287 lilspideygame4790 lilspideygame Profile-Image
    98 1185035279791292469 jason27ajkuxoq0930_21989 Jason27ajkuxOq Profile-Image
    99 1171196139647803513 gingvgo_72321 gingvgo Profile-Image
    100 1172080432389574690 sammymxx Sammymxx Profile-Image
    101 932054618568032336 cin03541 !Cin! Profile-Image
    102 928318741060673627 ctm3306 C Profile-Image
    103 923426902574759976 lavendxr5852 Lavendxr Profile-Image
    104 928591647611179018 justnathan2072 JustNathan Profile-Image
    105 1185021551825920066 sebastianwikok_15049 SebastianwikOk Profile-Image
    106 932086630767013908 cardsback3516 Card’s Back Profile-Image
    107 956192794014269481 noobypilotcedbalo NoobyPilot Profile-Image
    108 1185044716111265799 jeff71sj_50545 Jeff71sj Profile-Image
    109 932033514931650640 pikkujiiyoshiro0106 Pikku JiiYoshiro Profile-Image
    110 928366751090106368 thinkmeaname3956 ThinkMeAName Profile-Image
    111 956004017299927061 leethepenguin Lee The Penguin Profile-Image
    112 1171227973450469426 alexaknx Alexaknx Profile-Image
    113 923435722025869312 nuqlr1852 Nuqlr Profile-Image
    114 1172105789494792242 enbieiuj Enbieiuj Profile-Image
    115 1185039549991235654 joseph18op_88897 Joseph18op Profile-Image
    116 1185047411605897301 timothyhobuz0470_75133 TimothyhobUz Profile-Image
    117 919301068620435467 pengulink3296 Pengulink Profile-Image
    118 1185039045747818610 thomas57uliqun_95752 Thomas57uliqun Profile-Image
    119 1185037967992037489 keithroyilcuyo_96818 KeithroyIl Profile-Image
    120 1171205707576660133 mineprz mineprz Profile-Image
    121 1185038424101629962 anthony61jc0489_45767 Anthony61jc Profile-Image
    122 956202276408688650 slade4945 Slade Profile-Image
    123 1185036303155335240 juanatoc_464_16174 Juanatoc Profile-Image
    124 932067526681186414 talaan7447 Talaan Profile-Image
    125 956210819325132921 tomasiko69 NONE Profile-Image
    126 1172073543836631040 katrifbo katrifbo Profile-Image
    127 1185039095211241552 frankerawbanc_70119 Frankeraw Profile-Image
    128 1185043232661450814 christopher35ho0241_45629 LoganBrickman Profile-Image
    129 928398544392560743 lolunab3518 lol u nab Profile-Image
    130 1185043681737179197 paul73zmofod_90500 Paul73zmofod Profile-Image
    131 932082311263039488 4030500 403 Profile-Image
    132 1185045337325449267 derrickcagakjibi_12087 DerrickcagAk Profile-Image
    133 1185047444619284641 robert71cv0398_69104 Robert71cv Profile-Image
    134 923422685541851196 dannydevitonotachefgaming5257 Danny devito (notachefgaming) Profile-Image
    135 1185033301099020311 danielucuw_283_53388 Danielucuw Profile-Image
    136 956887823024275487 emokun0346 emo-kun Profile-Image
    137 928586086828085358 jeuaiaki_ Jeuaiaki Profile-Image
    138 928355373763674162 reyjr6542 ReyJr Profile-Image
    139 1171204995392209047 imafrsnm IMAFRsnm Profile-Image
    140 1185045242706153573 geraldnekuw0616_54600 GeraldnekUw Profile-Image
    141 956092289552384010 murasaki3097 Murasaki Profile-Image
    142 1185034487537606676 michael79bzocis_66346 Michael79bzocis Profile-Image
    143 932057102841708655 brooklynhalo. BrooklynHalo Profile-Image
    144 1185018638567231562 leosorev0926_79390 LeosorEv Profile-Image
    145 1185038257789079614 john49sq_34097 John49sq Profile-Image
    146 1185045519576338442 edward04gg0505_21319 FrankAdamson Profile-Image
    147 928600396002373633 chairs1275 CHAIRS Profile-Image
    148 956294250927120436 nyanpasu2803 NONE Profile-Image
    149 1171197414632341508 ptalanzy Ptalanzy Profile-Image
    150 956172424309784617 yukai1994 yukai Profile-Image
    151 1185045420594974761 craigaqetlifv_52424 Craigaqet Profile-Image
    152 956323664062722100 paah2281 Paah Profile-Image
    153 1171191966059466802 noahdwam Noahdwam Profile-Image
    154 932094826059563040 andrew.ppxt7127 andrew.ppxt Profile-Image
    155 1185043970150117467 janabuv_449_62362 Janabuv Profile-Image
    156 1210174835985088532 emotional69 emotional Profile-Image
    157 932070704042631219 sagaf3412 sagaf Profile-Image
    158 956157904539512874 scotties_ NONE Profile-Image
    159 932039160854872084 jackmeister4570 Jackmeister Profile-Image

    Contributing

    Your contributions to this repo are highly appreciated!
    If you know of any valuable tools or websites that are not listed here, please feel free to contribute by submitting a pull request.
    Here’s how you can contribute:

    1. Fork this repository.
    2. Add your tool/website to the appropriate category, providing a brief description and any relevant information.
    3. Ensure your additions follow the existing format.
    4. Create a pull request and explain your changes.

    License

    This repository is provided under the MIT License
    By utilizing the contents of this repository, you agree to abide by the terms of this license.

    Visit original content creator repository
    https://github.com/ThatSINEWAVE/Spy.pet-Info

  • gdots

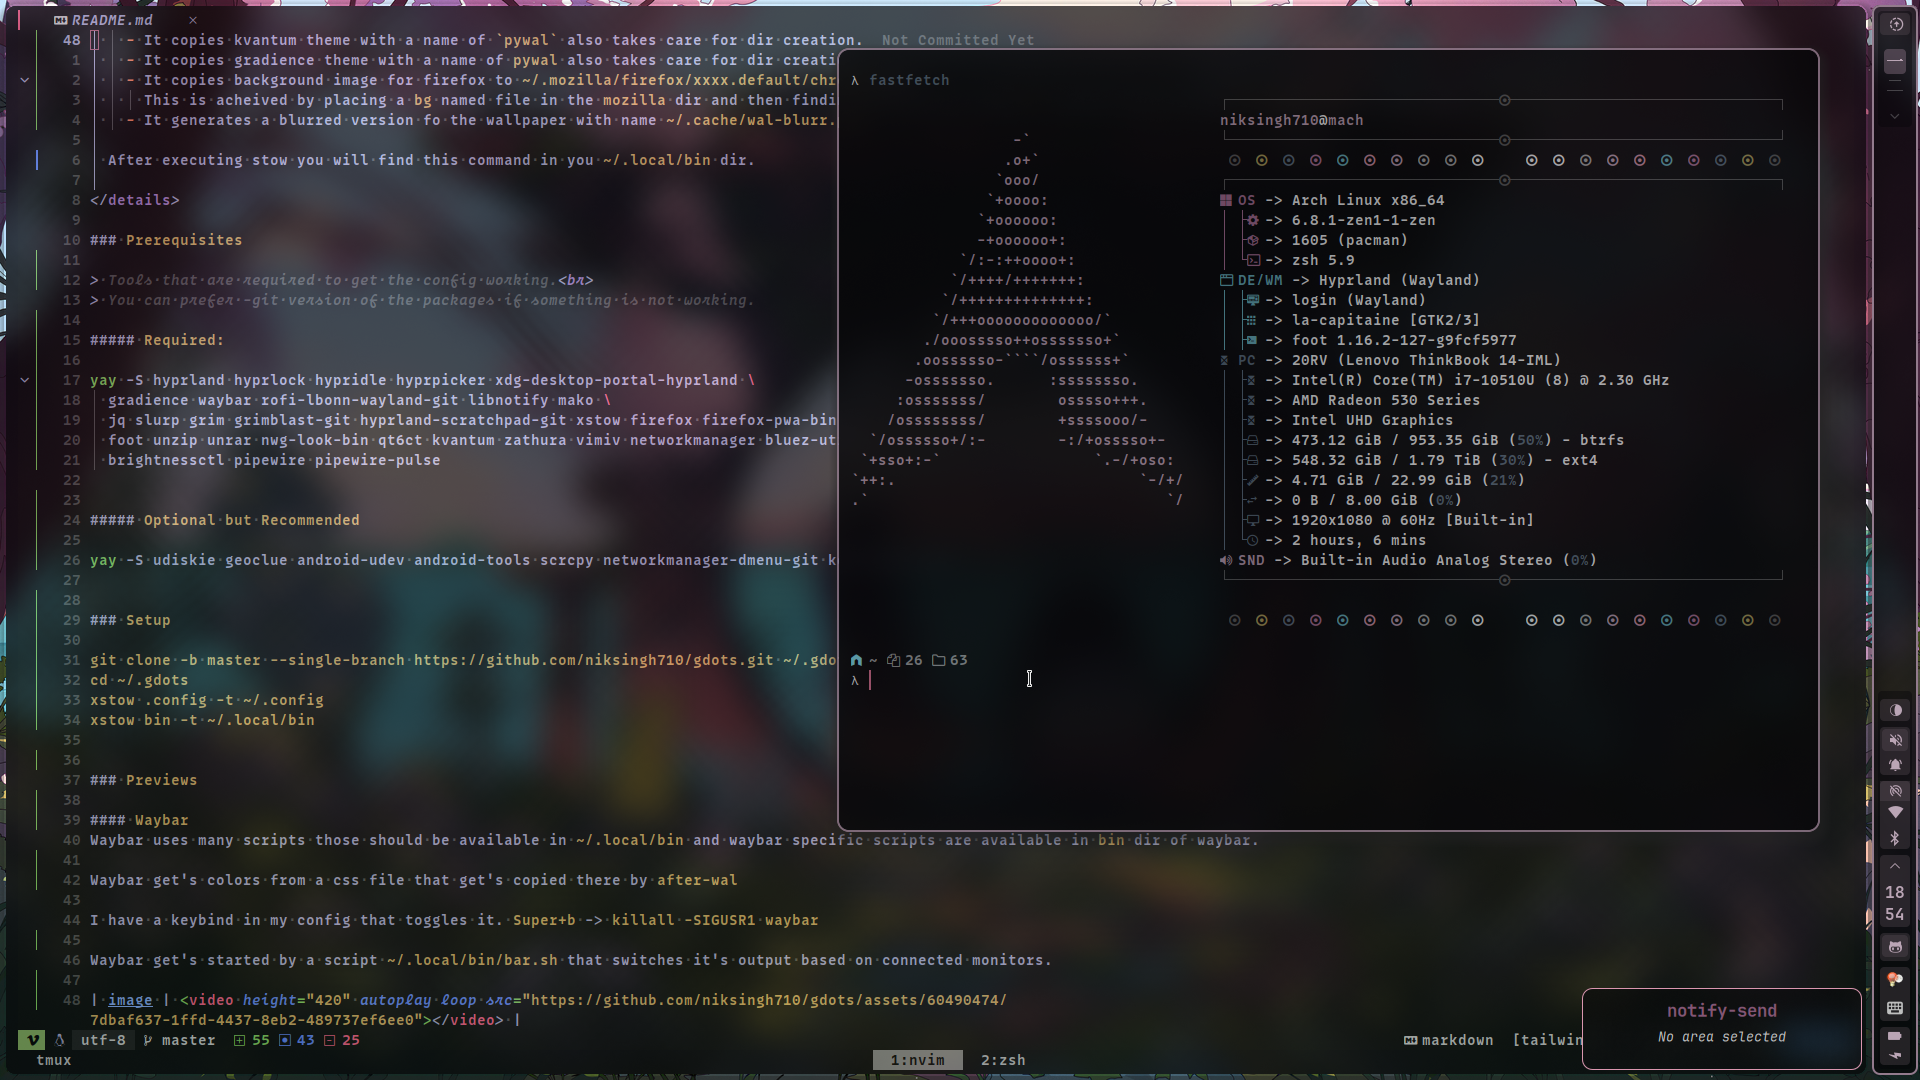
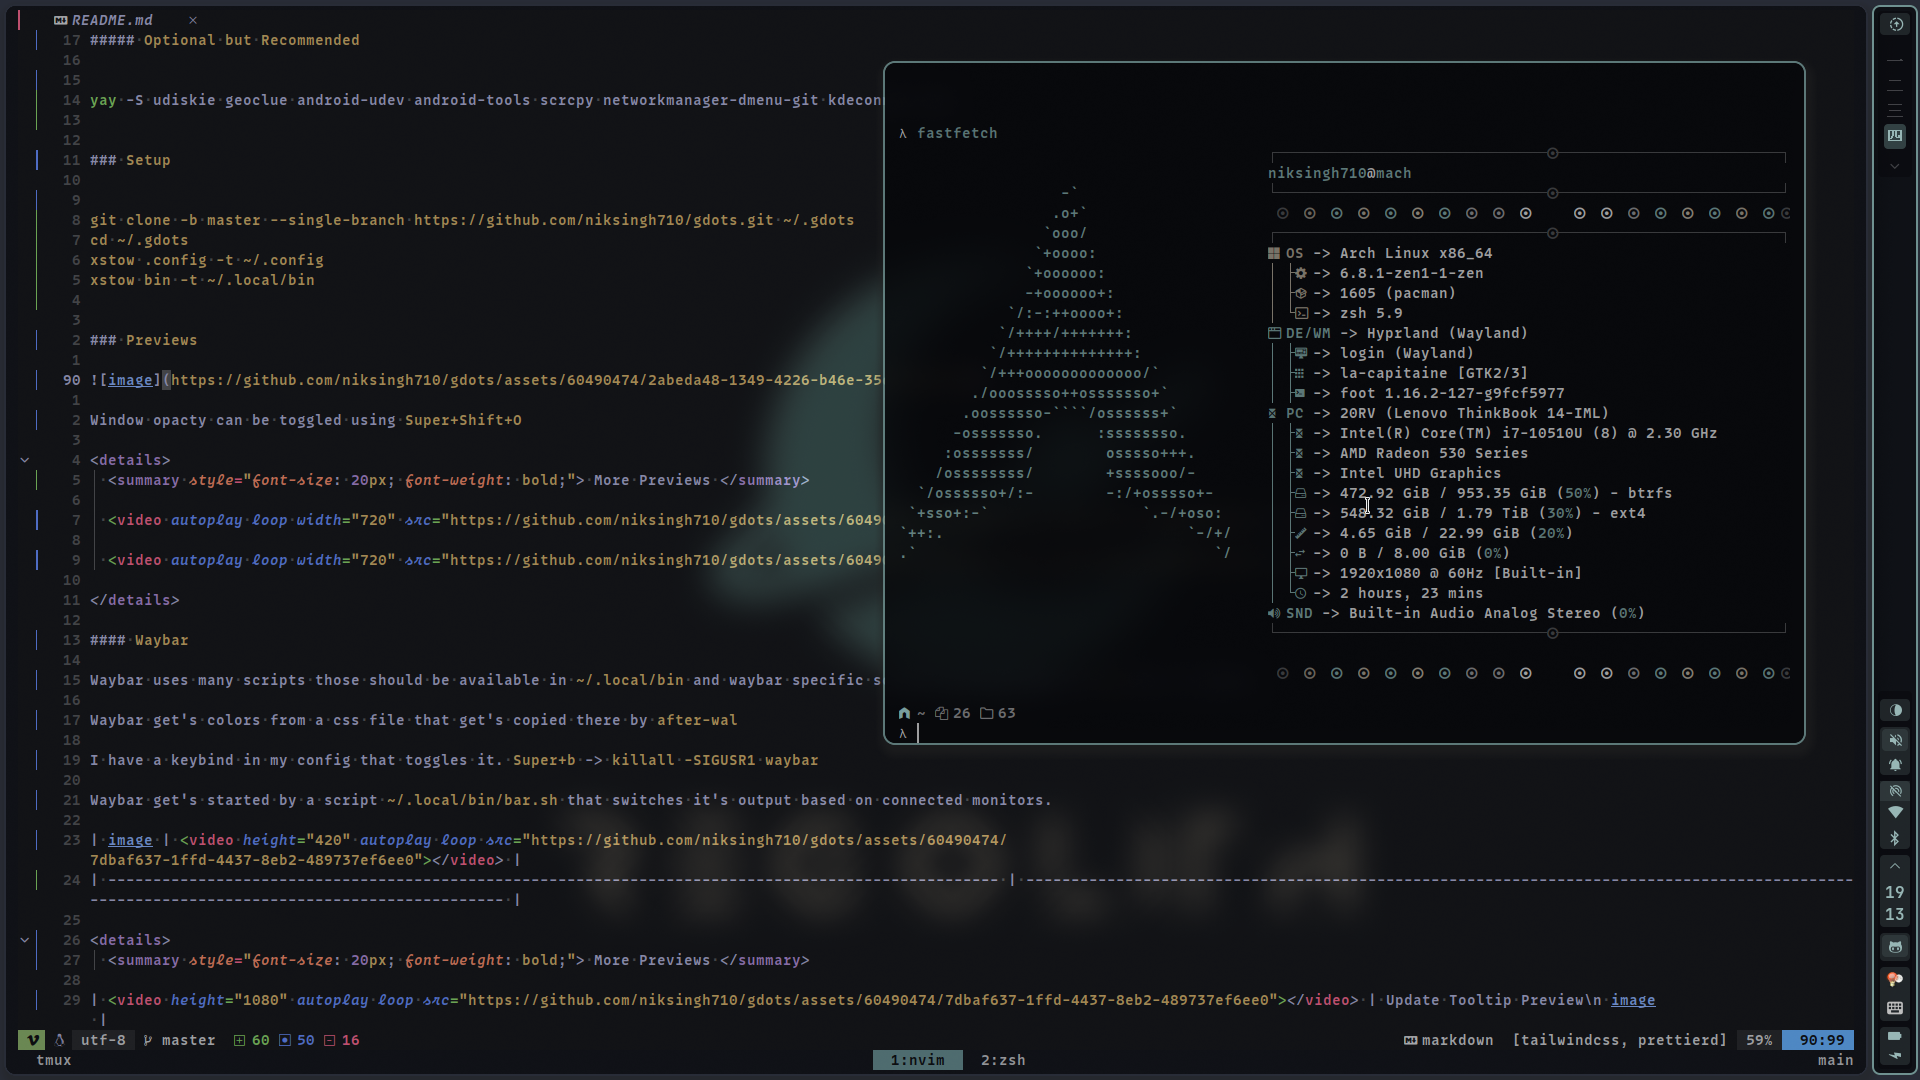
    image


    These are my dot files for Graphical Instance on my system.
    I use Arch Linux as My main OS and Hyprland as my window manager.
    The configuration is highly dependent on pywal i prefer a fork for 16-base colors pywal16

    GitHub repo size GitHub Org's stars GitHub forks GitHub last commit

    General Read

    If you are Reading this, you are probably interested in my dotfiles.
    I have a few things to say before you start using them.

    I use autologin via ~/.zprofile

    # Ensures me getting auto logged in into Hyprland
    check() {
    command -v "$1" &>/dev/null
    }
    
    check center-align && {
    echo "$USER" | center-align
    }
    
    check Hyprland && {
    pgrep -x Hyprland &>/dev/null || Hyprland &>/dev/null
    } || {
    echo "Hyprland Not found will not launch it as GUI instance"
    }

    GTK: adw-gtk3 (gradience for colors) KDE/QT: Kvantum (pywal theme)
    > [nwg-look-bin,qt6ct]

    • Wal*: My most of the colors are generated from pywal16 i have added templates but if you want to look at a generated file for reference, You can find that at extra/wal this is in the same format as it will be generated inside ~/.cache/wal. It has been generated using image below wall_secondary

    • Stow : Stow is the tool i prefer to manage my dot files (i use xstow to be exact but it shouldn’t matter).

      stow ./dir -t <target dir>

      e.g

      stow .config -t ~/.config

      Will create softlinks to all the dir inside repos .config to ~/.config/

    • Pywal : As i have mentioned earlier i use a pywal fork. It provides a 16 base color scheme.

      pywal16 provides .lighten(val%) and .darken(val%) to lighten or darken the colors. I use them in my templates so normal pywal won’t work here.

      wal -a 92 --cols16 darken --recursive -i ./path/to/wallpaper/or/dir -o after-wal

      You can check about wal command args by doing wal --help

      I want to grab your attention here for the after-wal script.

      • after-wal : This will be executed after wal command is executed.
        The wal command will generate all the color schemes from the ~/.config/wal/templates/ dir and place them in ~/.cache/wal.
        It is the after wal command that places the color schemes in the right place and does the right thing.
        e.g
        • It copies colors-waybar.css to ~/.config/waybar/colors.css (this file is in .gitignore)
        • It copies kvantum theme with a name of pywal also takes care for dir creation.
        • It copies gradience theme with a name of pywal also takes care for dir creation.
        • It copies background image for firefox to ~/.mozilla/firefox/xxxx.default/chrome/
          This is acheived by placing a bg named file in the mozilla dir and then finding the file by using fd command and placing wallpaper.png to that dir
        • It generates a blurred version fo the wallpaper with name ~/.cache/wal-blurr.png

      After executing stow you will find this command in you ~/.local/bin dir.

    Prerequisites

    Note

    Tools that are required to get the config working.
    You can prefer -git version of the packages if something is not working.

    Required:
    yay -S hyprland hyprlock hypridle hyprpicker xdg-desktop-portal-hyprland hyprshade \
      gradience waybar rofi-lbonn-wayland-git libnotify swaync \
      jq slurp grim grimblast-git hyprland-scratchpad-git xstow firefox firefox-pwa-bin \
      foot unzip unrar nwg-look-bin qt6ct kvantum zathura vimiv networkmanager bluez-utils \
      brightnessctl pipewire pipewire-pulse batify

    Note

    For hyrshade check out their documentation for -> hyprshade For batify check out their documentation for -> batify

    Optional but Recommended
    yay -S udiskie geoclue android-udev android-tools scrcpy networkmanager-dmenu-git kdeconnect mpv

    Note

    Mako can be used as all configuration regarding pywal and waybar DND is available in the config. Currently i am using swaync but i keep switching between mako and swaync.

    Setup

    git clone -b master --single-branch https://github.com/niksingh710/gdots.git ~/.gdots
    cd ~/.gdots
    xstow .config -t ~/.config
    xstow bin -t ~/.local/bin
    

    Previews

    image

    image image

    Window opacty can be toggled using Super+Shift+O

    More Previews

    output.mp4

    output.mp4

    Waybar

    Waybar uses many scripts those should be available in ~/.local/bin and waybar specific scripts are available in bin dir of waybar.

    Waybar get’s colors from a css file that get’s copied there by after-wal

    I have a keybind in my config that toggles it. Super+b -> killall -SIGUSR1 waybar

    Waybar get’s started by a script ~/.local/bin/bar.sh that switches it’s output based on connected monitors.

    image image
    More Previews
    output.mp4
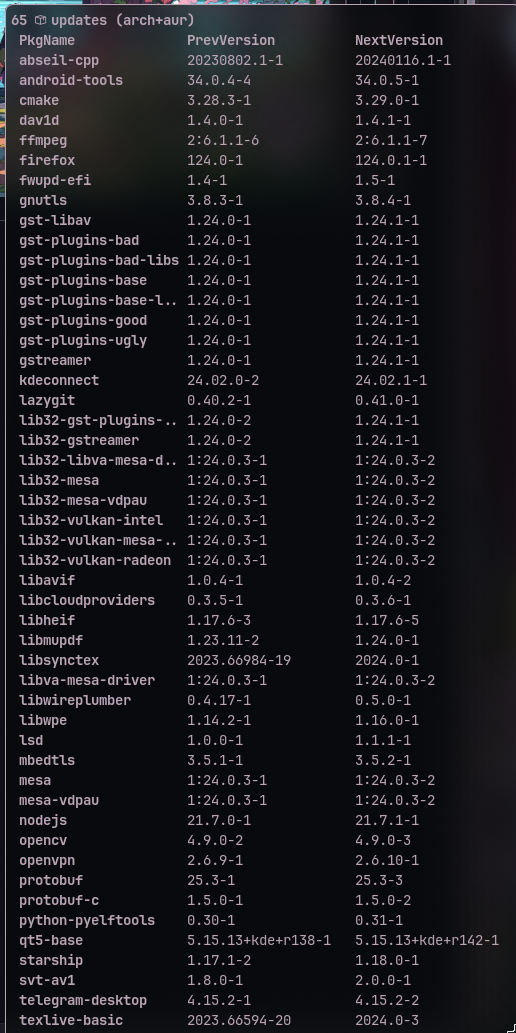
    Update Tooltip Preview image

    Firefox

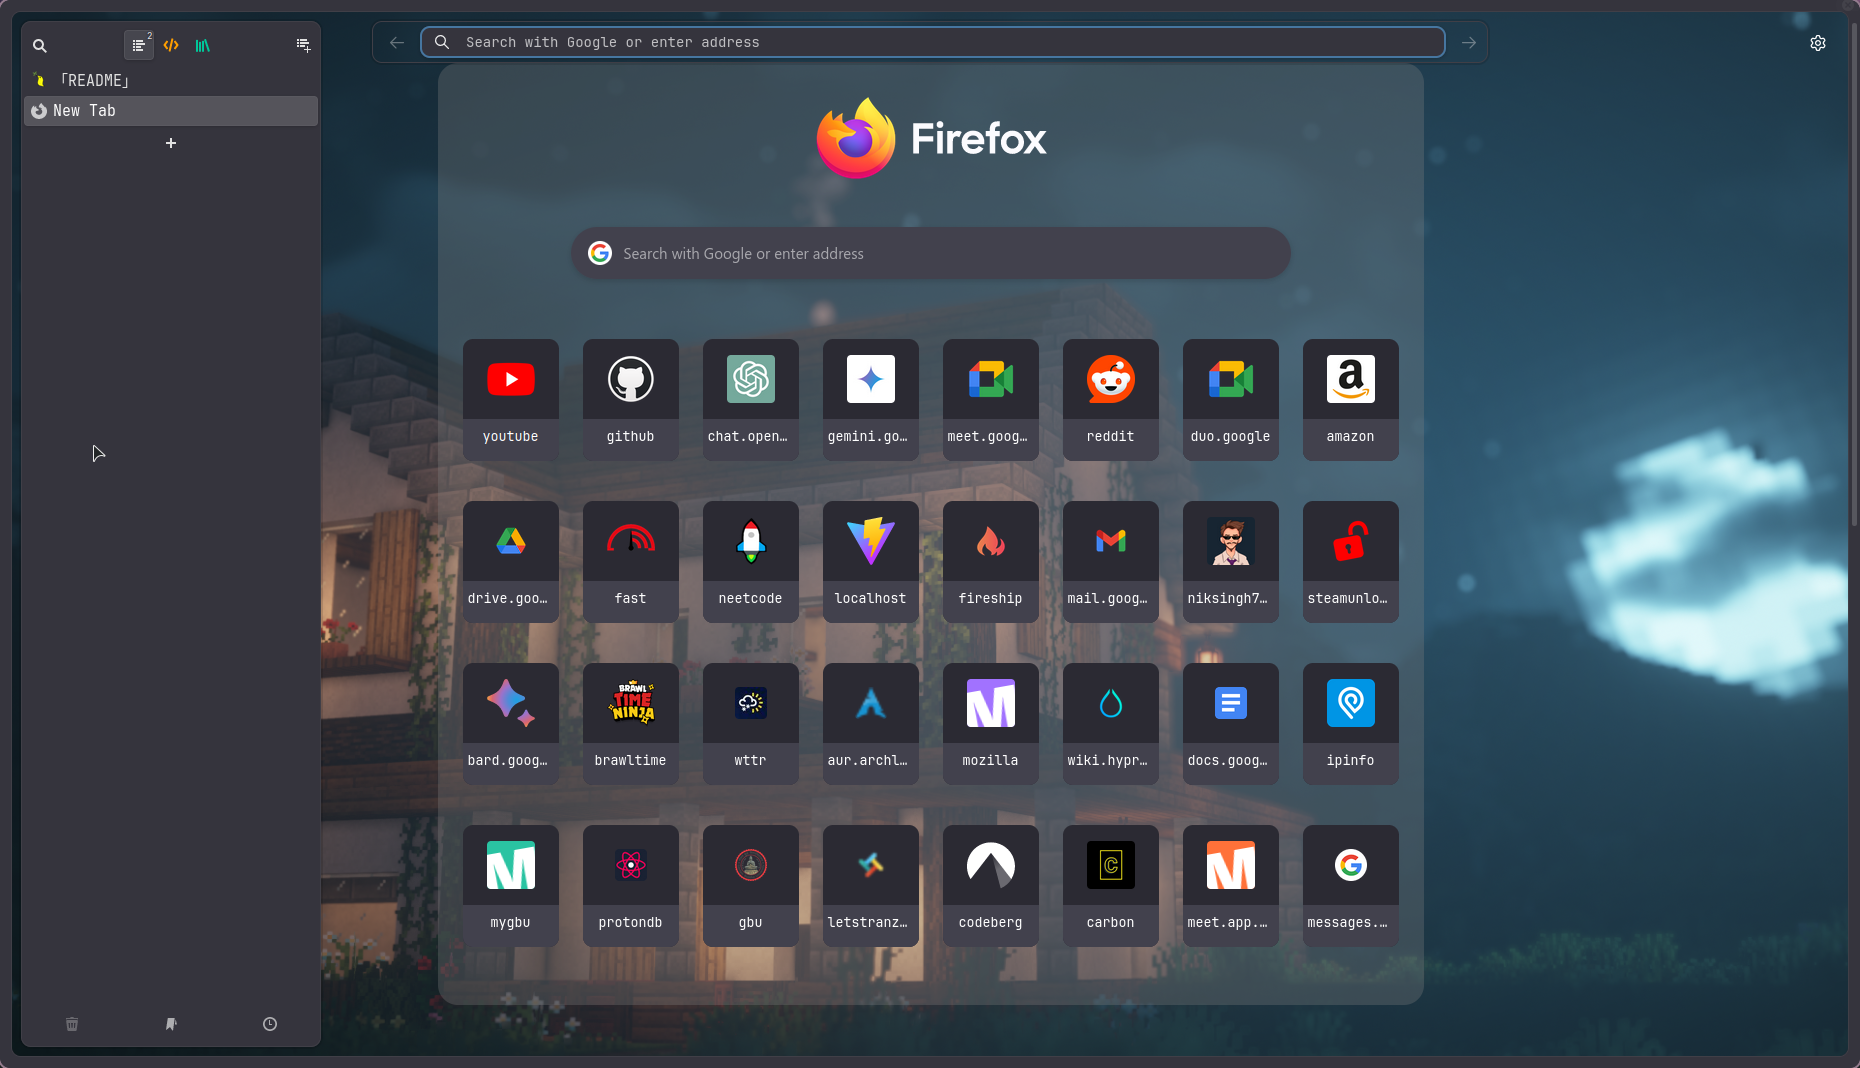
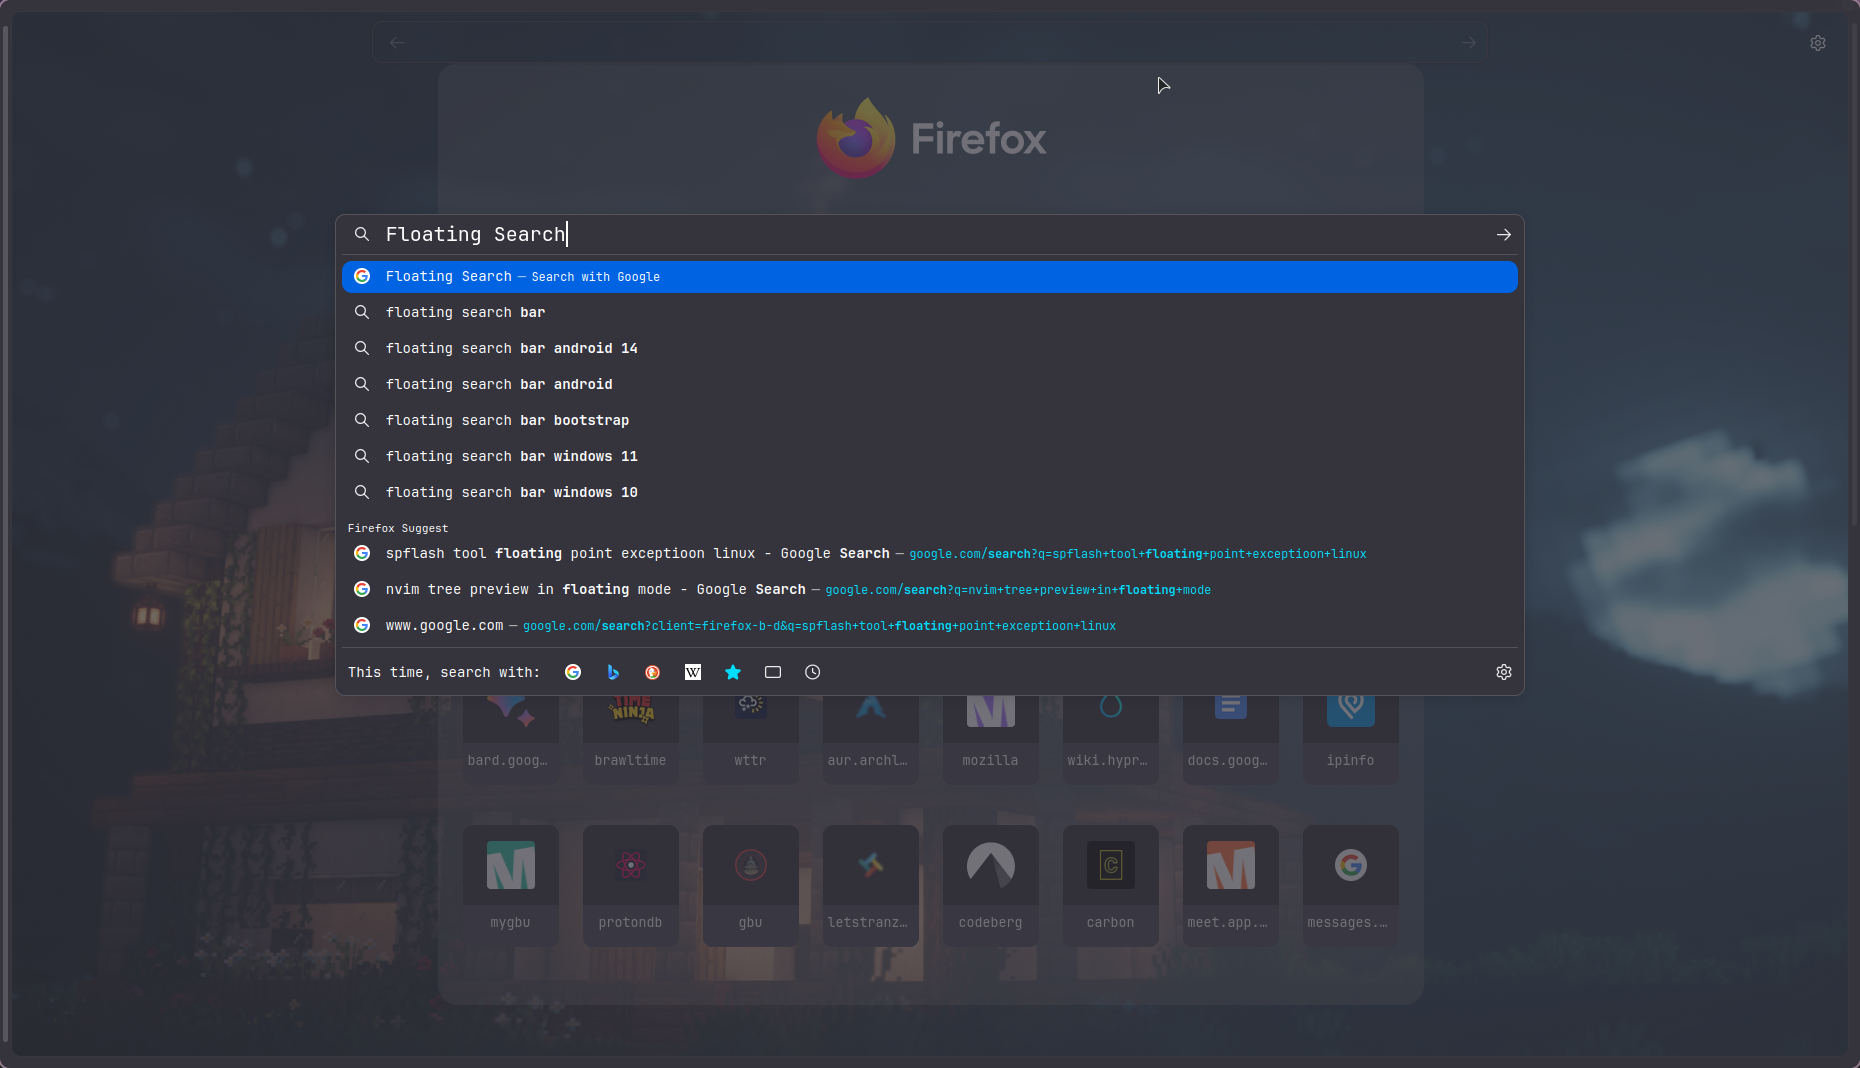
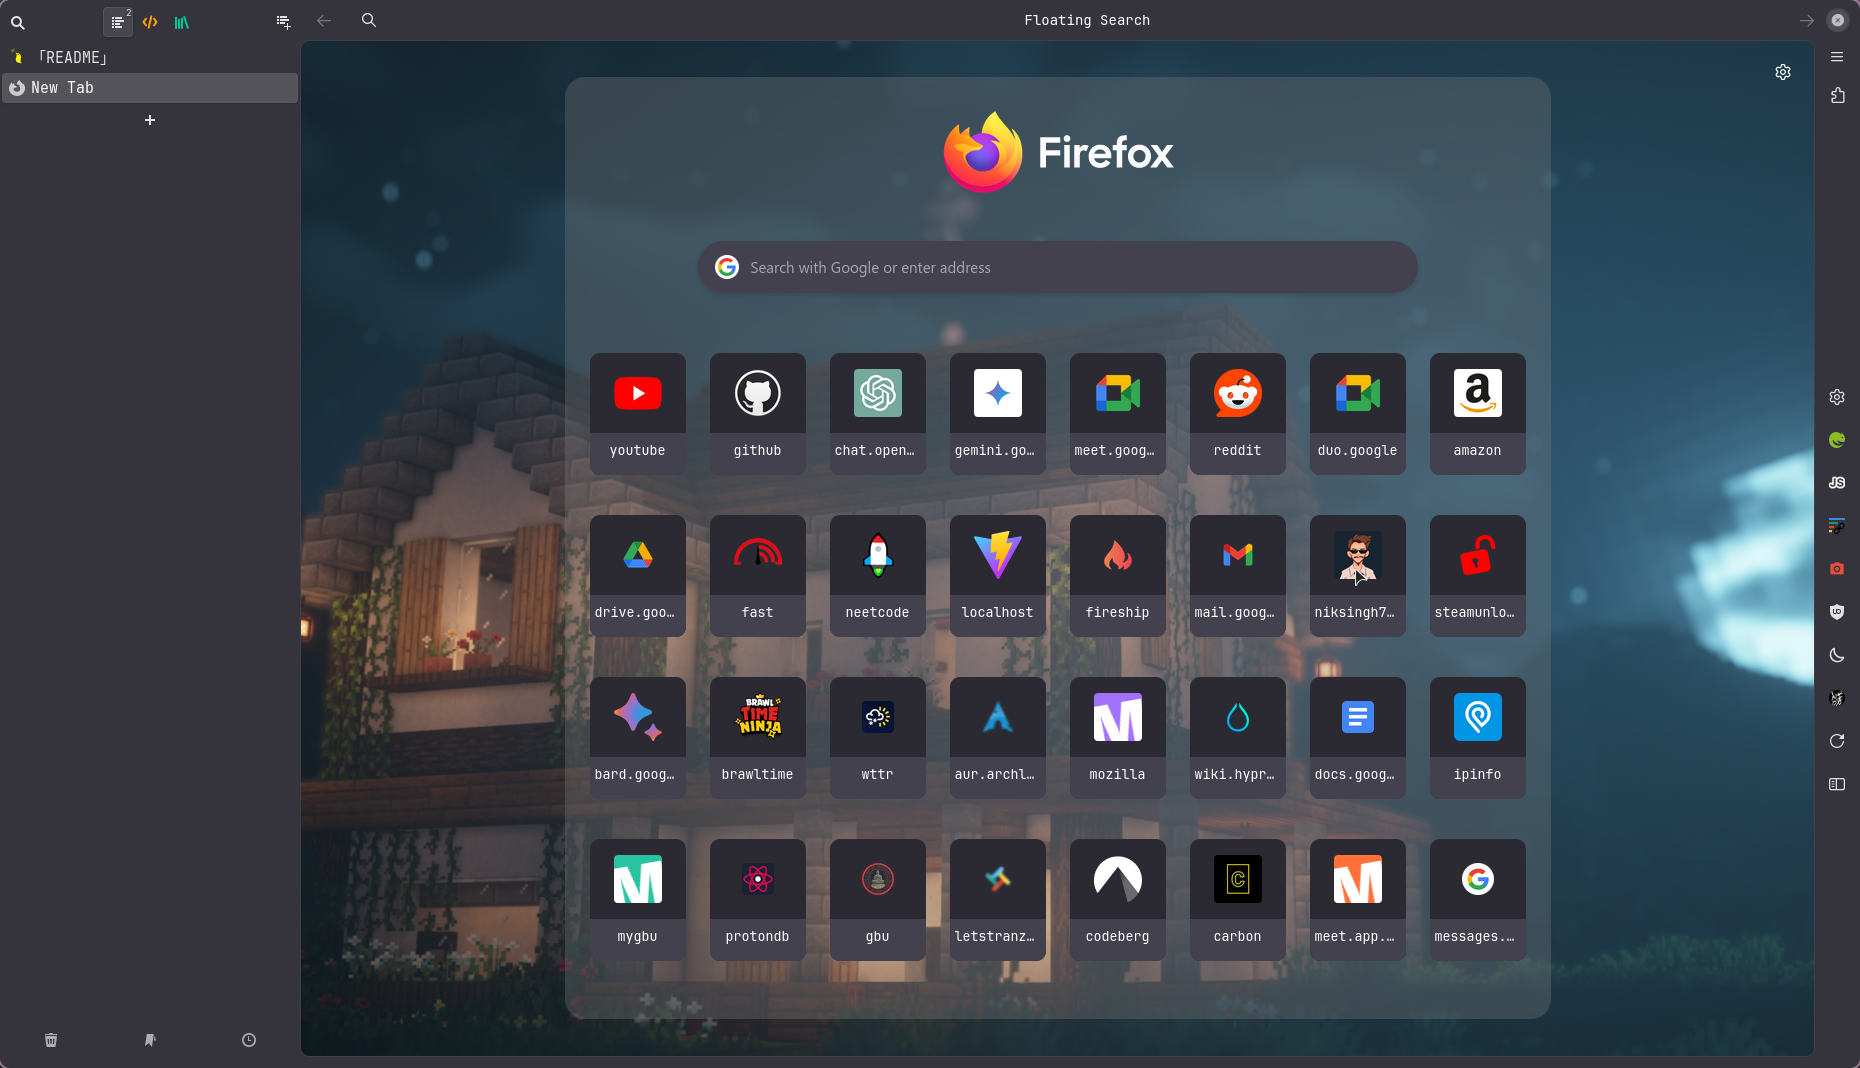
    The Firefox theme i use is ShyFox. Checkout the documentation for the setup. I have the current state of my theme in my extra/chrome.shyfox dir. The theme is so nice that it has floating tabs url bar and much more. (Check further preview)

    Keymaps i have setted up With my setup in my SideBerry and all of my extensions. e.g:

    • Alt-J,K : To switch in tabs
    • Ctrl-Shift-L : To toggle the floating of sidebery

    And Many more. Shortcuts are to be made by personal preference but then also if you feel i should list them or you want my one those are higly likely to be like vim ping on issue.

    image

    More Previews

    output.mp4

    image image

    image

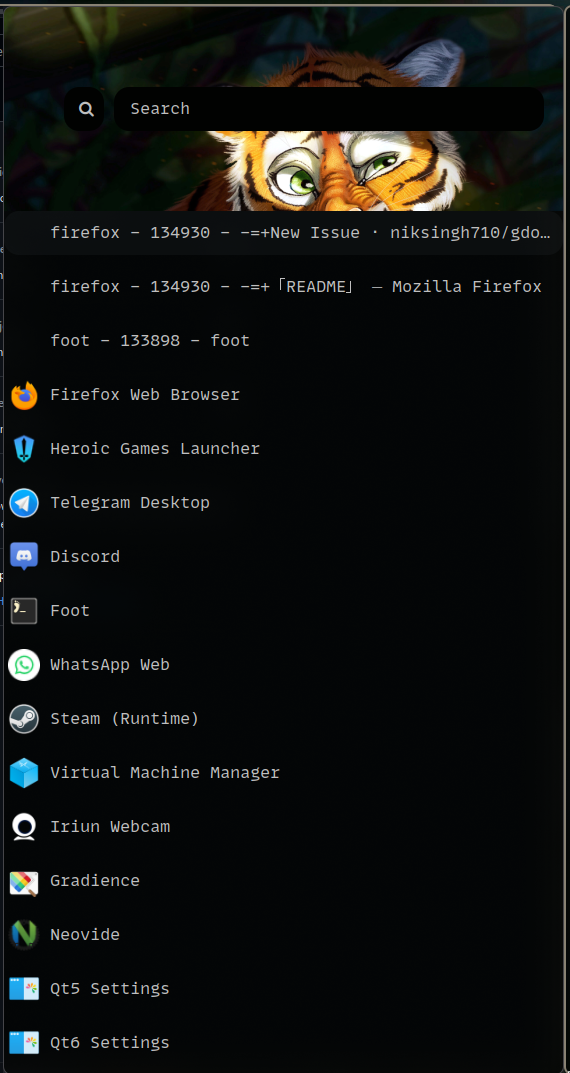
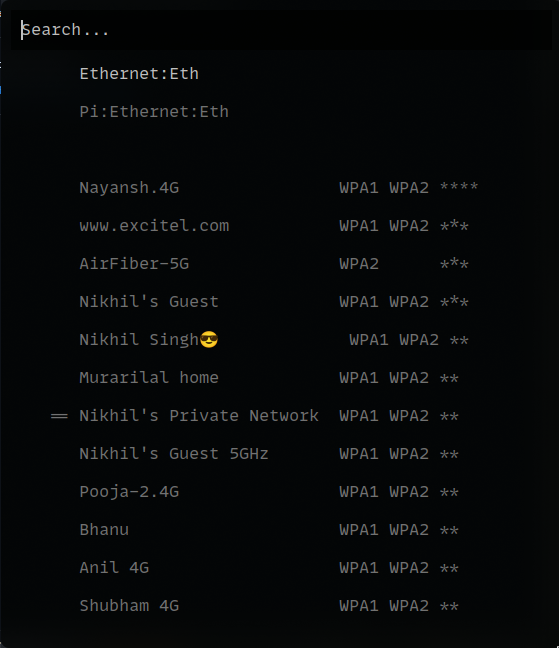
    Rofi
    image image

    Note

    Shell is seprate from this repository to keep it working on servers and other Os those are incompatible with this kind of graphical configuration state.

    Visit original content creator repository https://github.com/niksingh710/gdots
  • wfc4j

    wfc4j – The Wave Function Collapse library for Java

    The wfc4j library is a Java library that provides an implementation of the wave function collapse algorithm for procedural generation of content. This library can be used to generate a wide variety of content, such as tile maps, textures, and patterns.

    Installation

    To use the wfc4j library in your Java project, you can include the library as a dependency in your build configuration. Here’s an example of how to do it with Maven:

    <dependency>
        <groupId>dev.irzinfante</groupId>
        <artifactId>wfc4j</artifactId>
        <version>1.0.0</version>
    </dependency>

    Alternatively, you can download the library JAR file manually and add it to your project’s classpath.

    Examples

    Here are some examples that demonstrate the usage of the different API of the library:

    License

    Copyright (C) 2023-2024 Iker Ruiz de Infante Gonzalez iker@irzinfante.dev

    This program is free software: you can redistribute it and/or modify it under the terms of the GNU Affero General Public License as published by the Free Software Foundation, either version 3 of the License, or (at your option) any later version.

    This program is distributed in the hope that it will be useful, but WITHOUT ANY WARRANTY; without even the implied warranty of MERCHANTABILITY or FITNESS FOR A PARTICULAR PURPOSE. See the GNU Affero General Public License for more details.

    You should have received a copy of the GNU Affero General Public License along with this program. If not, see https://www.gnu.org/licenses/.

    LICENSE contains a copy of the full AGPLv3 licensing conditions.

    Acknowledgments

    The wfc4j library is inspired on Dan Shiffman’s Coding Challenge 171: Wave Function Collapse video, which is based on the original Wave Function Collapse Algorithm developed by Maxim Gumin.

    Visit original content creator repository
    https://github.com/irzinfante/wfc4j